This is a project for those who happen to have a used and unneeded Android smartphone lying around. And for those who simply feel like adding one more thing to their "stuff that my phone can do" lists, of course. In the following paragraphs, we'll guide you through the process of turning an Android handset into an IP camera with the help of two free and generally easy-to-use apps.
What's that, you ask? Well, an IP camera is one that connects to a network. Usually, it can be accessed and controlled from another device – a computer or a recording device, in most cases. These cost north of $50 apiece, but by repurposing an old Android handset, you can have one for next to nothing, and most of us likely have at least one of these lying around an old cupboard. A smartphone running IP camera software can act as a do-it-yourself security camera, or as a makeshift baby monitor, to give a few examples.
Method #1: BabyCam
The first app I've actually come to use and love over the course of the past six months since I've become a dad is BabyCam. The server-side of the app is only available on Android, but you can use any device with a web browser as a local client, be it an iPhone, iPad, Android tablet, a smart TV, laptop, and whatever else comes to mind. Even Chromecast is supported. Technically, it can be used for any other surveillance purpose as well and is by no means limited to baby monitoring, though it has some useful features that make it my favorite. For example, you can play a soothing lullaby to your baby, speak and listen to the munchkin, and even enable night-vision of sorts which overexposes the incoming video which is extremely helpful for the dimly-lit crib or bassinet.
Have in mind that the BabyCam video stream can't be normally accessed through the Internet; both the server and client apps need to be on the same Wi-Fi network or at least in the general vicinity of one another to connect with Wi-Fi Direct. For some, this could be a downside, but for me, it's a privacy peace of mind that I'm not exposing this sensitive part of my life to potential wrongdoers.
Recommended Stories
Another downside I can highlight is the not-so-smooth video playback: don't expect to get 60fps out of BabyCam, even 30 is a far stretch. Either way, it's still useful to me.
Step #1
After you've installed BabyCam on at least one Android device, make sure to position it near your baby's crib. I used a small flexible tripod with suction cups that can be attached to almost any surface. Bonus tip: make sure you have a power outlet or at least a powerbank ready if you plan on using BabyCam all the time, since it would generally drain the phone's battery in 3-4 hours.
Step #2
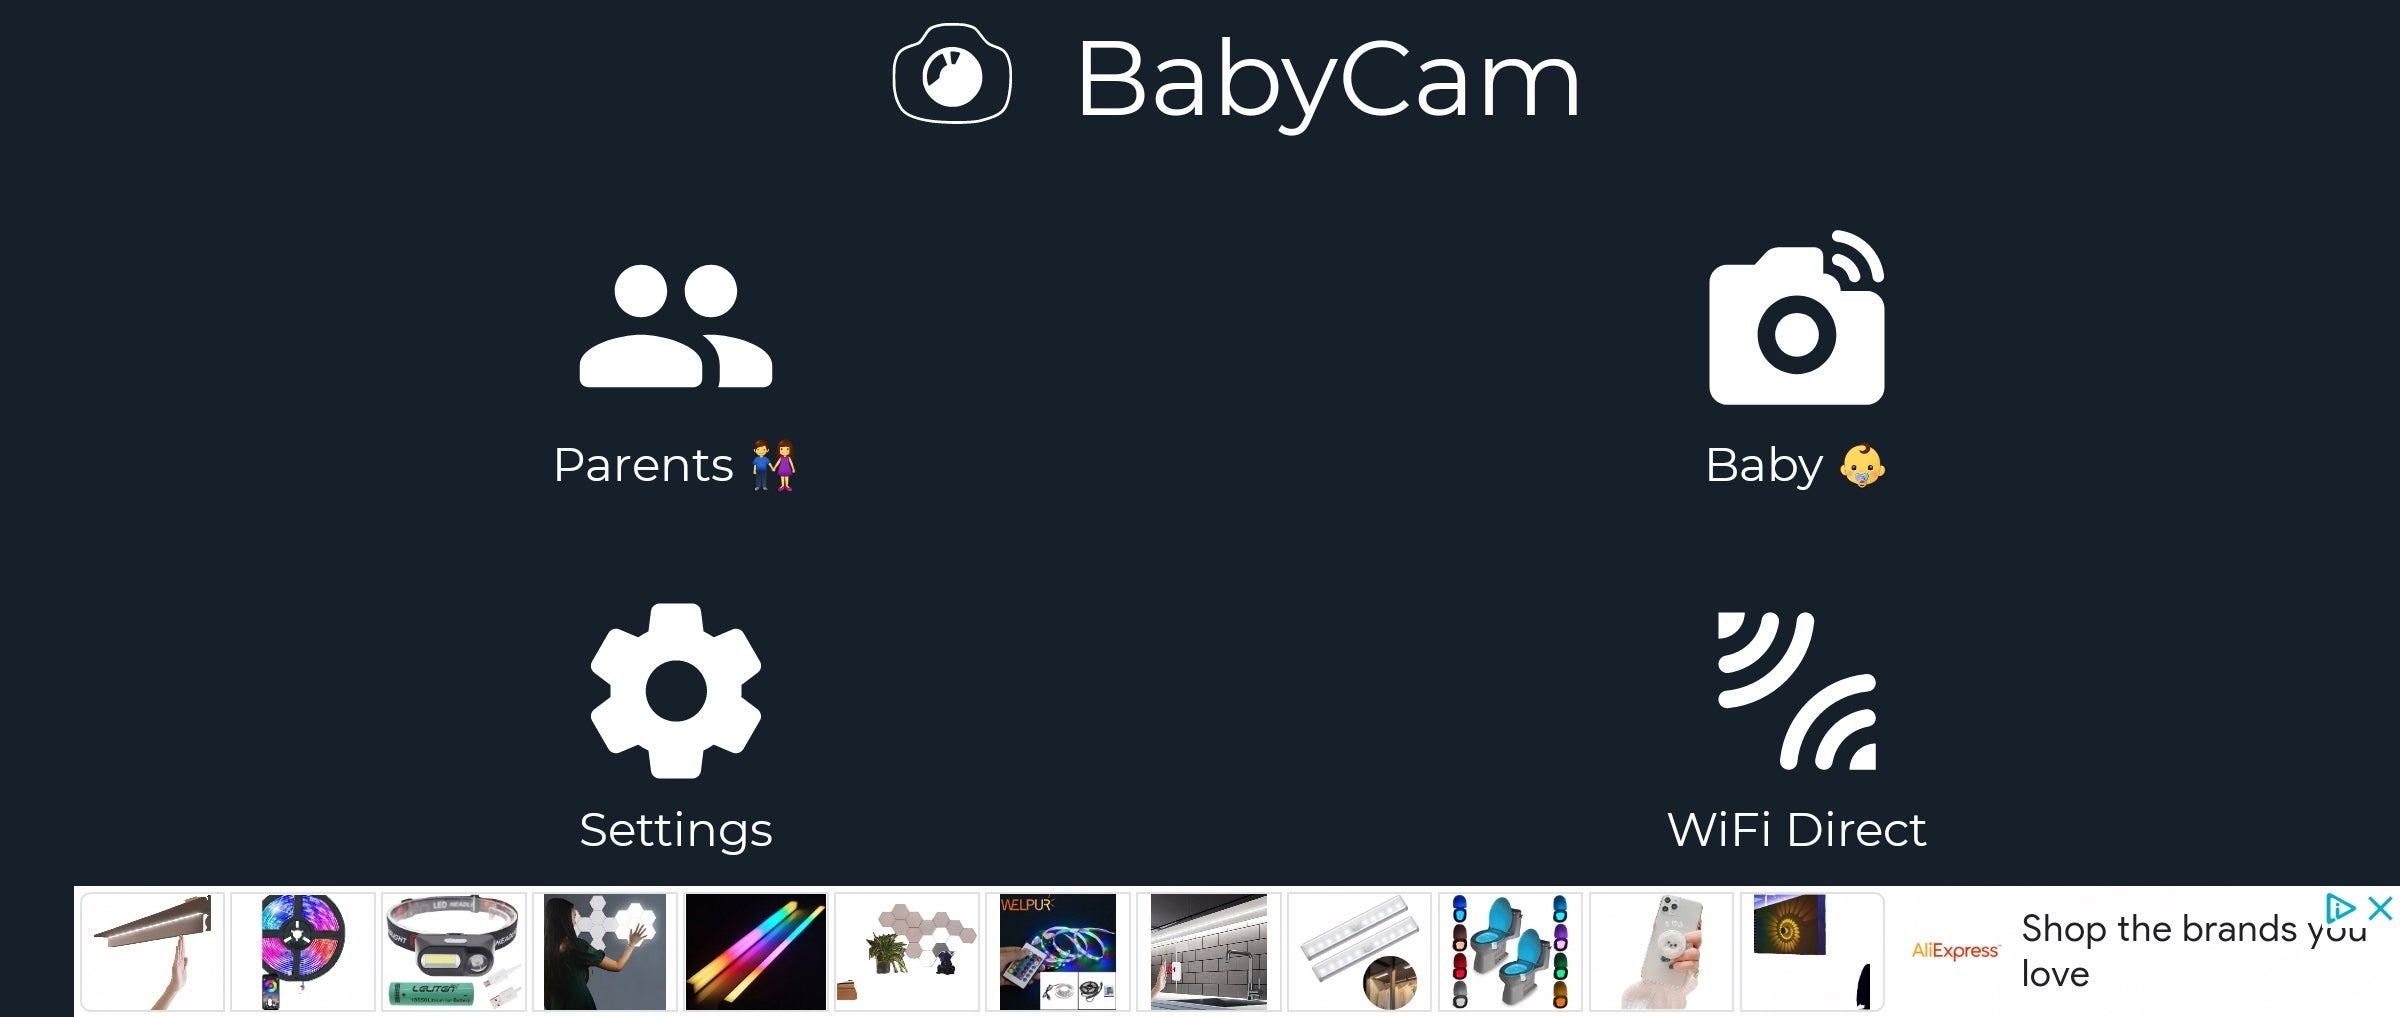
Once you open the app, you can choose between Baby and Parents. The first one, naturally, is the server-side aspect of the webcam interface, which should be run on the phone you wish to use to observe the baby. The 'Parents' option should be chosen on another Android device that acts as a monitor, but don't fret: the app gives you a "http://192.168.X.X:8080" web address that can be accessed from any local device. Even if you don't have Wi-Fi connection, the app can use Wi-Fi Direct to connect to another device directly.
The main BabyCam interface is as intuitive as it gets
Step #3
There's ton of useful features that you can play with. There's the super-nifty Alert + Listen feature which notifies you when the baby starts fussing or crying and immediately plays audio from the crib. You can also zoom the image or enable the camera's flash and lullaby functions no matter which client you're using to view your baby's activities.
Method #2: IP Webcam
You'll need IP Webcam, a free app available from the Play Store, and access to your home Wi-Fi network. This one is a bit more feature-rich than BabyCam, but that's a double-edged sword — there are lots of options and as of 2021, the interface isn't very intuitive. IP Webcam works best when the phone it is installed on is connected to a Wi-Fi network, not to a cellular one. That's because wireless carriers will most likely restrict the access to IP Webcam's service. So make sure that the phone you'll be using for the task is on a Wi-Fi network that you can access. Once the IP Webcam service is up and running, phones, tablets, and computers on the same network will be able to access its video stream from a web browser.
Step #1
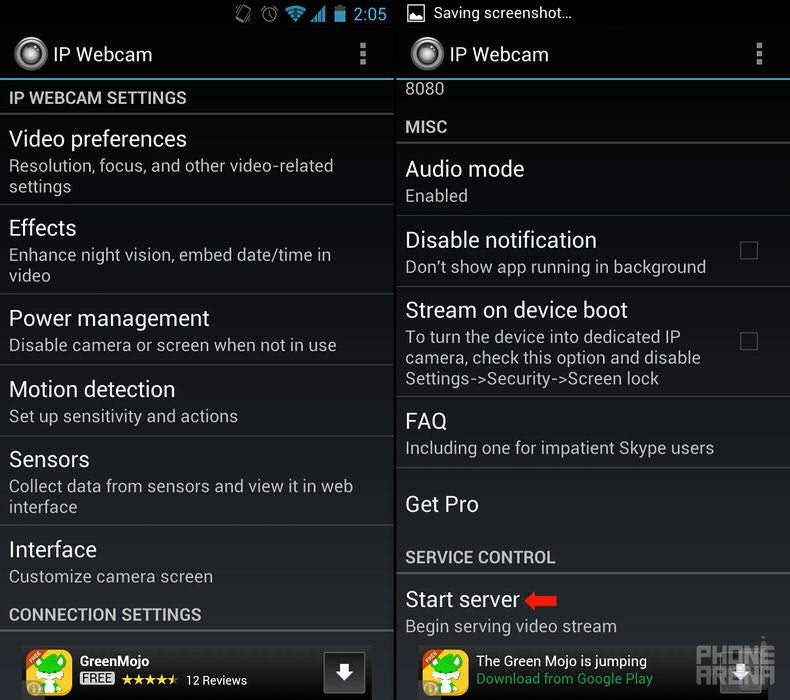
Now go ahead and launch IP Webcam. At this time, you'll be presented with a bunch of settings. Just leave these as they are for now and scroll down to the bottom of the page. Hit "Start server".
Step #2
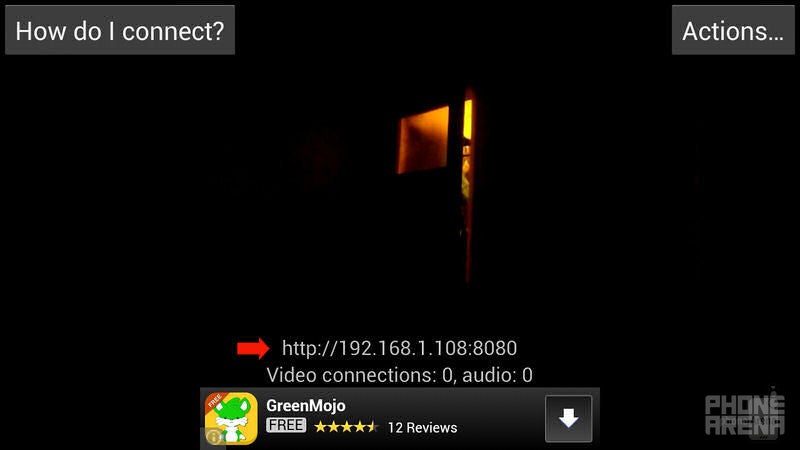
Voila! Your phone should be now displaying video from its main camera. Your phone's IP address should be now displayed on the screen - a line that will probably look like "http://192.168.X.X:8080".
Step #3
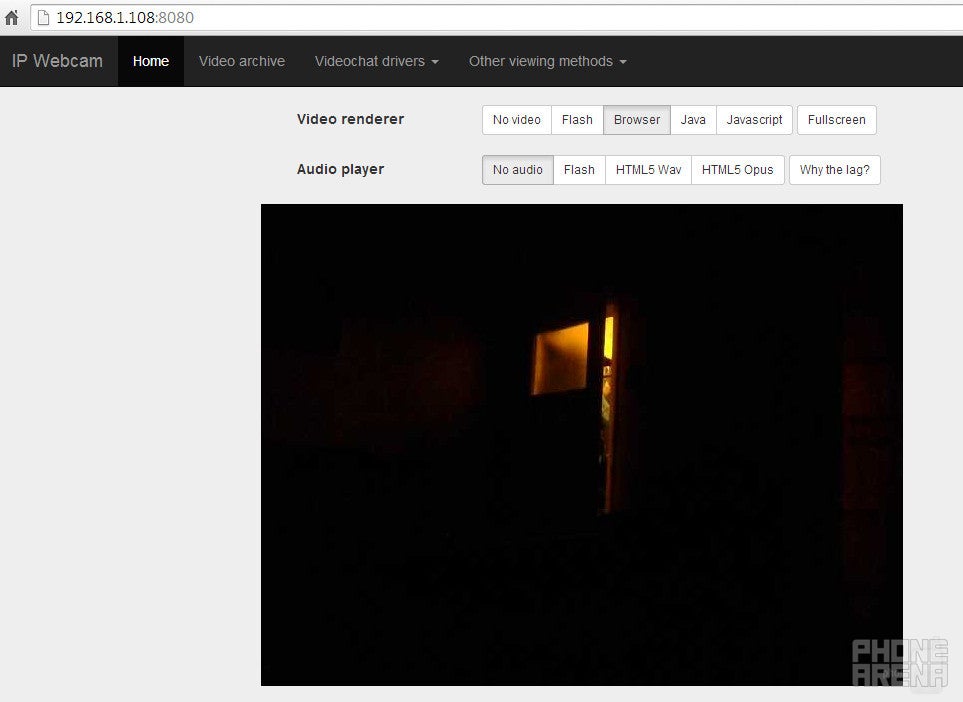
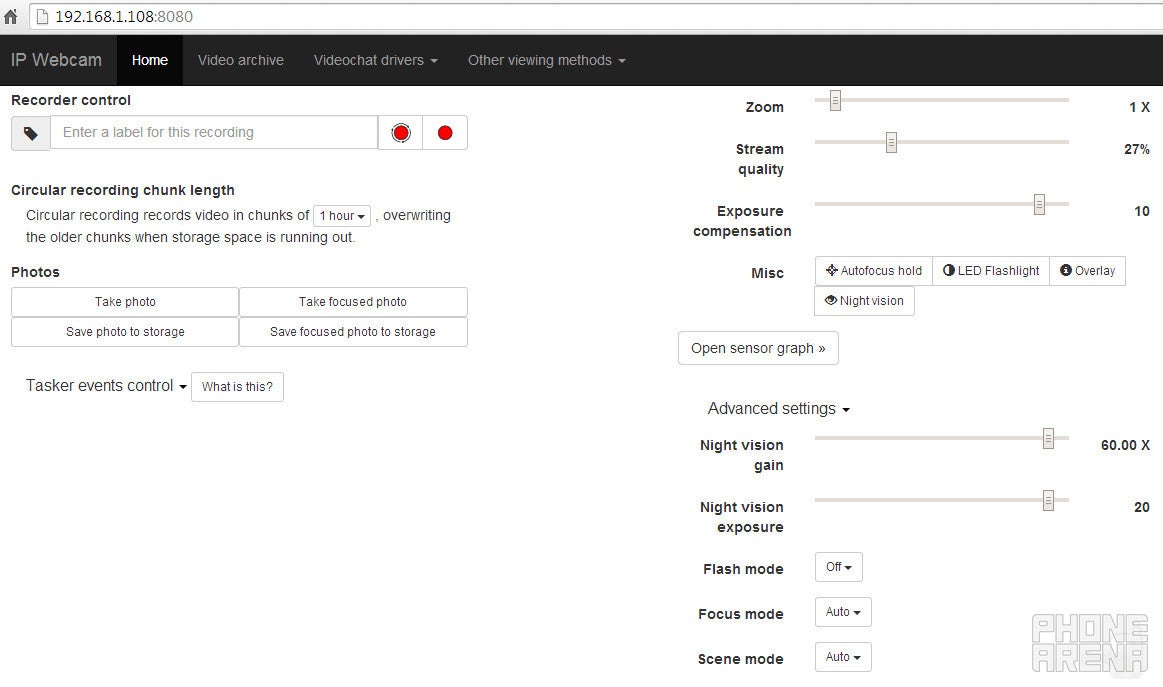
[TEXT]Type the IP address, exactly as it is shown, into the address bar of your favorite internet browser, be it on a computer or another mobile device on the same network. You will be taken to the IP Webcam interface. This is where you access the camera's video and audio streams from. Choose video and audio renderers. You might need to try these one by one and find out which combo works best.
Step #4
Try the controls if you're feeling adventurous. You may zoom in and out, or adjust the exposure if the video is too bright or too dark. Reduce the quality if your video stream is too choppy. Use the recorder option if you need to save a video - it will be stored on the phone itself. Still images, however, can be downloaded straight to the device you're viewing the video from.
And if you're away from home...
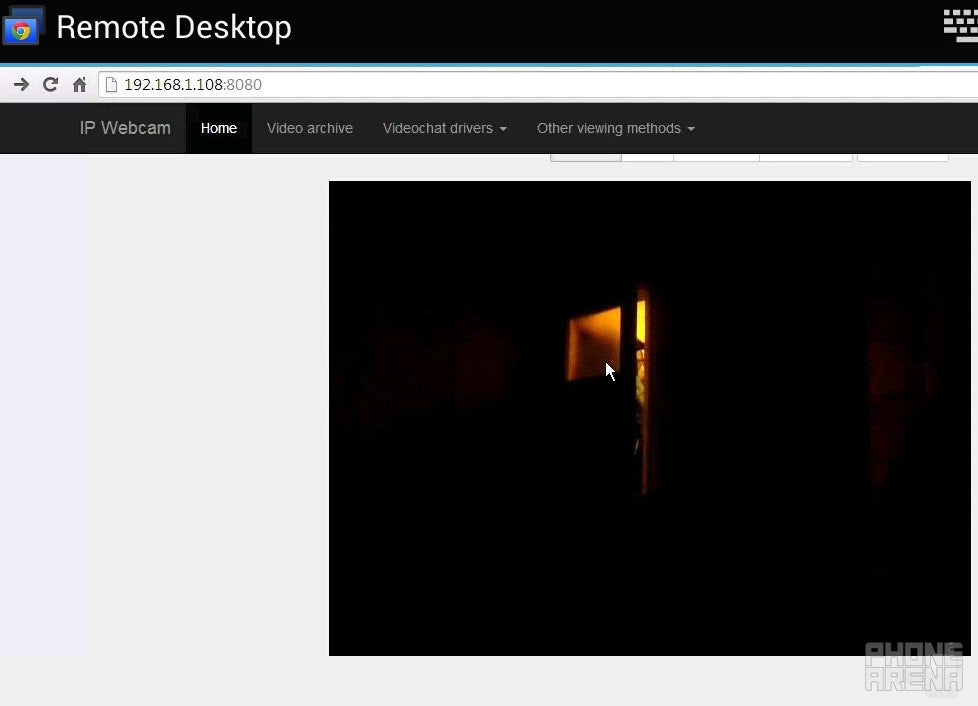
IP Webcam via Chrome Remote Desktop
Technically, the IP Webcam service should be accessible from another network, over the internet. This, however, requires better knowledge on network configuration than the average user possesses, and the process of setting up the connection will vary depending on your internet service provider and on the router that you have at home. Good news is that there's an easy workaround – just use Chrome Remote Desktop (or another remote desktop app, such as TeamViewer). Using Google's service, you can log into a computer at home and view your webcam from the computer's web browser. We gave it a try and the video stream flowed pretty smoothly. The downside to this method is that a computer at home should be always on.
Extra tips
If you'll be turning a phone into an IP camera permanently, consider getting a wide angle lens for it. This will give you a wider field of view – works well in tight spaces.
If you know how to access your router's settings, look for an option to assign a constant local IP address to your phone's MAC address. This way, you'll always know what address your IP camera is at.
Failing to connect? Your firewall or router might be interfering with the connection. Depending on what the issue is, you may have to whitelist your IP camera's IP address.
You might want to enable IP Webcam's built-in motion detection if you'll be using its video recording features. This will capture video only if a moving object is detected.
The developers of IP Webcam need your support. Consider buying the ad-free version of the app. This will also give you access to additional features, such as Tasker integration and UI customizations.
Recommended Stories
Loading Comments...
COMMENT
All comments need to comply with our
Community Guidelines
Phonearena comments rules
A discussion is a place, where people can voice their opinion, no matter if it
is positive, neutral or negative. However, when posting, one must stay true to the topic, and not just share some
random thoughts, which are not directly related to the matter.
Things that are NOT allowed:
Off-topic talk - you must stick to the subject of discussion
Offensive, hate speech - if you want to say something, say it politely
Spam/Advertisements - these posts are deleted
Multiple accounts - one person can have only one account
Impersonations and offensive nicknames - these accounts get banned
Moderation is done by humans. We try to be as objective as possible and moderate with zero bias. If you think a
post should be moderated - please, report it.
Have a question about the rules or why you have been moderated/limited/banned? Please,
contact us.


Things that are NOT allowed: