Switching from Android to iPhone: tips and tricks you should know


Moving Google contacts, email, calendar, and notes
To do that, go to the iPhone's Settings menu and open "Mail, Contacts, Calendars". Then choose "Add Account" and log in using your Google email and password. You will be asked to select the services that you want to synchronize with your iPhone – the options include Mail, Contacts, Calendars, and Notes (which is different from Keep). Just pick the ones you'd like to use and you should be all set.
Keep in mind that if both your iCloud (assuming you made one) and Google accounts are set to display and sync contacts, newly added contacts will be saved only to the account that is set as default. You may change the default account from the said "Mail, Contacts, Calendars" settings menu.
Start by finding the "Export" function on your Android phone. Different Android phones have this option placed in a different menu, but it should be somewhere in the Contacts app's list of options. The exported file will be saved in your Android phone's internal storage.
Now send yourself an email with the said vCard file attached to it and open it on your iPhone. (You may need to install a file browser, such as ASTRO or ES File Explorer, in order to attach the file.) Opening the attached vCard file on your iPhone will give you the option to view and import individual contacts, as well as to import all of the contained contact information.
Moving your text messages and call log
Transferring text messages from an Android smartphone to an iPhone is rather tricky. It is possible, but there's a catch – the only way of doing this is with the help of a smartphone manager compatible with both Android and iOS handsets. Unfortunately, neither Google, nor Apple offer such software, meaning that your only option is to trust a third-party solution. The accent here is on "trust" because, technically speaking, smartphone managers have access to anything stored on your mobile device. After all, they need access to this data in order to manage it. But at the same time, there's no guarantee that your sensitive won't secretly end up on a server somewhere on the other side of the world.
Anyway, we did some digging on the web and found several managers that seemed trustworthy. Only one of them, Moborobo (not to be confused with Mobogenie), succeeded in moving our texts from an Android phone to a non-jailbroken iPhone. The first step in the process was to connect our Android phone to our computer over USB. Also, we had to enable USB debugging in order to let Moborobo do its thing. Then from the "Data" tab in Mobo's interface, we exported all our messages as an XML file. It was important to select this particular format as others couldn't be imported into the iPhone's database, as we found out. The next step was to connect our iPhone over USB and to import the said XML file. After rebooting our iPhone, all of our texts were present in its Messages app.
Transferring your Android phone's call log is even trickier as having a jailbroken iPhone is a requirement. Again, you have to use a third-party smartphone manager to move this kind of data back and forth. One of the alternative solutions that we can think of is to export your call log and store it in a location you have access to – in the cloud or in your email inbox, for example. Then refer to it whenever you need to. Moborobo can export call log information in either Excel format (.XLS) or as plain text (.TXT), but you can also use Call Logs Backup & Restore for Android, which can export your call history in an XML file.
Moving photos, videos, and music
Transferring media from Android to iPhone is as simple as copying and pasting it over, right? Wrong. The iPhone's media library is managed through iTunes, which you can download for free from Apple's site, if your computer doesn't have it installed already. Frown not as iTunes is usually pretty reliable and easy to use.
To move some or all of your existing photos and videos from your Android phone, copy them to a folder on your computer. Put them in a new, empty folder if it is only these images and videos that you want transferred. Then connect your iPhone to your computer via USB and launch iTunes if it does not launch automatically. In iTunes, there should be an "iPhone" button in the upper right-hand corner – press it. What you'll see is an overview of your iPhone's status, but this is not important right now. Hit the "Photos" tab, enable "Sync photos" and "Include videos", choose the folder that you just moved your media into, and hit the Apply button in the lower right-hand corner. Do not disconnect your iPhone until the syncing process is complete. That should be it! Your photos and videos should now be found in a new album in your iPhone's Photos application.
Keep in mind that you may also move your old images to the cloud via a service of your choice – Google Drive, Dropbox, OneDrive, whatever. If you ever need to view any of your old photos, just use the service's iOS client to open it. The advantage of this solution is that you'll have more storage space on your iPhone for apps, games, music, and, of course, new photos and videos.
You may also send photos to Apple's iCloud service even if you don't have a Mac. On Windows, you can do that using Apple's iCloud Control Panel application, which is available as a free download from Apple's web site. Once downloaded, it can be configured to synchronize the photos from a selected folder with your iCloud account, where up to 5GB of cloud space are available at no charge.
Moving music to the iPhone is also done with the help of iTunes. Before any music is transferred, however, it has to be imported into the iTunes library. By now, Apple's application has most likely scanned your computer for media and imported it automatically. Now just find the music that you want transferred and copy it over to your iPhone with a right click and the "Add to Playlist" option. If for some reason iTunes doesn't meet your requirements as a media manager, there are alternatives. Foobar2000, Media Monkey, even the old-school WinAmp are compatible with iPhones, iPads, and iPods so they can be used for transferring music as well.
Of course, you don't necessarily need to store any music on your new iPhone. There are some great streaming services out there that you can use instead – iTunes Radio, Pandora, Slacker, Spotify, to name a few. With the latter two, you may even save music offline, although you'll need to be a paid subscriber to have the feature enabled.
Google apps
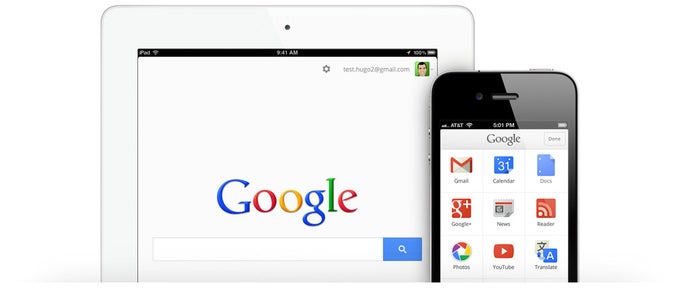
Google's apps and services don't run on Android only, you know. Many of the company's applications can be used on an iPhone as well. So if for some reason the stock email client in iOS does not suit your needs, you may download and use Gmail instead. Google Maps and Google Chrome are also available on iPhone as alternatives to Apple Maps and Safari. Go through the list below and feel free to download every Google app you think you'll need on your iPhone.
- Gmail
- Chrome
- Google Drive
- Google Maps
- YouTube
- Google Docs
- Hangouts
- Google+
- Google Earth
- Google Search
- Google Play Books
- Google Play Music
- Google Translate
Moving Chrome, Firefox, or Internet Explorer bookmarks to Safari
If you've been using Chrome, Firefox, or Internet Explorer for a while, then your list of bookmarks has most likely grown quite a bit. And there has to be an easy way of transferring all these bookmarks to Safari in iOS, right? Well, that's correct. Remember Apple's iCloud Control Panel application that we mentioned earlier? It is capable of synchronizing bookmarks across browsers as well, so you can easily import yours to your iCloud account.
Popular stories


Latest News
Things that are NOT allowed:
To help keep our community safe and free from spam, we apply temporary limits to newly created accounts: