How to move an app to the microSD card on Android

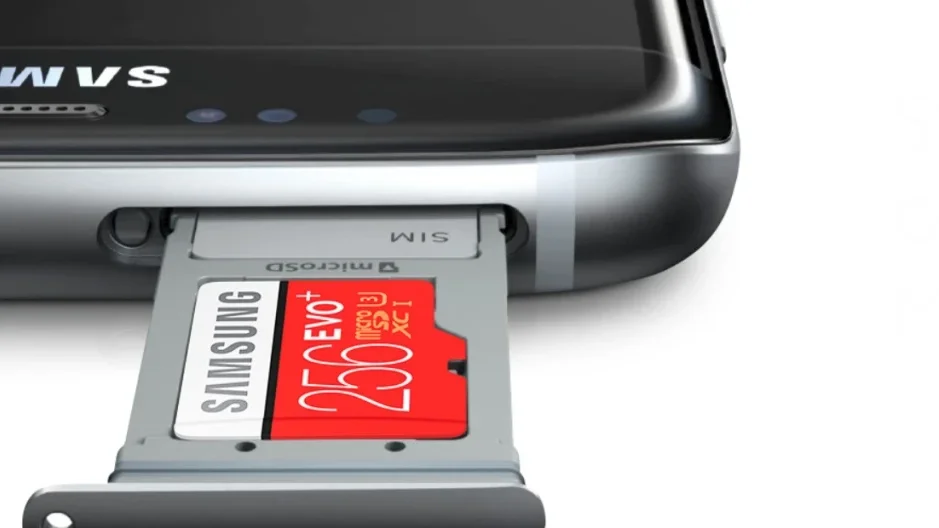
MicroSD cards might be already in the Red Book of endangered technology species but there are some companies that are still keeping the slot safe and sound. Nowadays phones come with around 128GB base storage, which is plenty but still, there are times when you might find yourself struggling for storage.
We all know that high-resolution videos are the main culprit when it comes to storage eaters but let’s say you’ve already moved all your videos on your memory card. Don’t forget that modern apps and games are getting bigger and bigger, and moving one to the SD card of your phone can free gigabytes of memory.
This method is universal and if an app supports it you will be able to move a large portion of it to the SD card. Bear in mind that the exact steps might vary depending on the operating system and the UI of your phone. The steps above are for Samsung devices running Android 11 on top of OneUI 3.
There’s another way to expand your phone’s storage, without having to move all the apps manually to the SD card. There are two ways to do this. If you have an empty SD card at hand, just insert it into your SD card slot. If your phone supports that option, a notification will pop up asking you how you want to use your SD card. Choose the option that says “adopt external storage”.
(Note: not all phones support this merged storage option.)
There’s another way to try and do this, and it’s done through settings:
There are some considerations with this method. First, you won’t be able to swap your SD card, or use it to transfer files to other devices. Second, the internal memory of your phone is much, much faster than the average SD card. In order to work properly, your phone will settle for the slower speeds of the SD card, and won’t utilize the faster transfer rates of its internal memory.
Here’s how to move an app to a microSD card:
- Unlock your phone and go to the Settings app.
- Scroll down and find the Apps option.
- Choose the app you want to move to the SD card and tap on it.
- Then select the Storage options.
- If the app supports the feature, you will see an option called Storage used. To move the desired app from the main phone memory to the SD card, select Change.
- Then select the microSD card.
- Tap on Move.
- That’s it - the files will be transferred to the SD card
How to merge the SD card with the internal storage of your phone
There’s another way to expand your phone’s storage, without having to move all the apps manually to the SD card. There are two ways to do this. If you have an empty SD card at hand, just insert it into your SD card slot. If your phone supports that option, a notification will pop up asking you how you want to use your SD card. Choose the option that says “adopt external storage”.
(Note: not all phones support this merged storage option.)
- Insert the microSD card into your phone.
- Find the Settings app and open it.
- Navigate to Storage and tap on it.
- The SD card you just inserted should be right there - tap on it.
- Select the menu button and choose Storage settings.
- There should be an option saying Format as internal.
- Tap on Erase and format.
- Confirm with OK.
- Migrate your data (or choose to do so later).
There are some considerations with this method. First, you won’t be able to swap your SD card, or use it to transfer files to other devices. Second, the internal memory of your phone is much, much faster than the average SD card. In order to work properly, your phone will settle for the slower speeds of the SD card, and won’t utilize the faster transfer rates of its internal memory.
Read More:
Best micro SD cards for Samsung Galaxy, LG, Motorola, and Xperia phones (2021)
Follow us on Google News


Things that are NOT allowed:
To help keep our community safe and free from spam, we apply temporary limits to newly created accounts: