Back in June, Apple officially unveiled iOS 10. One of the novelties that did not make enough headlines were the numerous new APIs that got introduced, with one of the more intriguing ones being iOS 10's RAW image capture support in the DNG (Adobe's Digital Native) file format.
Much to the delight of shutterbugs, it allows developers to implement RAW image capture in their camera apps and let users capture lossless, uncompressed photos that are editing-friendly. choose whether to capture JPEG, RAW only, or JPEG + RAW, which is akin to what most DSLR cameras out there offer. However, you can't shoot RAW with Apple's stock camera app.
We already showed you a couple of iOS apps that let you do just that, but we felt like we have to further elaborate on all that RAW business, as in what's it exactly, do you need it in your life, and do you have to actually care? Let's delve in and find out whether this camera fancy schmancy is worthy of your attention.
What is RAW and why should you care?
Simply put, RAW images are lossless files that contain uncompressed and minimally-processed data captured from the camera sensor of the device. That's usually the format Also known as "digital negatives", said files need to be developed with additional software, like Adobe Photoshop Lightroom, Apple Photos, Corel AfterShot, etc. We wouldn't delve further into this issue for further reading check Wikipedia or look around on Google.
Recommended For You
What are the benefits of RAW versus JPEG?
Countless, but we will narrow it to a couple of things.
First of all, the lack of compression means that if you export a JPEG or a PNG file out of your source RAW, there will be zero loss of detail in comparison with a regular JPEG photo taken with the camera in the same situation. Essentially, you get the highest level of quality you can eke out of your phone's sensor.
Also, RAW files usually have a bit depth of 12, 14, or16 bits compared with the measly 8-bit depth of a run-of-the-mill JPEG file. This means that RAW files retain a way larger amount of different brightness levels that you can edit without compromising the overall image quality - an 8-bit JPEG gives you 256 levels to play around with, while a 12-bit RAW gets you 4096. This lets you fine tune the shadows and the highlights and correctly expose your photo.
RAW also lets you correct severely over- or under-exposed photos without deteriorating the overall quality of your photo thanks to the larger amount of information it holds within itself. Additionally, when you're shooting in JPEG your phone automatically sets the white balance of the image; with RAW, you can set the white balance afterwards in a non-destructive way.
We can go on, but what you need to take home at the end of the day is that RAW is a much, much better choice if you want to produce quality images. With a bit of manual post-processing and touching-up, a RAW file can easily blow a JPEG pic out of the water.
Now, many will be quick to argue that one can also edit JPEG image to achieve similar results. While that is mostly true, we shouldn't overlook the fact that unlike RAW, compressed JPEG images are way less forgiving when it comes to subsequent editing.
Let's talk examples now. We took a resident iPhone 6s Plus, downloaded Manual (a camera app that supports RAW), and went out for a walk. We shot some regular JPEGs with the default iOS camera app and shot the RAWs with Manual.
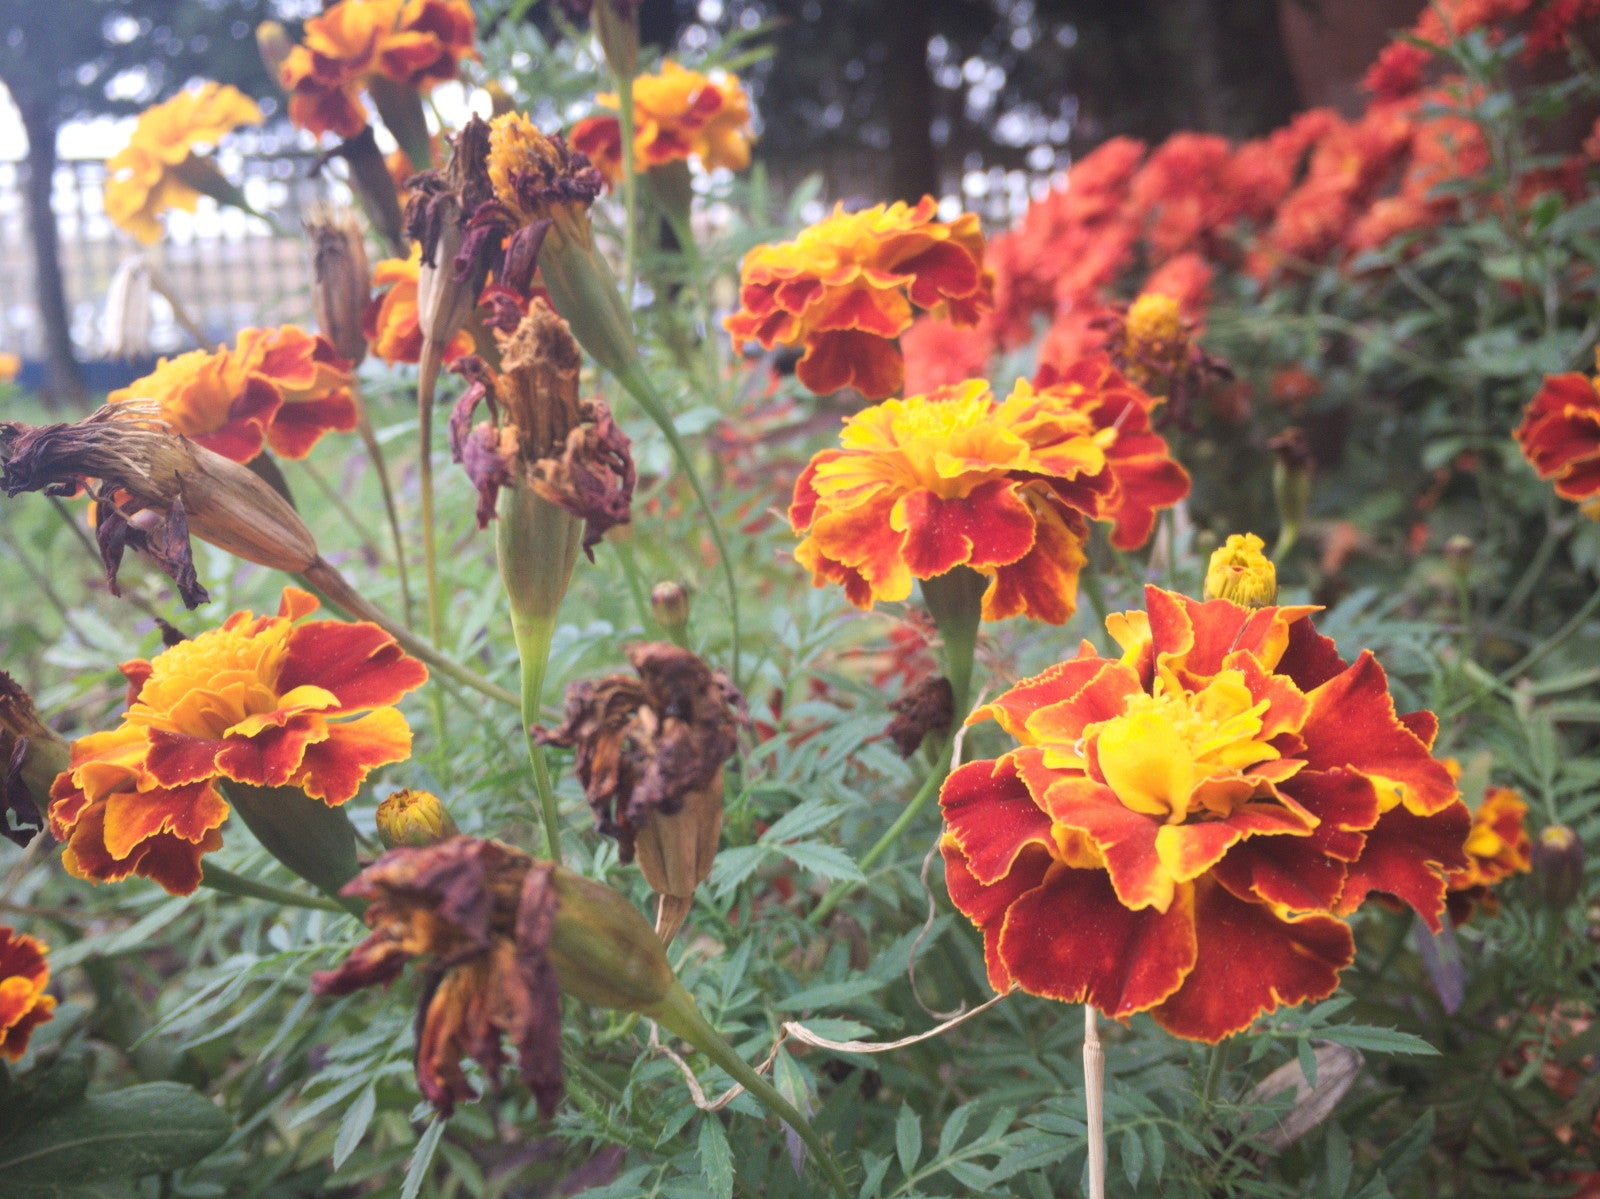
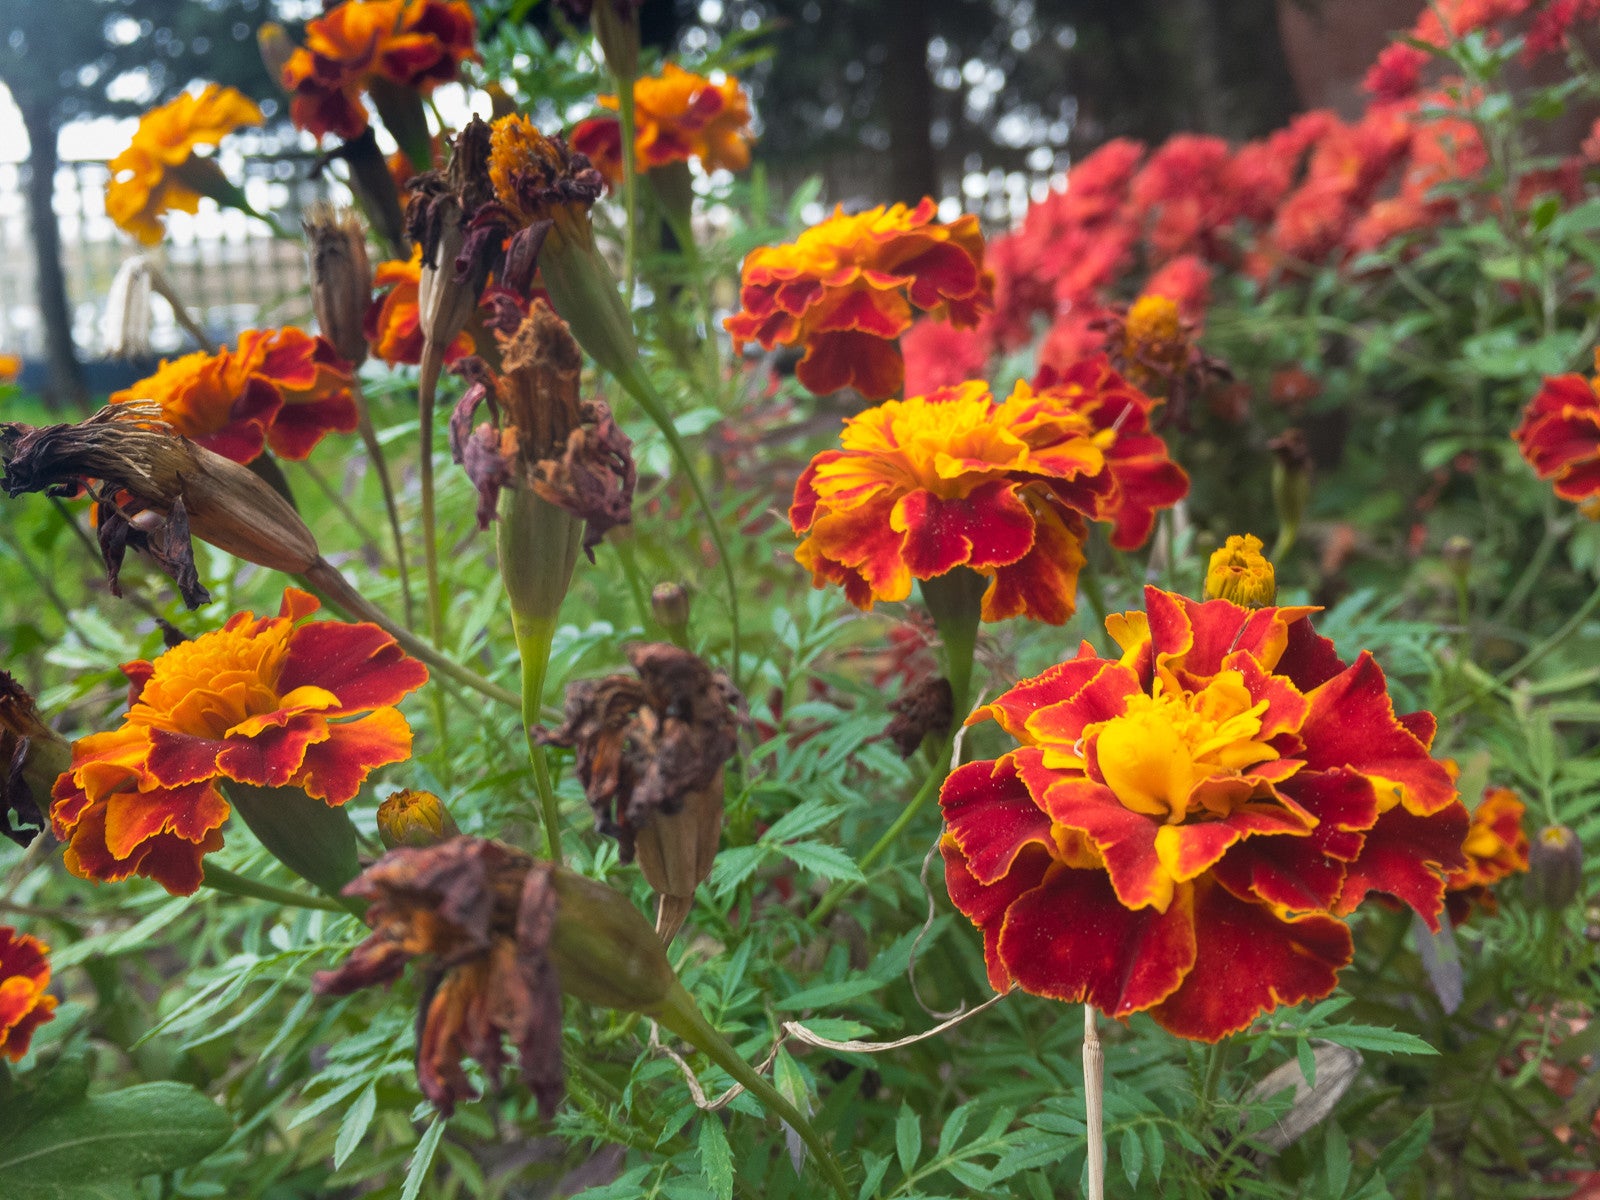
Scene 1
< JPEGEdited RAW >
The rather bleak and over-exposed JPEG is absolutely nothing to write home about and would normally find its final resting place in our recycle bins: the colors are uninspiring and the foliage in the background. After a few basic edits in Adobe Lightroom, we achieve a much better look for our flower scene.
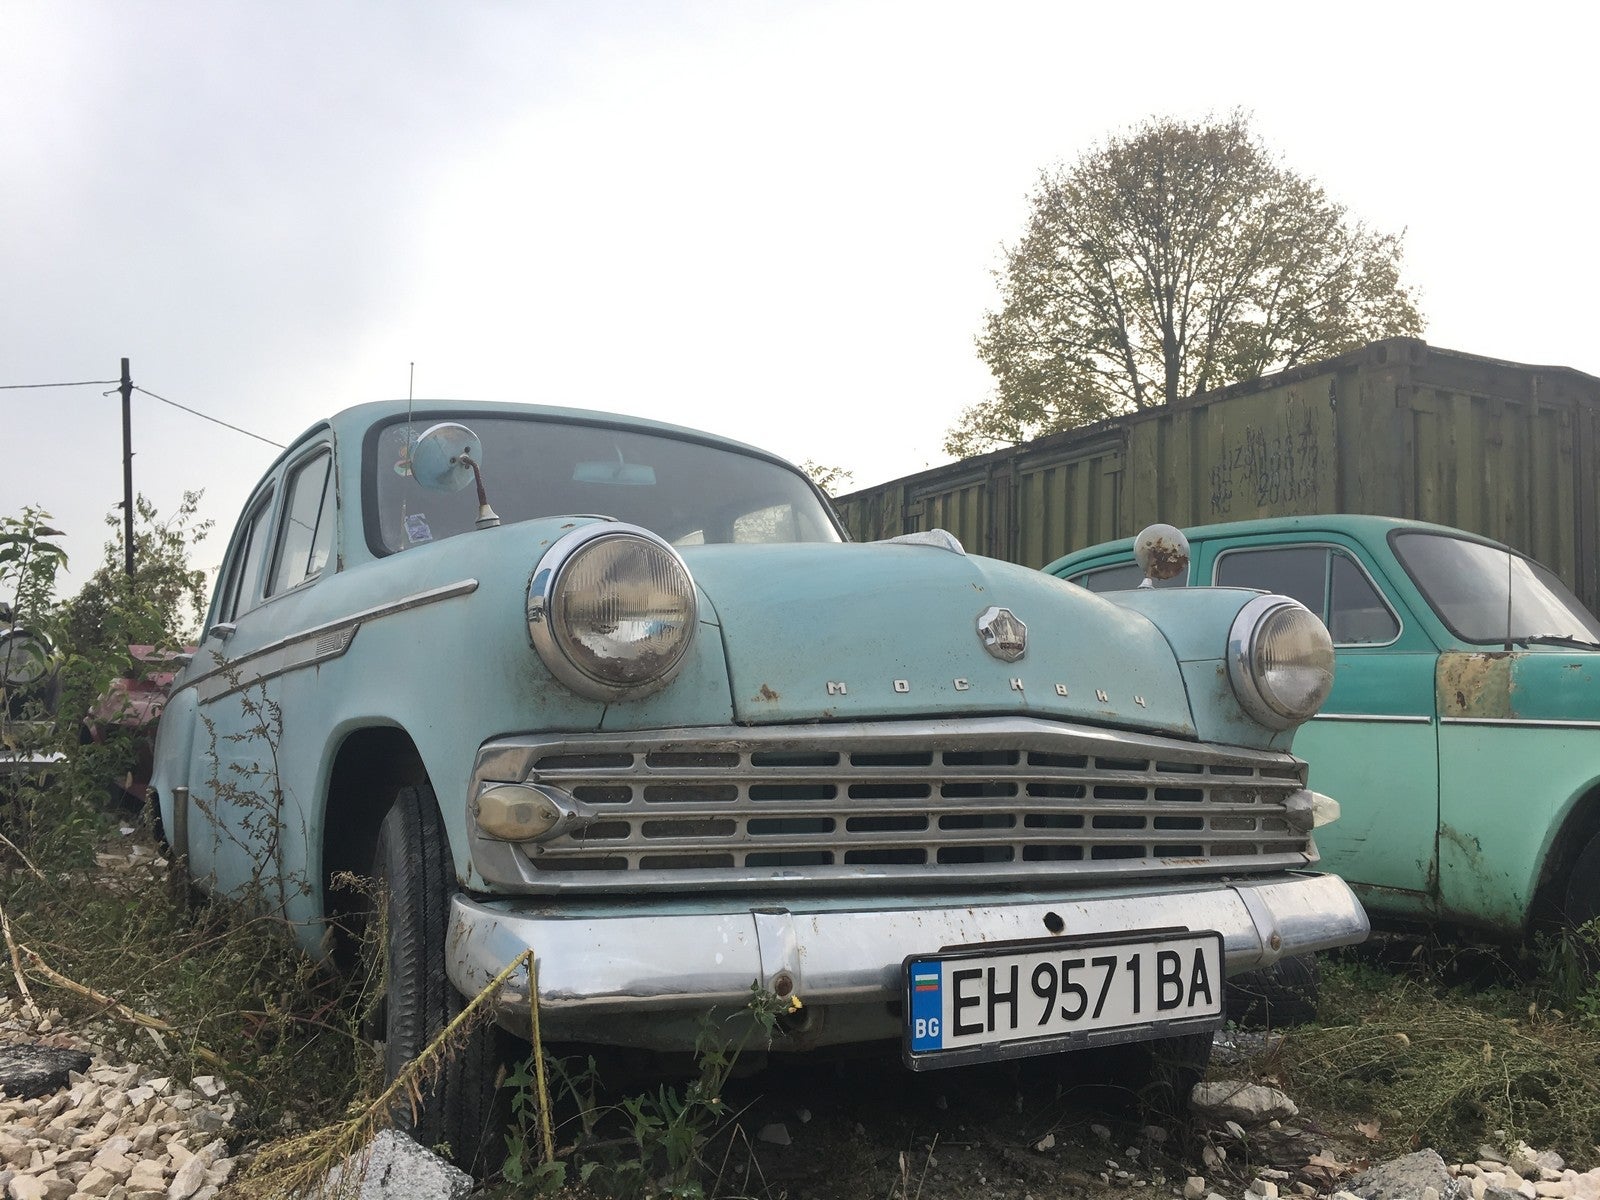
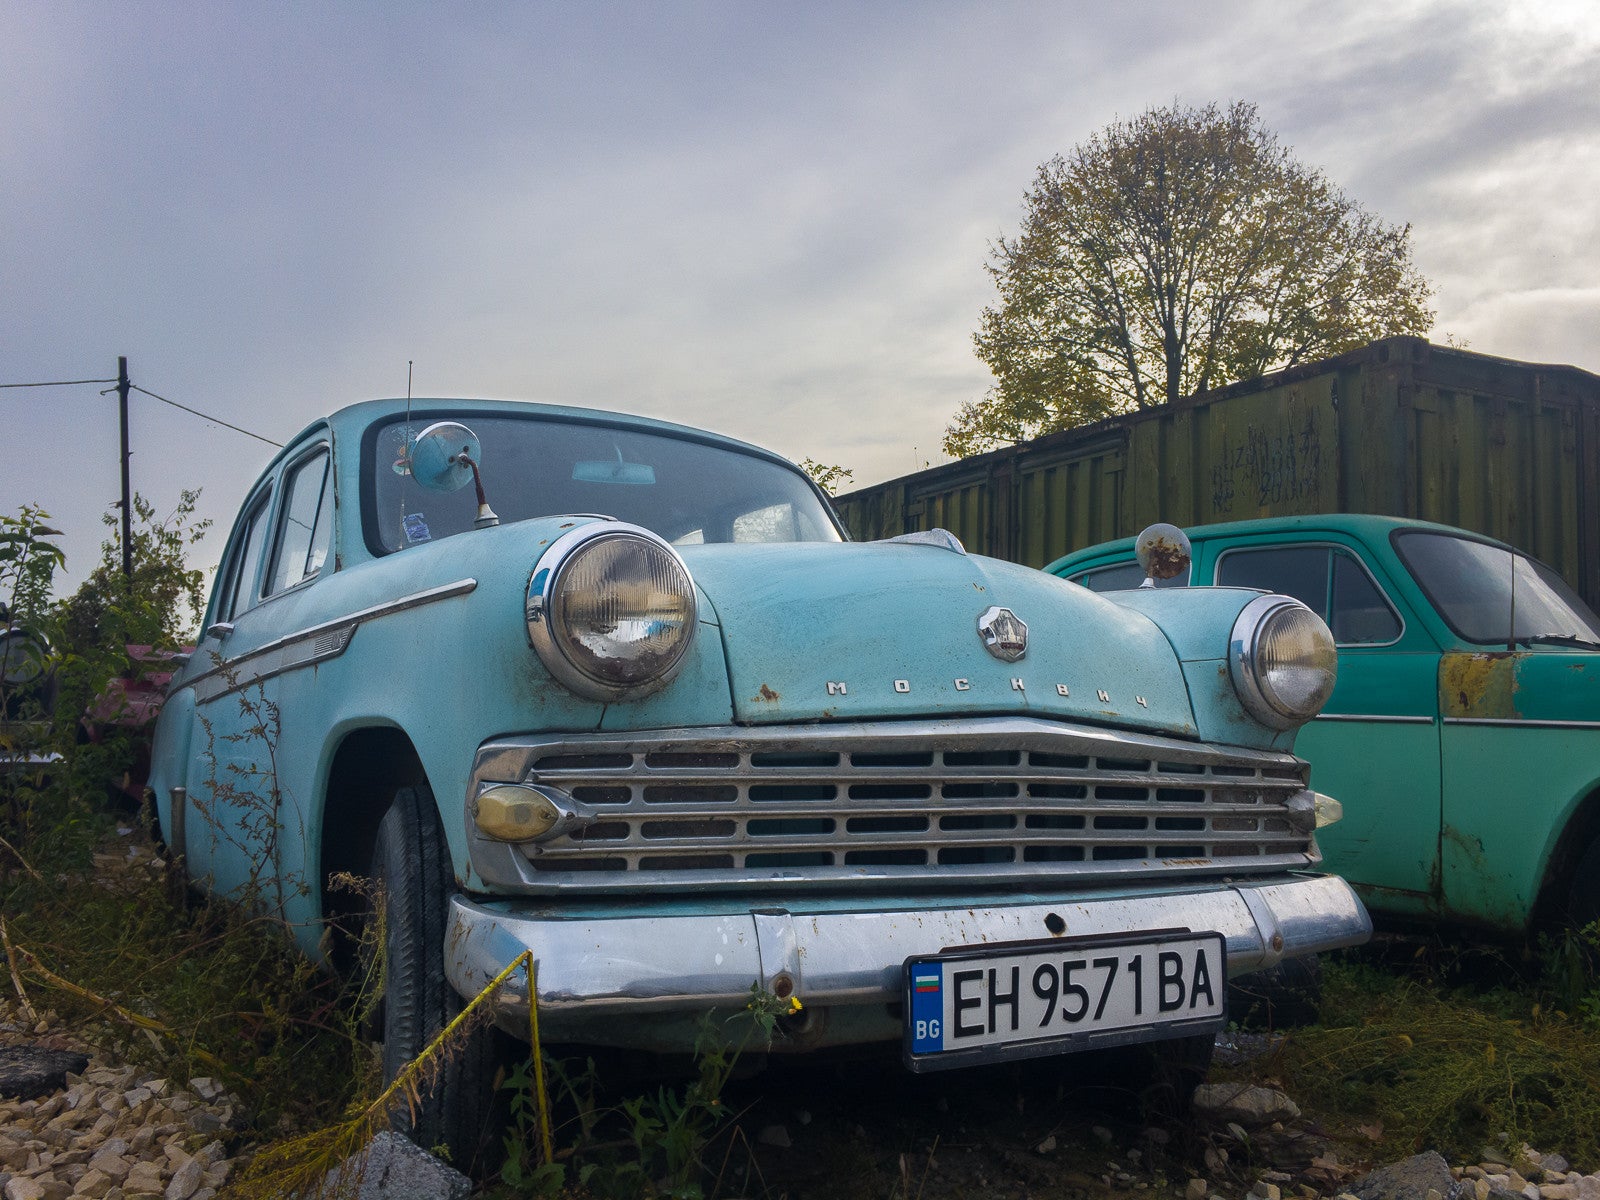
Scene 2
< JPEGEdited RAW >
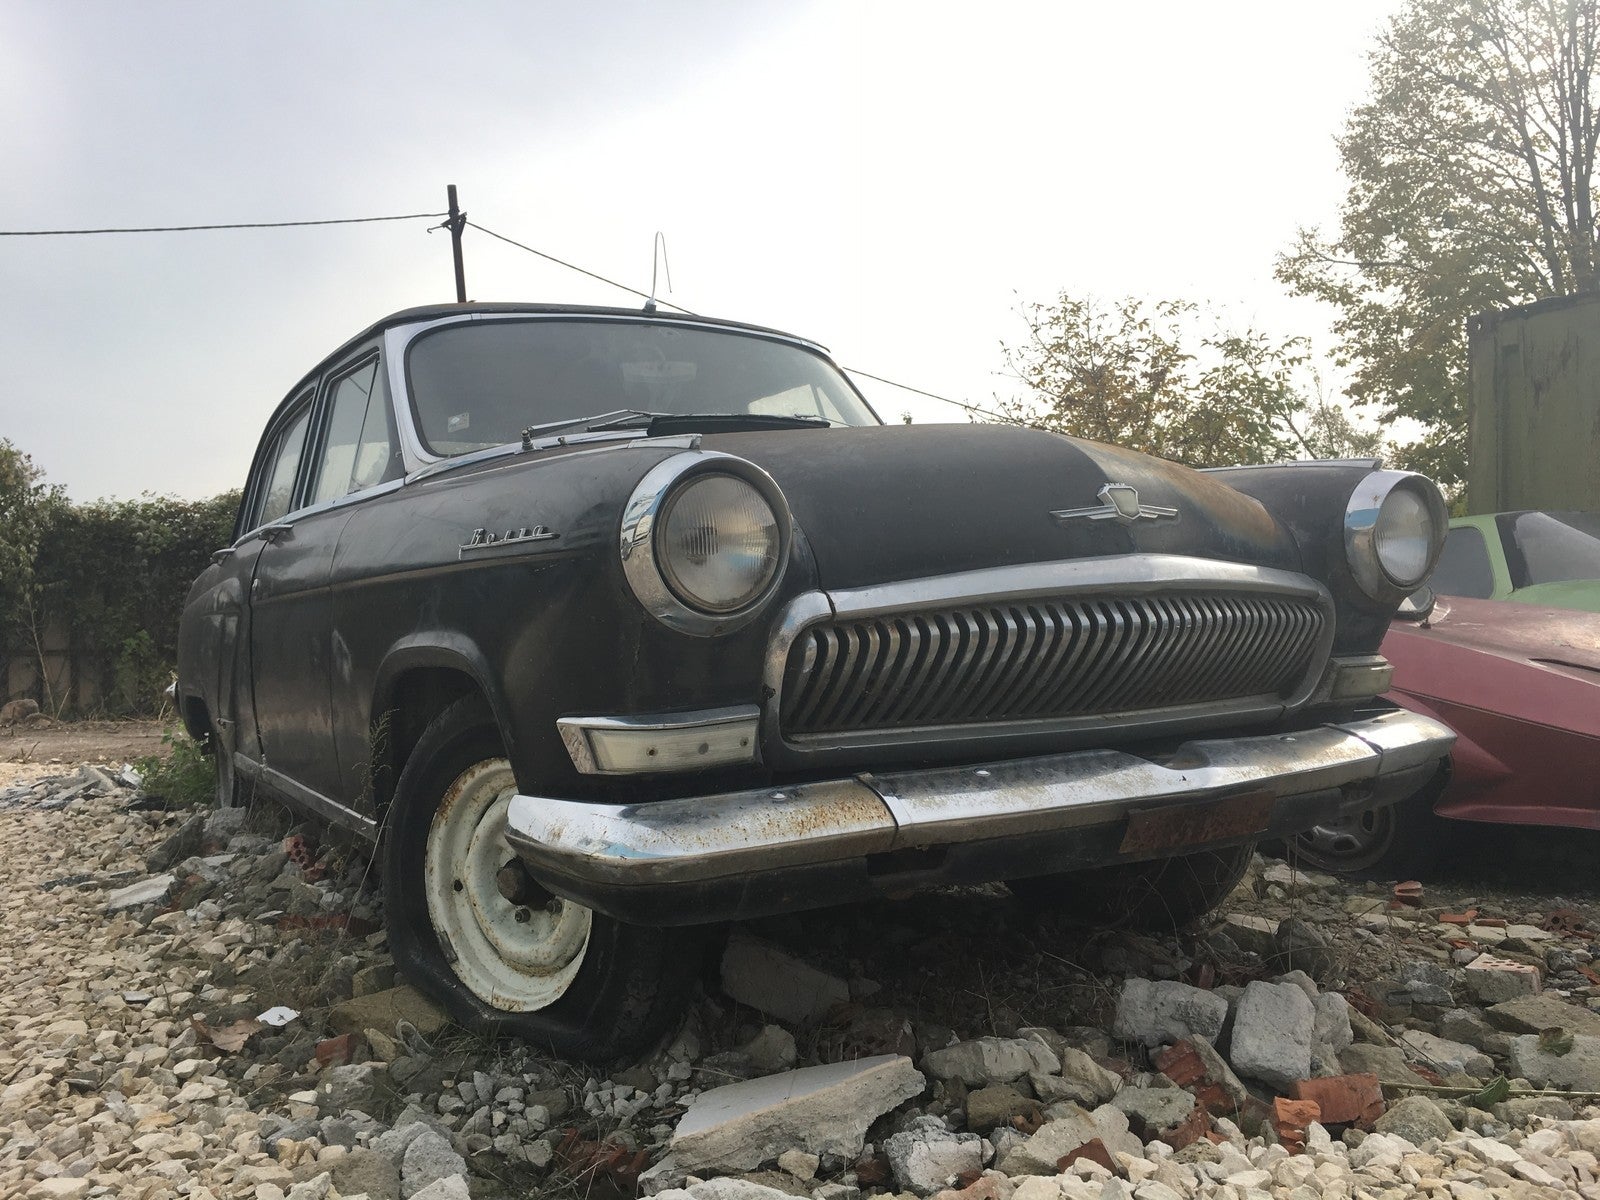
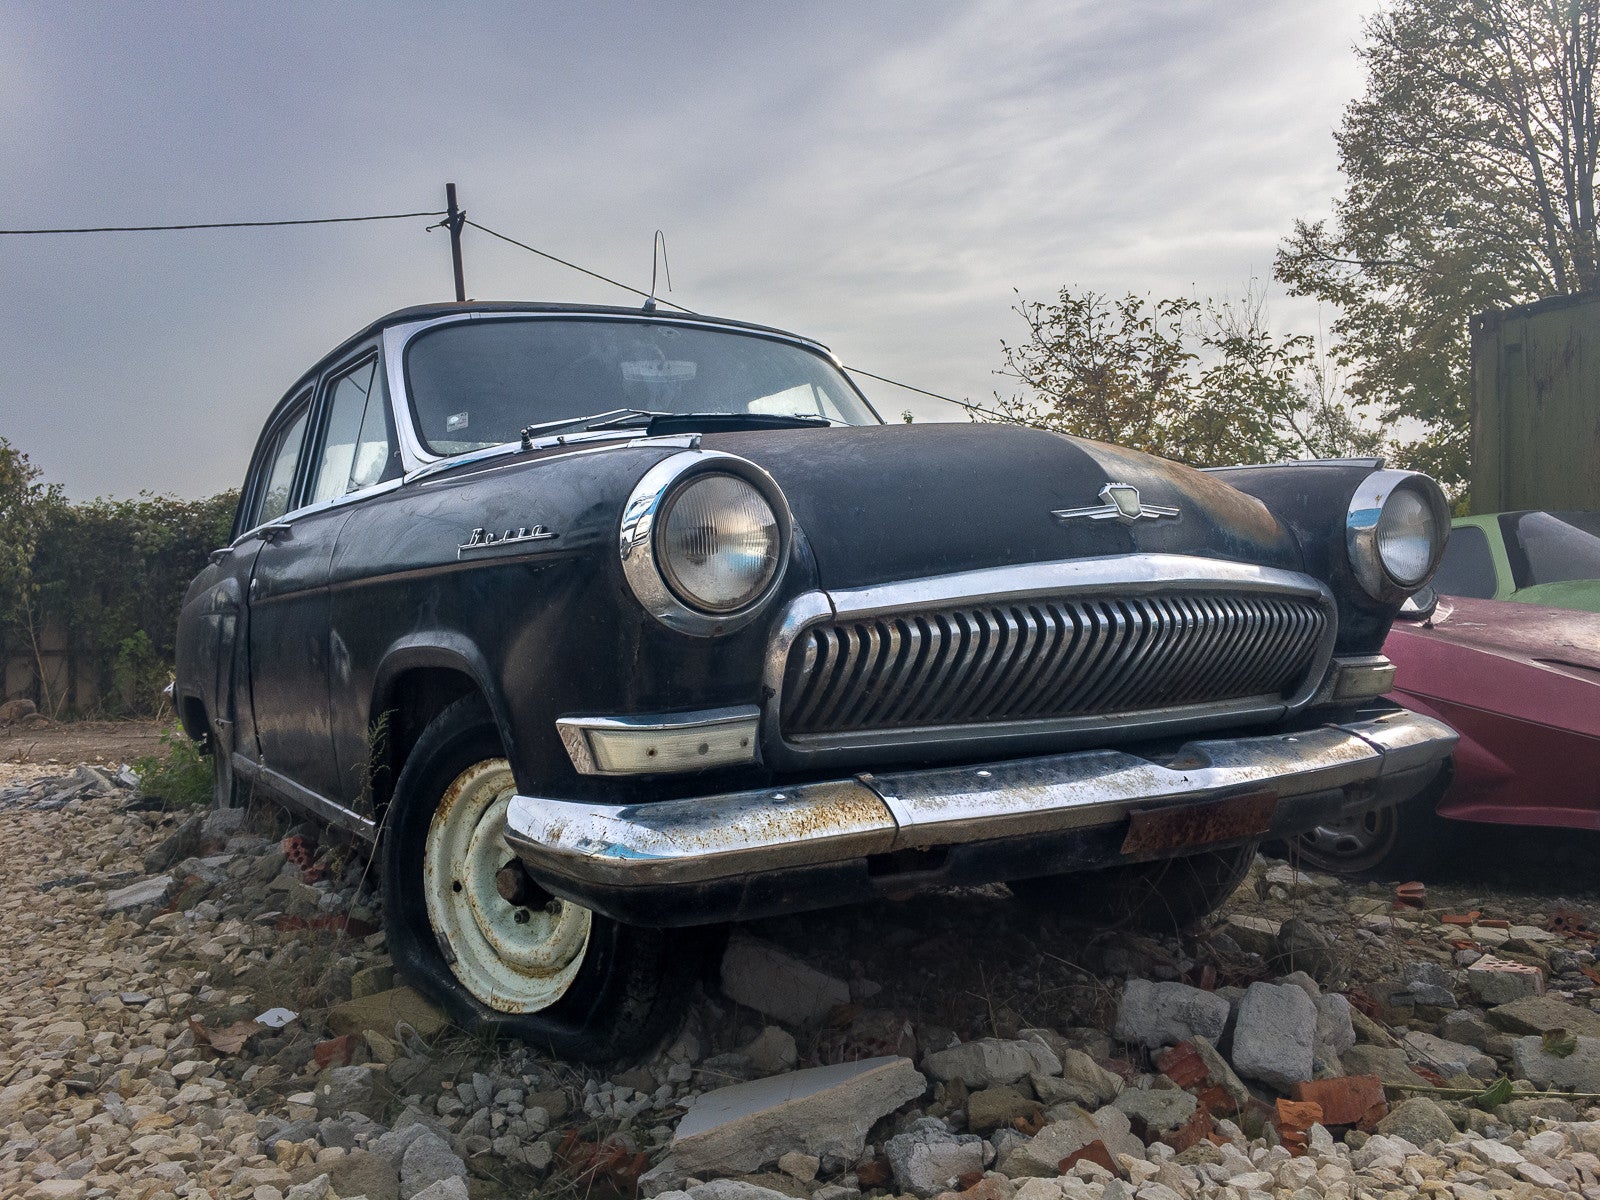
The JPEG in the tricky scene above has preserved zero to no detail in the sky and clouds' area. Everything is a milky blur; the colors of the sky-blue car are also a bit off and appear a bit greenish. RAW to the rescue - we snapped two identical pictures with different expositions, merged them together into an HDR image and after a few touch-ups, we've got a way better-exposed picture with more vivid colors.
Scene 3
< JPEGEdited RAW >
This otherwise great shot would have been ruined if we went with the JPEG, which is obviously uninspiring and rather dull - it looks like someone has put a brown filter in front of our lens, yuck! Once again, RAW saves the day - after combining two images into an HDR in order to preserve as much detail in the sky area as humanly possible, we edited the image to the point where it's essentially wallpaper-worthy.
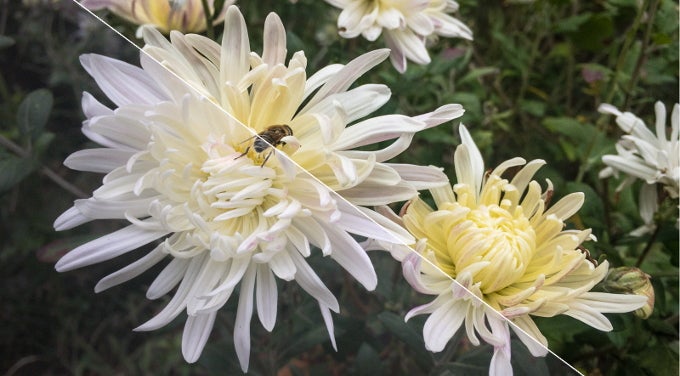
Scene 4
< JPEGEdited RAW >
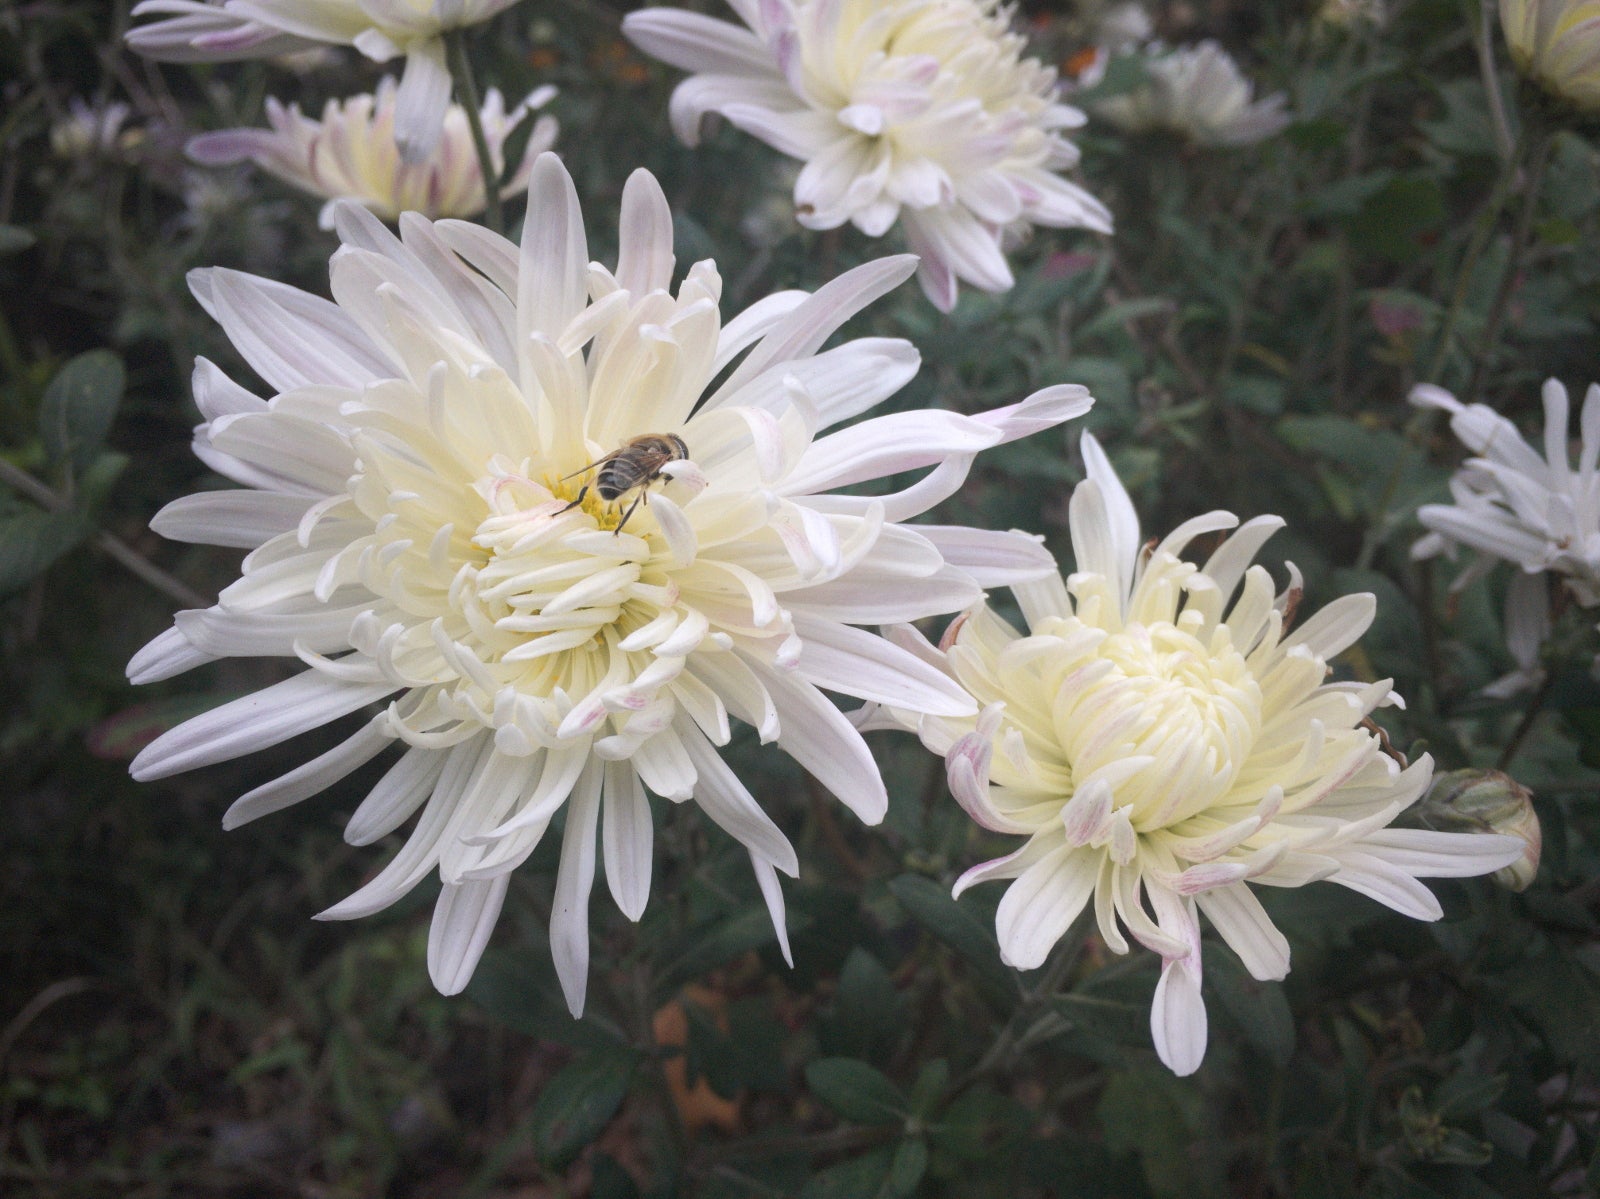
Once again, under low-light outdoor conditions, a run of the mill JPEG photo will end up mostly unimpressive. It takes a RAW image file to bring out the best of that beautiful flower and the industrious bee sucking its juices.
Scene 5
< JPEGEdited RAW >
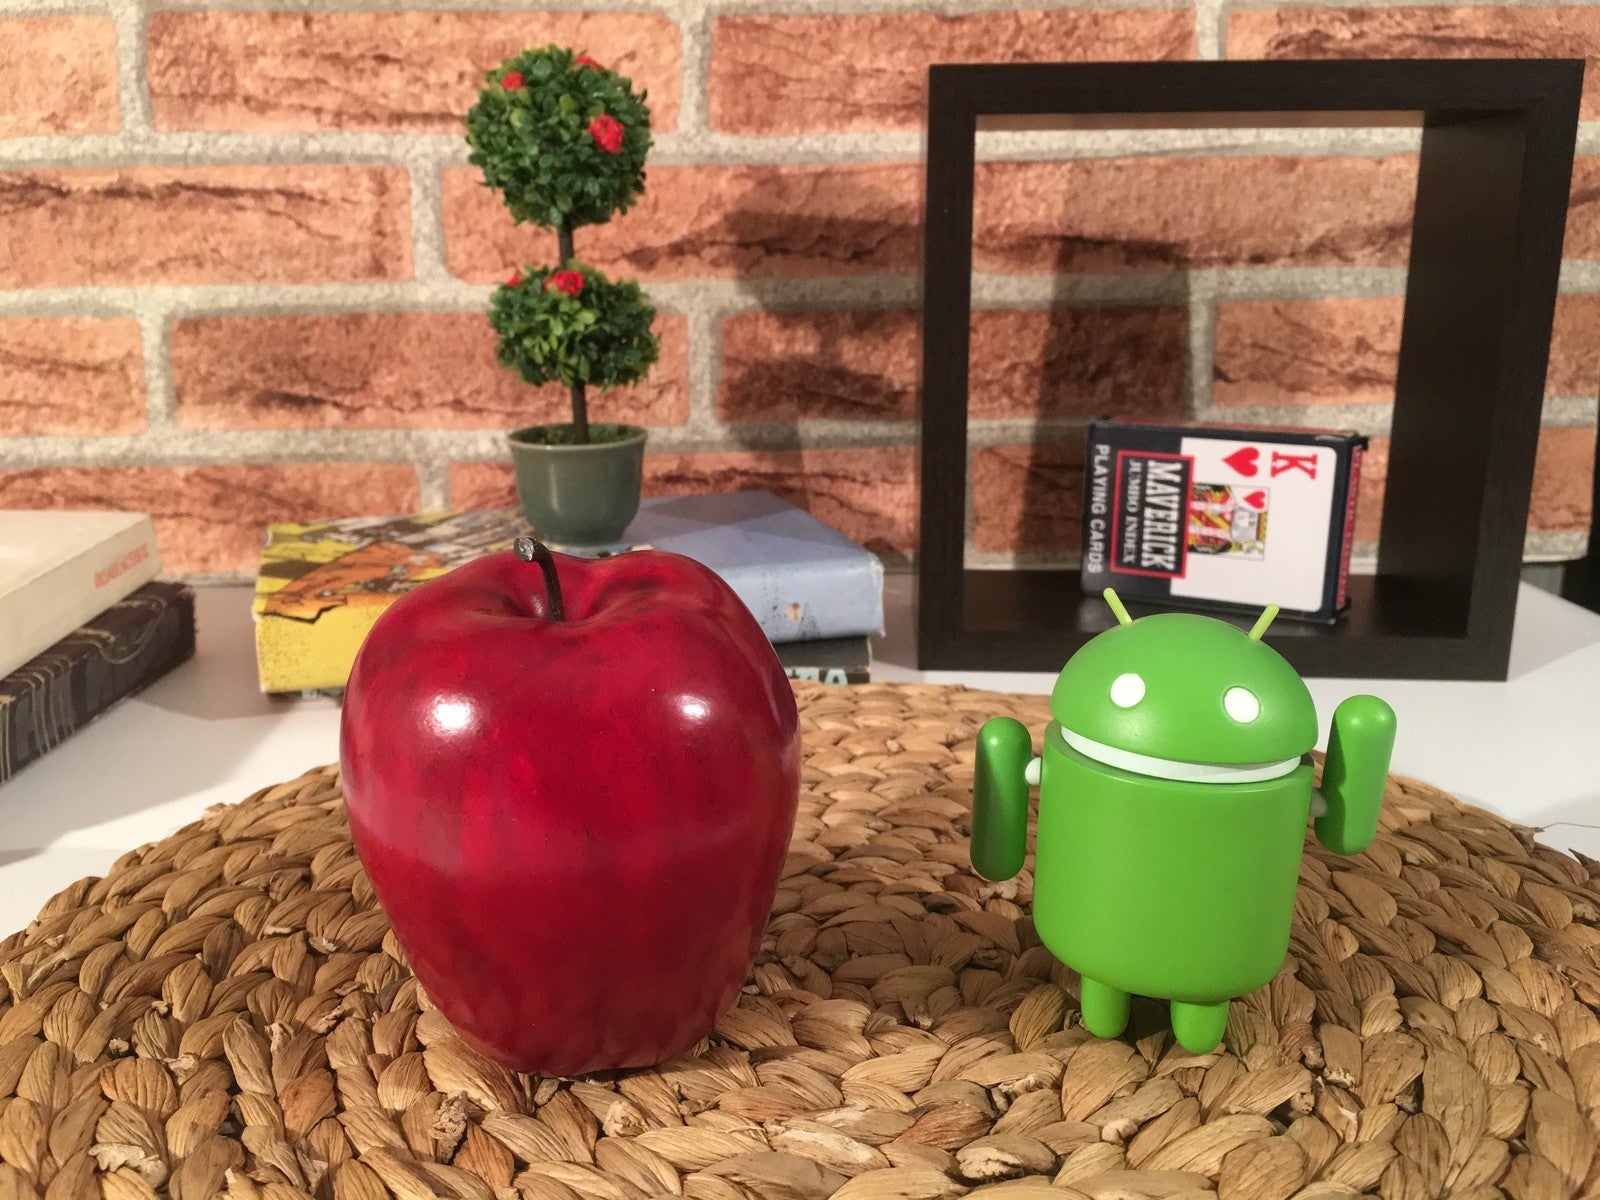
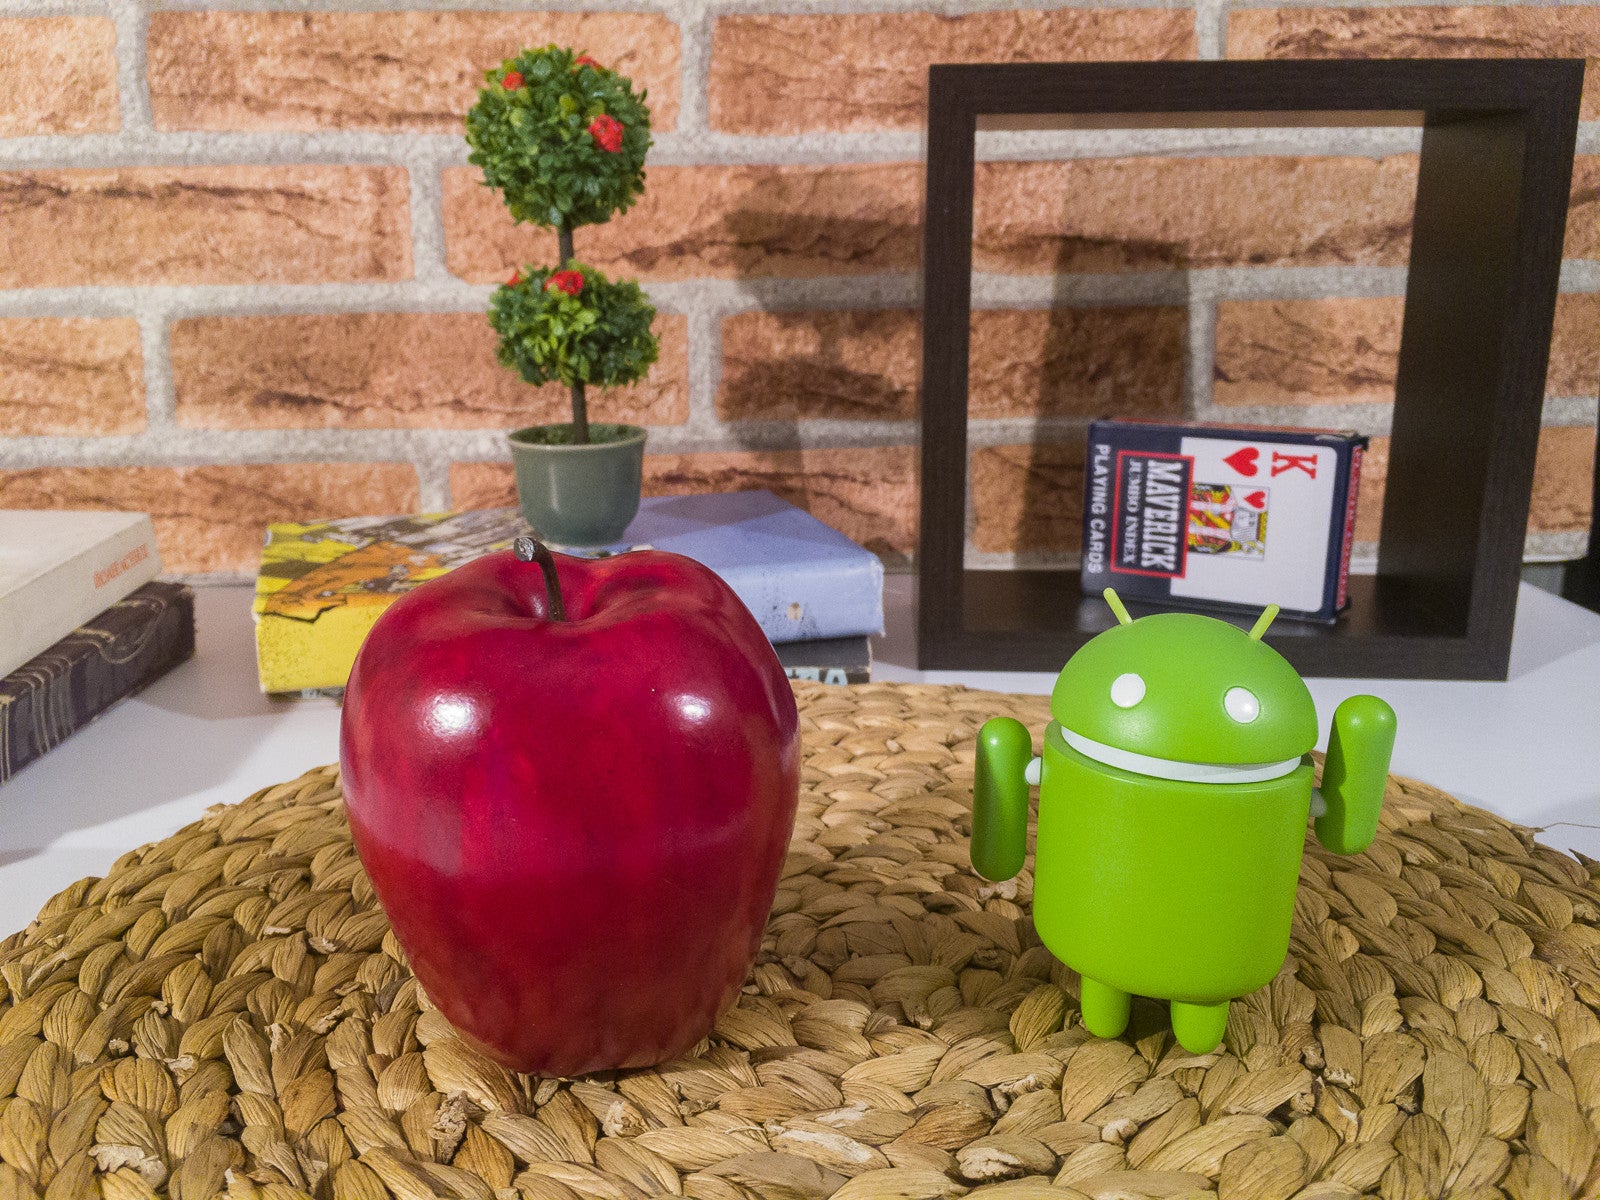
The JPEG in this scene clearly shows us why you should consider shooting RAW in tricky situations. In this indoor scenario, the JPEG exhibits a totally wrong white balance, making white appear yellowish, greens have a noticeable blue tint, while detail on the tiny plant in the background is hard to discern. That's not we are looking for in a photo. On the other hand, after a few basic edits, the RAW image we developed has more details preserved as well as the correct white balance for that scene. Also, the Android figurine is the correct hue of green.
Alrighty then, can my iOS 10-running iPhone shoot RAW?
Yes, but you need to make sure that you're sporting a compatible model. Currently, five iPhones and one iPad can shoot RAW photos: the iPhone SE, the iPhone 6s, the iPhone 6s Plus, the iPhone 7, the iPhone 7 Plus, and finally, the 9.7-inch iPad Pro. The common denominator between all of these is that they all sport 12MP iSight cameras at the back. If you have one of these and you're running iOS 10, you're good to go. Oh, and have in mind that only the rear camera can shoot RAW images.
Anything else I need to know about RAW files?
Well, have in mind that due to their lossless nature, RAW files are noticeably larger than compressed JPEGs. DNG files taken with your iPhone will generally vary in size but will gravitate in the 9–11MB range, whereas a high-quality JPEG images are at around 3x - 4x smaller. Thus, enabling JPEG + RAW capture from within a compatible third-party app and snapping a ton of pictures will take up lots of your phone's storage, so have this in mind.
Okay, tell me how to shoot RAW on my iPhone!
All right, seems you've decided to improve your photography game big time, congrats! As we mentioned multiple times, you need to pick a camera app from the App Store that has this new feature implemented by its developer. Examples of such apps are Adobe Lightroom, Manual, ProCam 4, ProCamera, and many others.
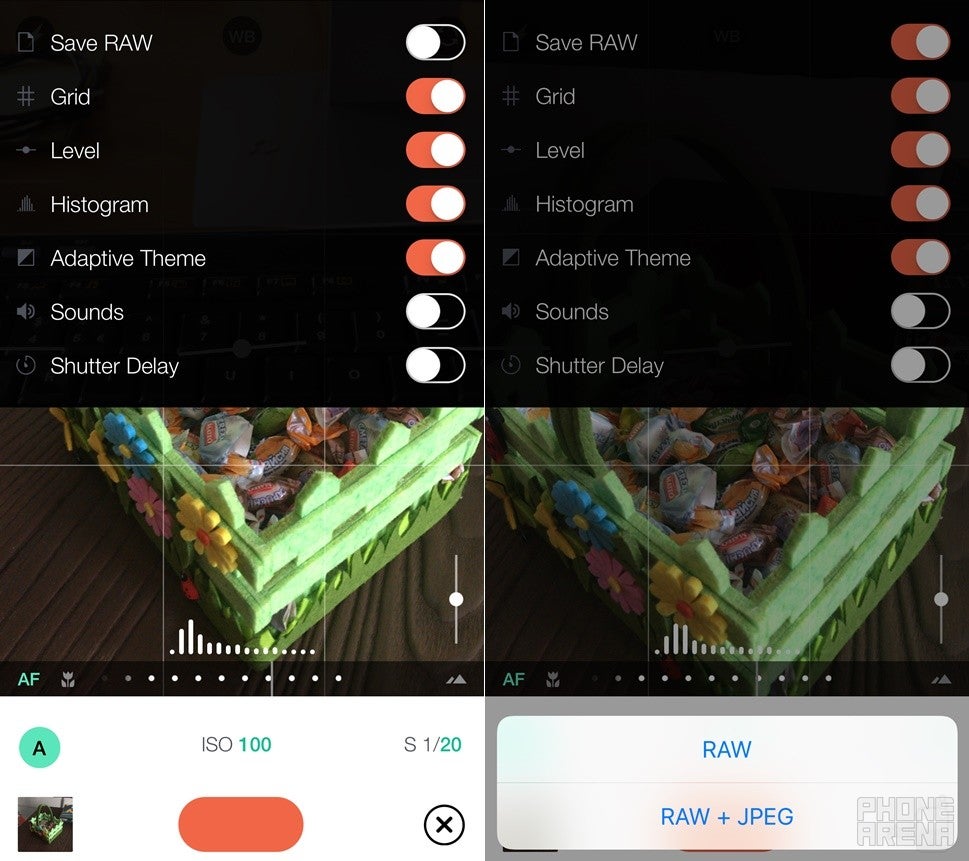
So, let us say that the Manual camera app tickles your fancy. After you get it from the App Store, fire it up and head straight to its settings menu by hitting the cog on the right part of the bottom bar. In the menu that appears, enable the first option, "Save RAW". A popup query will immediately pop up from the bottom, allowing you to select whether to shoot RAW only or RAW + JPEG, which is advisable if you intend to quickly share the pictures with your pals. After you've enabled Manual's RAW capturing functionality, unleash your inner photographer and snap a couple of pics.
Manual is among the more intuitive third-party apps that shoot RAW
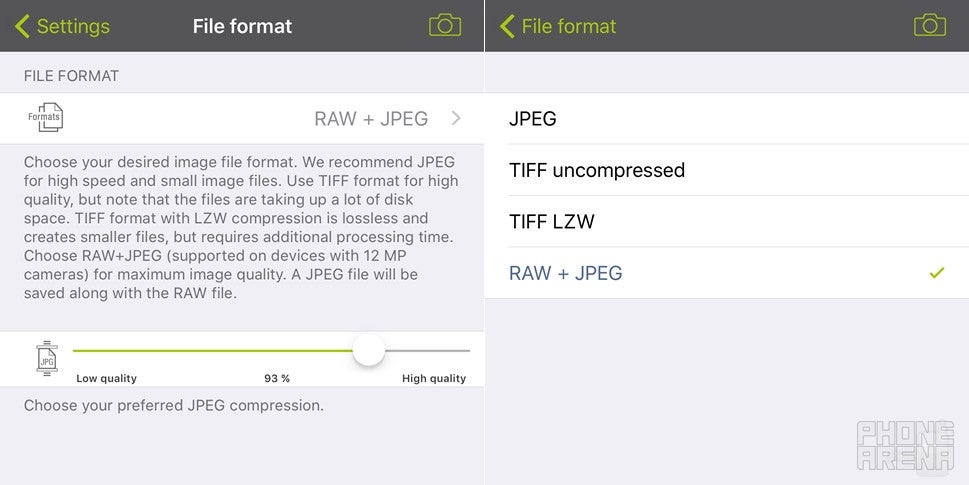
Another noteworthy camera app that supports RAW image capture on compatible iPhones is ProCamera. It's a bit more feature-rich than Manual, but the sheer multitude of settings it features could easily be off-putting to certain users that don't want to tinker with shutter speed, white balance, and exposure compensations every time they intenд to shoot a few pics. In order to shoot RAW images with that one, tap the hamburger menu on the bottom bar, then open the app's settings page, and head to the "File Format" menu — you will be able to choose between a few file combinations. Naturally, the option that floats our shutterbug boat is "RAW + JPEG", so go ahead and select that one.
ProCamera's settings page allows you to choose your preferred capture format of choice
Can I edit RAW photos on my iPhone or iPad?
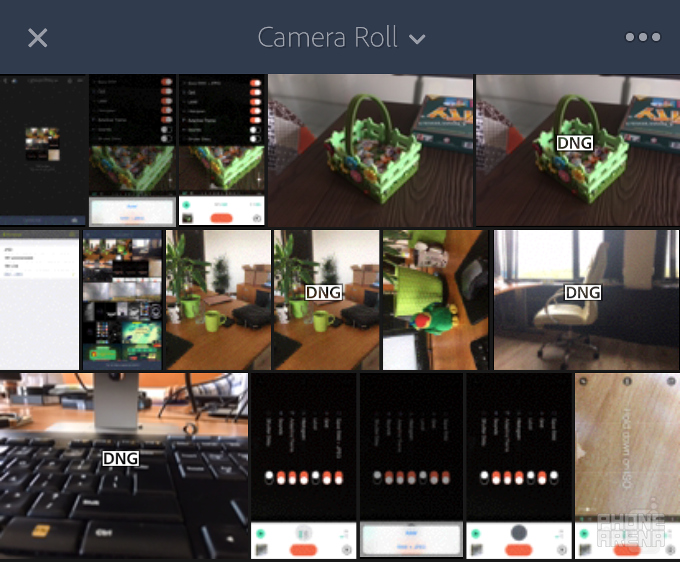
Yes, you can. The easiest way to do so is by firing up iOS' built-in Photos app and making use of its Edit feature. Generally, it will do the job, but we'd suggest a more capable third-party app - Adobe Photoshop Lightroom, available for both the iPhone and the iPad. It's a bit superior in terms of what it offers from a feature standpoint. The level of control you have over each RAW file you process is simply superior to what Apple's Photos has in store.
Lightroom lets you edit DNG files
Snapseed, Google's excellent image-editing app, also supports RAW image editing. It allows you to adjust a host of aspects of the image you're processing, like tint, shadows/highlights, exposure, color temperature, and other settings. In case you've grown accustomed to Snapseed, then make sure to pick this one and use it to fine-tune your DNG files.
In the end of the day, should I shoot RAW from now on?
Of course not. If you don't feel comfortable with post-processing an image on your own, then no, shooting in RAW will likely deteriorate your photography game big time. Otherwise, if tinkering with lossless image files is your second nature, then iOS 10's newly-scored RAW image support is likely a huge novel feature for you.
Peter, an experienced tech enthusiast at PhoneArena, is captivated by all things mobile. His impartial reviews and proficiency in Android systems offer readers valuable insights. Off-duty, he delves into the latest cryptocurrency trends and enjoys sci-fi and video games.
A discussion is a place, where people can voice their opinion, no matter if it
is positive, neutral or negative. However, when posting, one must stay true to the topic, and not just share some
random thoughts, which are not directly related to the matter.
Things that are NOT allowed:
Off-topic talk - you must stick to the subject of discussion
Offensive, hate speech - if you want to say something, say it politely
Spam/Advertisements - these posts are deleted
Multiple accounts - one person can have only one account
Impersonations and offensive nicknames - these accounts get banned
To help keep our community safe and free from spam, we apply temporary limits to newly created accounts:
New accounts created within the last 24 hours may experience restrictions on how frequently they can
post or comment.
These limits are in place as a precaution and will automatically lift.
Moderation is done by humans. We try to be as objective as possible and moderate with zero bias. If you think a
post should be moderated - please, report it.
Have a question about the rules or why you have been moderated/limited/banned? Please,
contact us.


Things that are NOT allowed:
To help keep our community safe and free from spam, we apply temporary limits to newly created accounts: