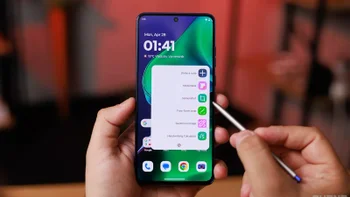
How to root the Verizon Samsung Galaxy Note II

MrRobinson and Beanstown101 - these are the folks you have to be thankful to and buy a beer for their hard work on rooting the Verizon Samsung Galaxy Note II already.
As usual, their method was pulled together over at XDA-Devs in a single thread by senior member Droidstyle, and is fairly straightforward, as Verizon Android rooting goes.
Initial complaints that the signal icon is not visible after applying this, or the multiwindow mode acting up seem to have been fixed with the latest version, so follow the steps below if you want to root the 5.5" giant at your own risk, then remove bloatware, introduce tethering and other goodies. There are even the steps to roll back the rooting if you need to for warranty purposes and such:
Step 1: Download and install these files to your pc:
Odin- http://forum.xda-developers.com/atta...2&d=1340993443
Samsung driver- http://tinyw.in/Fdoz(dont worry about the link saying GSIII, it still works fine on the GN2.)
Step 2: Download one of the rooted stock odin images below to your pc:
Root66_VZW_stock_VRLAJB 4.1.1- http://d-h.st/IKs(must be unzipped to extract the .tar file. also do not worry about the md5 extension)
mirror- http://www.androidfilehost.com/?fid=9390210501348163619
Step 3: Power device off, hold the volume down/home/power keys until you see a yellow triangle, then press the volume up key to access "odin or download mode".
Step 4: Open odin and connect the oem usb cable from pc to device. Adb driver should automatically install(atleast it did for me on windows 7). There should be a "comport number" in upper left hand corner of odin indicating communication between the pc & device.
Step 5: Uncheck Auto reboot
Step 6: Click on the PDA function of odin. Select the rooted system.img you downloaded in step 2, then select start. This operation should take less than 8 minutes before odin will say pass/reset.
Step 7: Pull and reinstall battery.
Step 8: Press and hold the volume up/home/power buttons until you see a green android. You should boot into ASR(Android Stock Recovery)
Step 9: Wipe cache.(If you experience errors, boot back into ASR and wipe data.)
Step 10 reboot!
**This will not wipe data/factory reset unless you chose to do so after you flash the new image**
(It is recommended to wipe data in ASR if you experience problems after the install)
**This is a fully working root method, everything works. All issues reported early in the thread have been fixed**
--------------------
How to unroot 4.1.1 JellyBean
- There is no Official stock image released as of 12/3/12. However the root image MrRobinson created, for all intents and purposes, is stock.
- There are only two additional files added, /system/xbin/su and /system/app/Superuser.apk.
- If you remove those two files with a app such as filemanager you are back to unrooted stock.
source: XDA-Devs
Follow us on Google News


Things that are NOT allowed:
To help keep our community safe and free from spam, we apply temporary limits to newly created accounts: