Everyone knows there's plenty of quick shortcuts to performing a variety of actions on an iPhone, just as there is on PCs and Macs.
Many of them are simple "Gestures," or pre-programmed finger movements you can do on the screen: primarily a series of taps, flicks, swipes, drags, pinches, touch-and-holds—even shaking your iPhone. Not to mention the developers playing around with additional face recognition-based features, which we may be seeing in the future.
iPhone 13: price, release date, features, and specs
In this mini-tutorial, we want to show you the best ways to instantly undo or redo an action. Because as it turns out, there's more than one.
1. Shake, shake, shake!
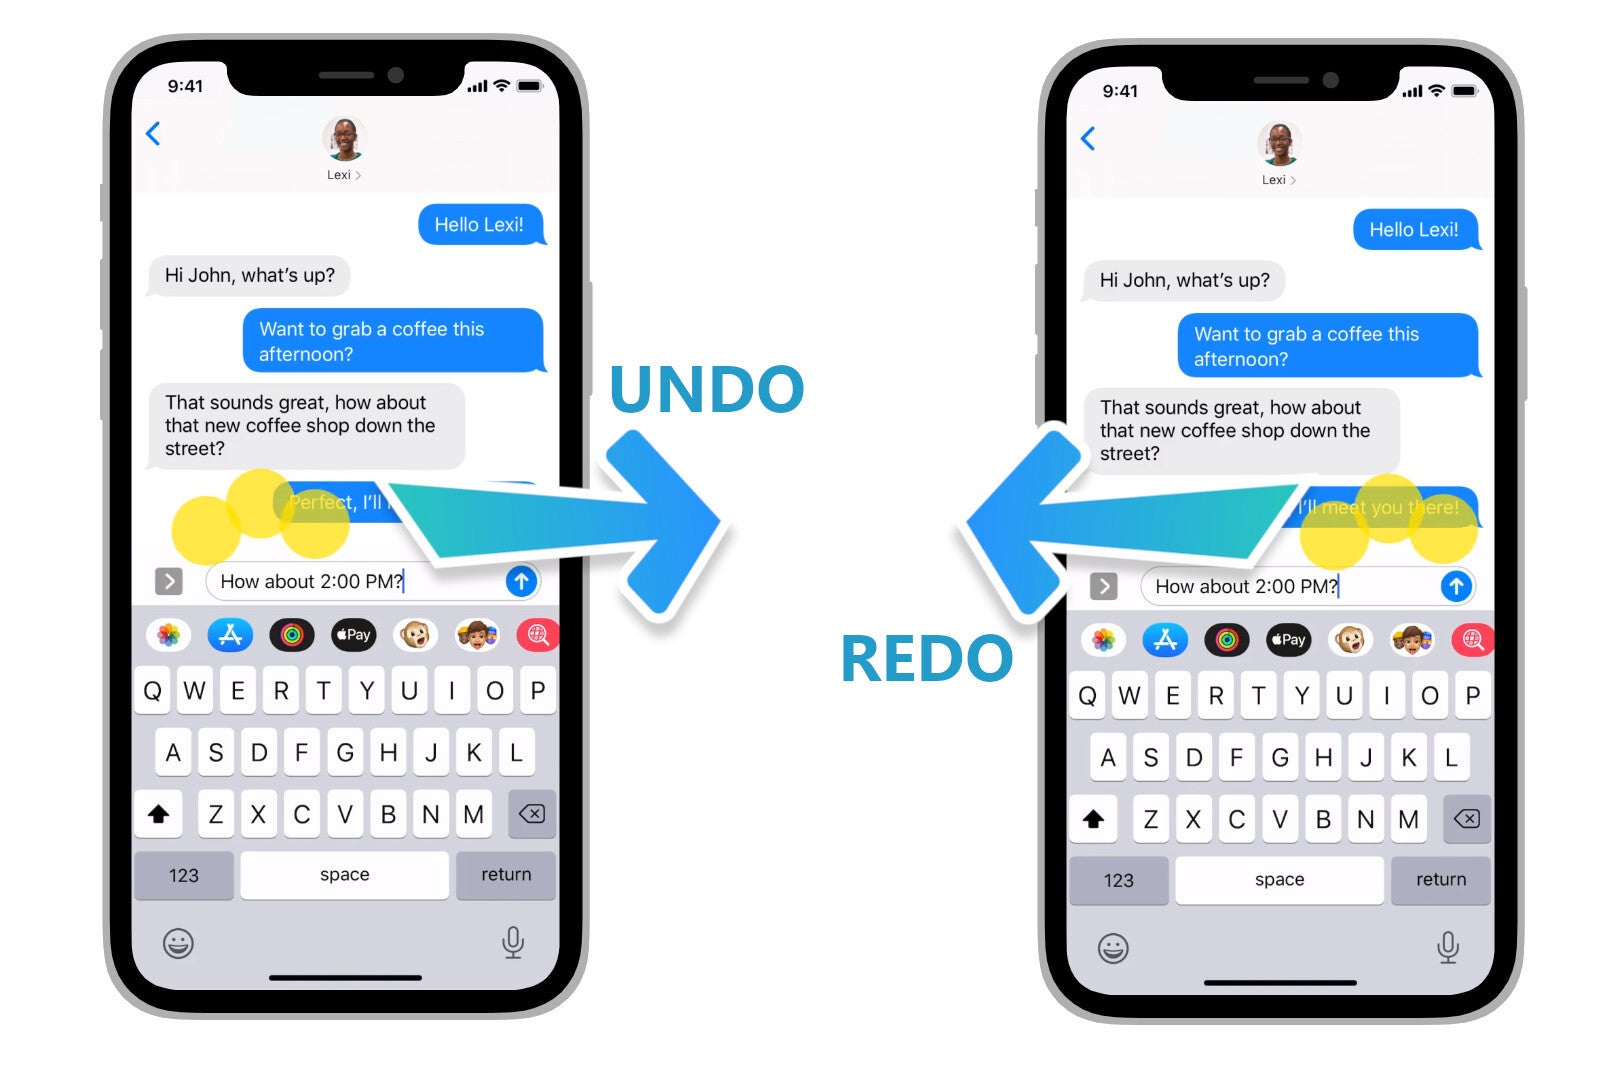
The first and probably most well-known way to undo typing on both iPhones and iPads is to simply shake your device. Left, right, up, down, it doesn't matter—just shake it like you just don't care (we apologize). Once the device registers the shake gesture, it will show an on-screen confirmation asking whether you want to go ahead and undo your typing.
If you've already undone an action you'd like to redo, you simply repeat the shake gesture, and this time you'll receive an "undo or redo" prompt on your screen.
For the record, the shake gesture only applies to typing actions. In other words, it won't work to undo an accidentally uninstalled app, or unsend an inopportunely sent message.
Recommended For You
However, Apple has also given third-party developers the ability to use the shake gesture to prompt different actions in different apps. This means that if you're typing text into a third-party app, it isn't always guaranteed to trigger the "undo" prompt. Rather, the developer may have programmed it to perform a different action in that particular software.
Personally, I find that trigger to be rather inconvenient at times. If you're someone like me who tends to use their hands a lot while they're talking, or gestures wildly, the shake gesture may prove to be more of a nuisance than anything else.
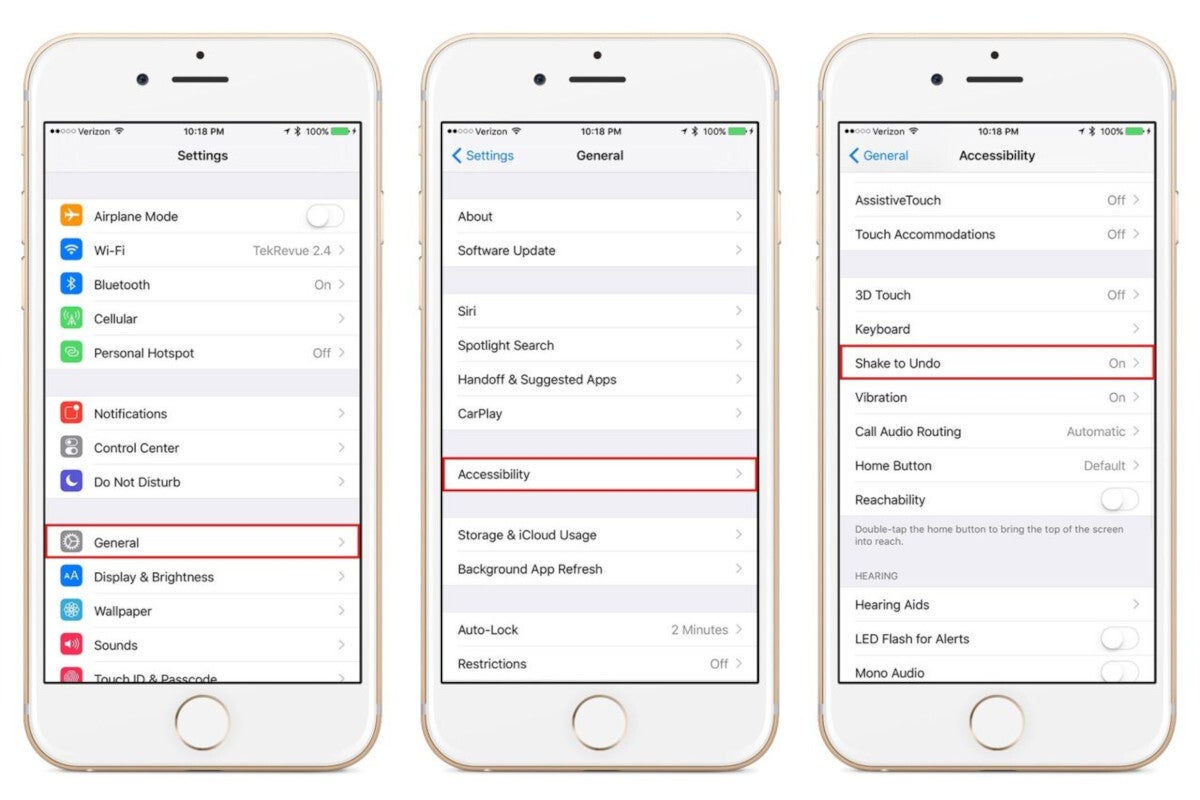
If that's the case and you'd like to turn off the shake-activated "undo" gesture, you need to go to the accessibility settings in Settings > General > Accessibility. There, you can control whether or not your iPhone registers future "shakes."
Image credit - Tech Junkie
2. Three-Finger Swipe Gesture
Ever since iOS 13 was released in 2019, there's a brand new—and arguably much more convenient—way to perform the undo action. As long as you've got an up-to-date iPhone 6s or later, you can go ahead and try out this feature.
The new trigger is a three-finger swipe movement which will instantly trigger the action, without any confirmation prompts this time around. To undo on iOS 13 or later, you simply need to swipe to the right using three fingers.
The fingers don't have to be arranged a certain way or facing a certain direction. As long as the iPhone registers three of them anywhere on the screen, moving together in a rightward motion, it will remove the last text-related action you did (which includes copying or pasting text, as well as typing).
Much better than looking like a fool shaking your phone around (or accidentally triggering the prompt) all the time, ain't it? These two are the only "undo" gestures available so far on iOS 14.
Want to Create Your Own Gestures?
You may already know that Apple lets you customize your own gestures as well, using the AssistiveTouch feature available on all iPhones with iOS 10 or later. This can be done by going to Settings > Accessibility > Touch > AssistiveTouch and turning it on. From there, you're able to customize a slew of items, such as:
Top Level Menu: Add or remove from the icons in the menu, with a maximum of 8 icons. Tapping an icon lets you change the action it triggers.
Single-Tap / Double-Tap / Long Press / 3D Touch: All these can be customized to trigger different actions (3D Touch is available only on the iPhone 6s through iPhone XS Max)
Create New Gesture: You can create your own custom gestures here.
Idle Opacity: This lets you change the visibility of the menu button when idle.
Confirm with AssistiveTouch: This lets you confirm payments with Face ID by using a custom gesture, rather than the side button double-click.
Six-month unlimited plan is now 57% off
$90
$210
$120 off (57%)
Mint Mobile is now allowing you to get whichever plan you like for either three, six, or 12 months for just $15/mo. If you go for the six-month unlimited service, for instance, you'll now have to pay just $90 upfront instead of $210.
A discussion is a place, where people can voice their opinion, no matter if it
is positive, neutral or negative. However, when posting, one must stay true to the topic, and not just share some
random thoughts, which are not directly related to the matter.
Things that are NOT allowed:
Off-topic talk - you must stick to the subject of discussion
Offensive, hate speech - if you want to say something, say it politely
Spam/Advertisements - these posts are deleted
Multiple accounts - one person can have only one account
Impersonations and offensive nicknames - these accounts get banned
To help keep our community safe and free from spam, we apply temporary limits to newly created accounts:
New accounts created within the last 24 hours may experience restrictions on how frequently they can
post or comment.
These limits are in place as a precaution and will automatically lift.
Moderation is done by humans. We try to be as objective as possible and moderate with zero bias. If you think a
post should be moderated - please, report it.
Have a question about the rules or why you have been moderated/limited/banned? Please,
contact us.


Things that are NOT allowed:
To help keep our community safe and free from spam, we apply temporary limits to newly created accounts: