Everyone can snap an iPhone photo but not everyone knows how to make the most out of the iPhone camera without having to become a “pro photographer”.
How many times have you handed your iPhone to somebody with the hope they’ll take an Instagram-ready pic of you, just to end up with a crooked photo, because this person… hates you!
OK, maybe the photographer doesn’t hate you, but you’ll absolutely love some of the iPhone camera tips I’ve gathered here. They should help you:
Take straight photos
Take more appealing selfies
Be less distracted when taking photos
Get a more dramatic picture every single time (no editing needed)
The best part? These features take literally seconds to set up (or learn), and once you start using them, you’ll never look back. And they aren’t just some tips and tricks I’ve picked so I can put together this article (what am I, ChatGPT?!). I use every single one of them on iPhone 13 mini and the iPhone 15 Pro Max I have for testing.
Now, let’s make you a better iPhone photographer…
10 “secret” iPhone camera tricks and settings take seconds to set up, and will forever change the way you take photos with your iPhone
Unlike humans, photos of humans have only one orientation - straight! Using the Level in your iPhone camera should be an amendment in the constitution.
Recommended For You
Turn on your iPhone camera “Level” and never take a crooked photo again
First on my super useful iPhone camera settings list has got to be the “Level” feature you can turn on by going to Settings > Camera > Level.
As I said in the intro, literally everyone seems to take crooked photos, which can often ruin the moment you’re trying to capture. The solution is no rocket science…
The iPhone’s “Level” feature is a white line that appears in the middle of your camera viewfinder, which goes yellow once you’ve nailed the perfectly straight angle of your photo. Even better, your iPhone vibrates when you’ve nailed the composition. One tip for Apple would be to make this vibration stronger.
iPhone’s mirrored selfies will trick your brain into liking your selfies way more
Mirrored selfies can look better because your brain thinks so!
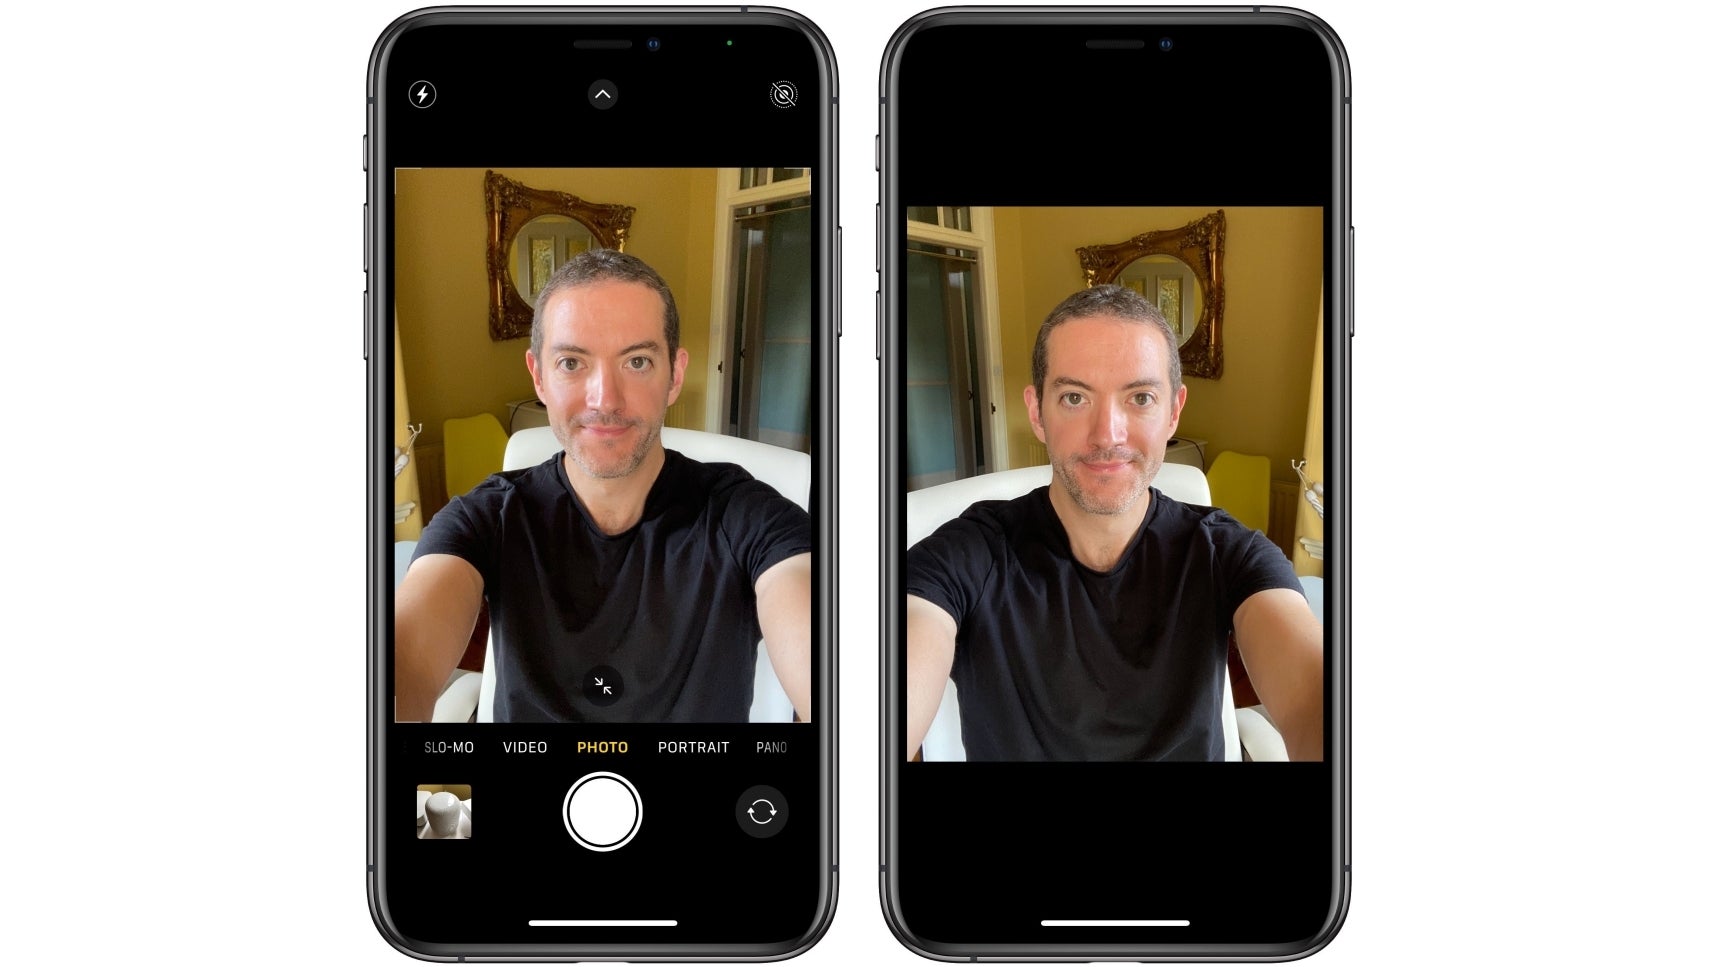
For the next one, you’ll go to Settings > Camera > Mirror Front Camera.
And the reason you might want to do that is because humans are used to seeing and liking the way they appear in the mirror, which is actually the opposite of how other people see us. Hence why many people tend to find mirrored selfies more flattering.
I’m sure almost everyone, at one point, has gone to the iPhone’s photo editor and flipped their selfie around to see if it looks better. Well, if you like your “mirrored” selfies better, now you don’t have to do this every single time. Or perhaps this feature is turned on, and you want to turn it off, because you want to appear more “authentic” in selfies.
Anyway, that’s more than enough time spent on talking about vanity. Let’s move on…
Your iPhone tries to distract you when you’re taking a photo - here’s how to change that
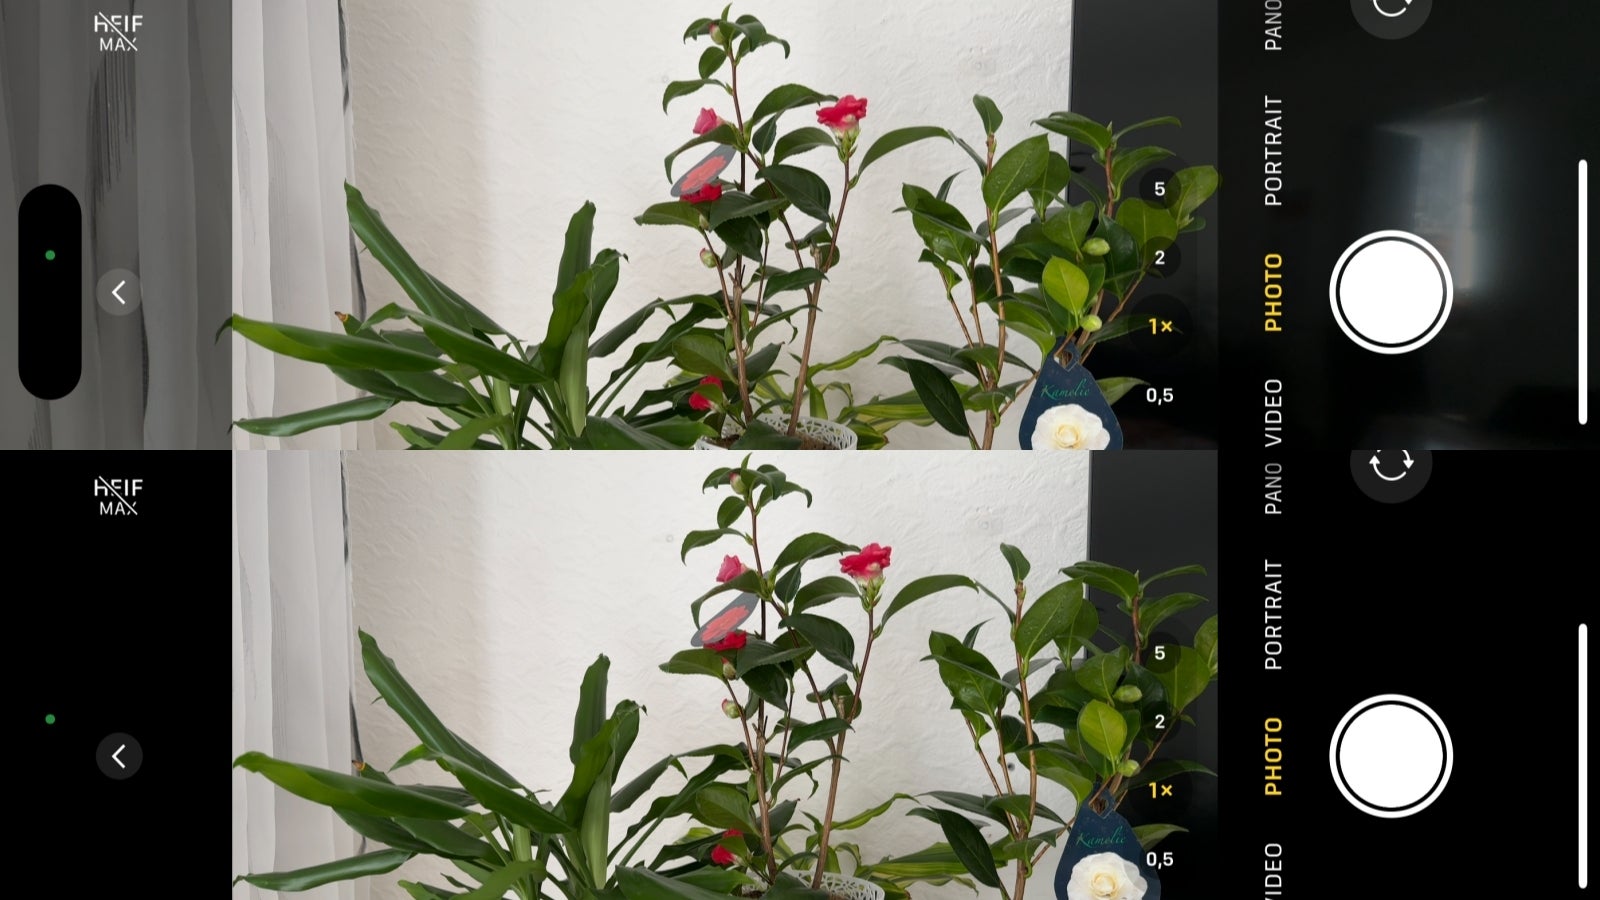
View Outside the Frame ON (top) vs View Outside the Frame OFF.
For this one, you’ll need to go to Settings > Camera > View Outside the Frame.
New iPhones ship with the “View Outside the Frame” feature turned on for two reasons: For one, they have zoom and ultra-wide-angle cameras, and Apple wants to remind you they are available to use by displaying a wider frame of view under what is essentially your camera viewfinder. And two - I suppose this makes the experience of using the camera feel more immersive.
However, I very quickly realized how distracting seeing outside the frame I’m trying to capture can be - especially when it’s a busy shot, or one with movement. Not to mention, the Dynamic Island shows up when this camera setting is turned on, and I don’t think anyone needs to see it.
Having the left and right side of my viewfinder blacked out makes for a way easier, less distracting photo taking experience, and I’m sure most of you will find this to be true.
iPhone can alter the size of your face and the shape of what you're taking a photo of - unless you change this setting
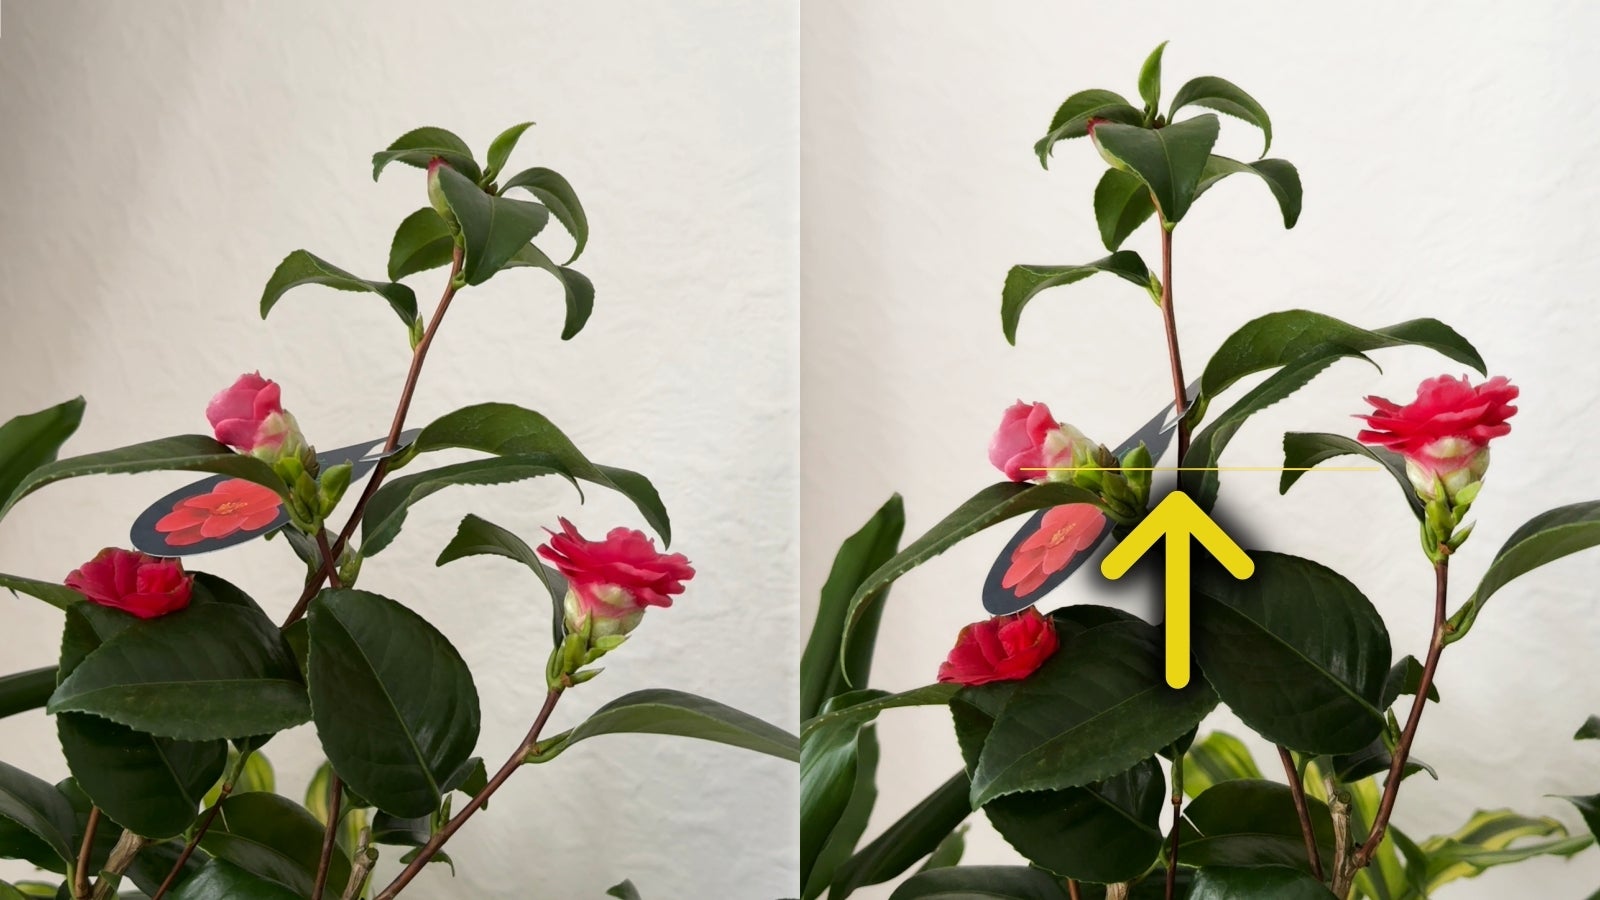
1x (24 mm) vs 1.5x (35mm) - setting the default focal length on iPhone to 35mm will give you more realistic, less distorted photos, which better represent the world the way you see it through your eyes.
Apple introduced variable focal lengths with no quality loss with the iPhone 15, and this feature has been a bigger game-changer than expected.
If I were you, I’d immediately change my iPhone’s primary camera default focal length from 1x to 1.5x Simply go to Settings > Camera > Main Camera > Set default lens to 35mm (1.5x). Alternatively, you can always switch back/forth between the two in the camera app.
See, when taking photos with my iPhone 13 mini, I’d zoom in a little bit, because this way I don’t have to get too close to my subject, which makes my photo look more natural. Now, this feature is something you can turn on in your iPhone 15 camera settings, which is awesome.
As you can see in the photo sample above, stepping back and zooming to 35mm (1.5x) instead of standing physically closer to your subject while using the 1x (24mm) focal length, results in a more natural photo with better focus, and less distortion.
The second image (which I’ve cropped from the first one) shows how the lines in the floor as well as the pot are supposed to appear versus the distorted look you get with the 24mm (1x) shot. I haven’t changed the angle when taking the photo (or cropping it), so the differences in the perception are 100% real.
Shooting in 35mm (1.5x) instead of 24mm (1x) will give you more accurate photos in general but where it comes in clutch is when taking photos of people. It’s no coincidence many pro cameras come with a 35mm lens as default - this focal length is closer to what we see with our eyes, making people’s faces appear the way they should. So, let’s leave 24mm in history please.
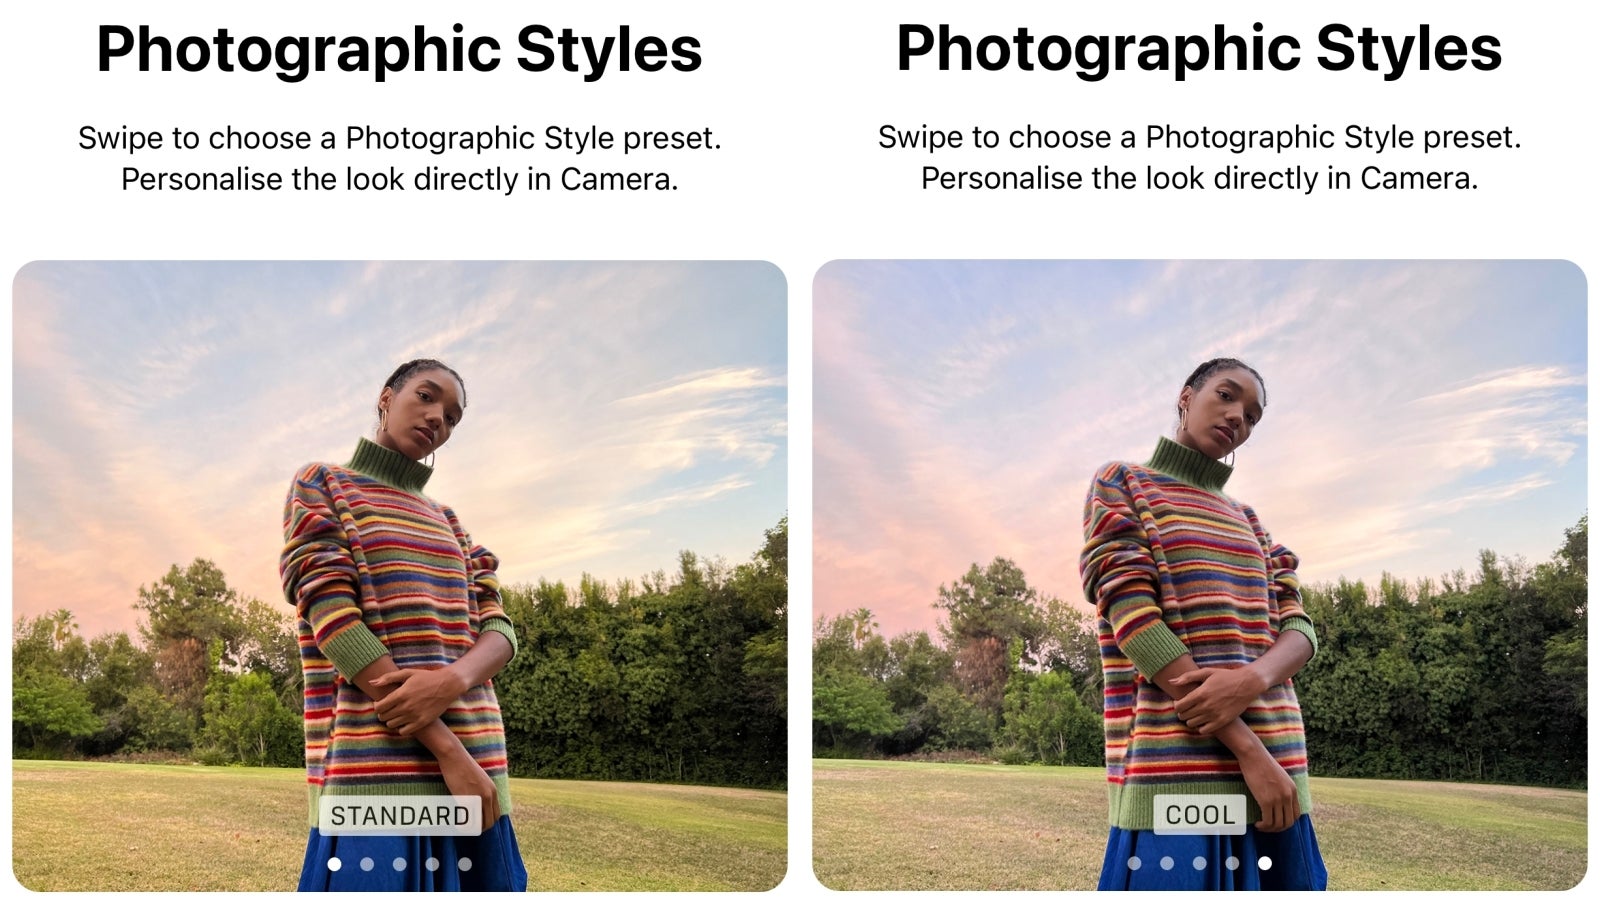
You should use Photographic Styles in your iPhone camera - they are more than just a filter
Not a filter!
Last but not least, the iPhone has another underrated feature, which has been around for a while now - Photographic Styles.
The main reason I find Photographic Styles useful is because iPhone can sometimes take a photo with little contrast, which lifts up the shadows and washes everything out. Adding more contrast through Photographic Styles isn’t better only because you don’t have to edit the photo, but because this “edit” is baked into the actual image properties, and isn’t a filter (which is why it’s higher quality).
Something else many people don’t know about Photographic Styles is that they can be adjusted to your liking. For example, the Rich contrast style doesn’t need to be super contrasty, or the Warm one doesn’t need to be super warm. By dragging the sliders to adjust the styles, you can get a “Rich warm” style that’s just a tad more contrasty and warmer than the iPhone’s Normal style - without overdoing it.
Note that Photographic Styles settings are preserved, which is great if you like a particular style and want it to be on by default every time you fire up the camera. However, certain contrast and saturation levels don’t work for every shot, which is why you might want to double check if you’re in a Style that’s fitting for your photo. For example, more contrast can make night photos too dark.
Apple keeps refusing to give iPhone a proper “pro mode” but your iPhone camera is way more flexible than you think
While I’m sure you’ll know some of the tricks and features listed here, I’m also pretty sure some people will learn at least one new iPhone camera trick they didn’t know before, and if that’s the case, then I’ve done my job.
Actually, I have at least five more iPhone camera tips I can share with you but this article is already way too long, so you’ll have to stay tuned for “Part 2” when you’ll learn even more “niche” and arguably even more useful iPhone camera tricks like:
How to edit all of your photos/videos in (literally) one click - yes, it’s possible!
How to take more realistic photos/videos
How to take Portrait mode photos with Night mode on, and more…
Six-month unlimited plan is now 57% off
$90
$210
$120 off (57%)
Mint Mobile is now allowing you to get whichever plan you like for either three, six, or 12 months for just $15/mo. If you go for the six-month unlimited service, for instance, you'll now have to pay just $90 upfront instead of $210.
Martin, a former tech journalist at PhoneArena, brings a unique blend of humor and insight to his work. His fascination with smartphones began with a Galaxy Young and evolved through a series of trades and upgrades, making him a self-proclaimed smartphone nerd. Martin's content often combines current analysis of market trends with historical references and future predictions. Whether it's a deep dive into technical issues or a first-person commentary on industry events, Martin's articles are designed to inform and engage. His critical perspective is driven by genuine curiosity and a desire to keep readers informed, not by any corporate sponsorship.
COMMENTS (0)
COMMENTS (0)
All comments need to comply with our
Community Guidelines
PhoneArena Community Rules
A discussion is a place, where people can voice their opinion, no matter if it
is positive, neutral or negative. However, when posting, one must stay true to the topic, and not just share some
random thoughts, which are not directly related to the matter.
Things that are NOT allowed:
Off-topic talk - you must stick to the subject of discussion
Offensive, hate speech - if you want to say something, say it politely
Spam/Advertisements - these posts are deleted
Multiple accounts - one person can have only one account
Impersonations and offensive nicknames - these accounts get banned
To help keep our community safe and free from spam, we apply temporary limits to newly created accounts:
New accounts created within the last 24 hours may experience restrictions on how frequently they can
post or comment.
These limits are in place as a precaution and will automatically lift.
Moderation is done by humans. We try to be as objective as possible and moderate with zero bias. If you think a
post should be moderated - please, report it.
Have a question about the rules or why you have been moderated/limited/banned? Please,
contact us.


Things that are NOT allowed:
To help keep our community safe and free from spam, we apply temporary limits to newly created accounts: