How to take better looking foodie pics with your smartphone
This article may contain personal views and opinion from the author.
If you follow me on social media, you probably notice this theme of me sharing a ton of foodie pictures quite frequently. I'm not afraid to say I have a huge appetite, especially for dishes that arouse the nasal passages, but when it comes to sharing what I'm about to feast on, I've managed to iron down the process that's required to take some drool inducing photos using my smartphone. Seriously, some of the shots I've taken myself caused me to salivate looking back at them – then again, the way the shots were composed initially really helped to capture the essence of these foodie pics.
Shoot in natural lighting
Artificial lighting can cause colors to appear unnatural.
In addition to casting soft lighting, natural light also helps too with color reproduction. Colors will appear more natural in tone, realistic to the real-world composition of what you're shooting. Of course, artificial lighting can throw off the white balance, causing it to cast either warmer color tones with incandescent light – while certain florescent lights can end up producing a cooler color reproduction.
Great examples of leveraging 'natural' light. Most of them are taken next to a window drawing in natural light.
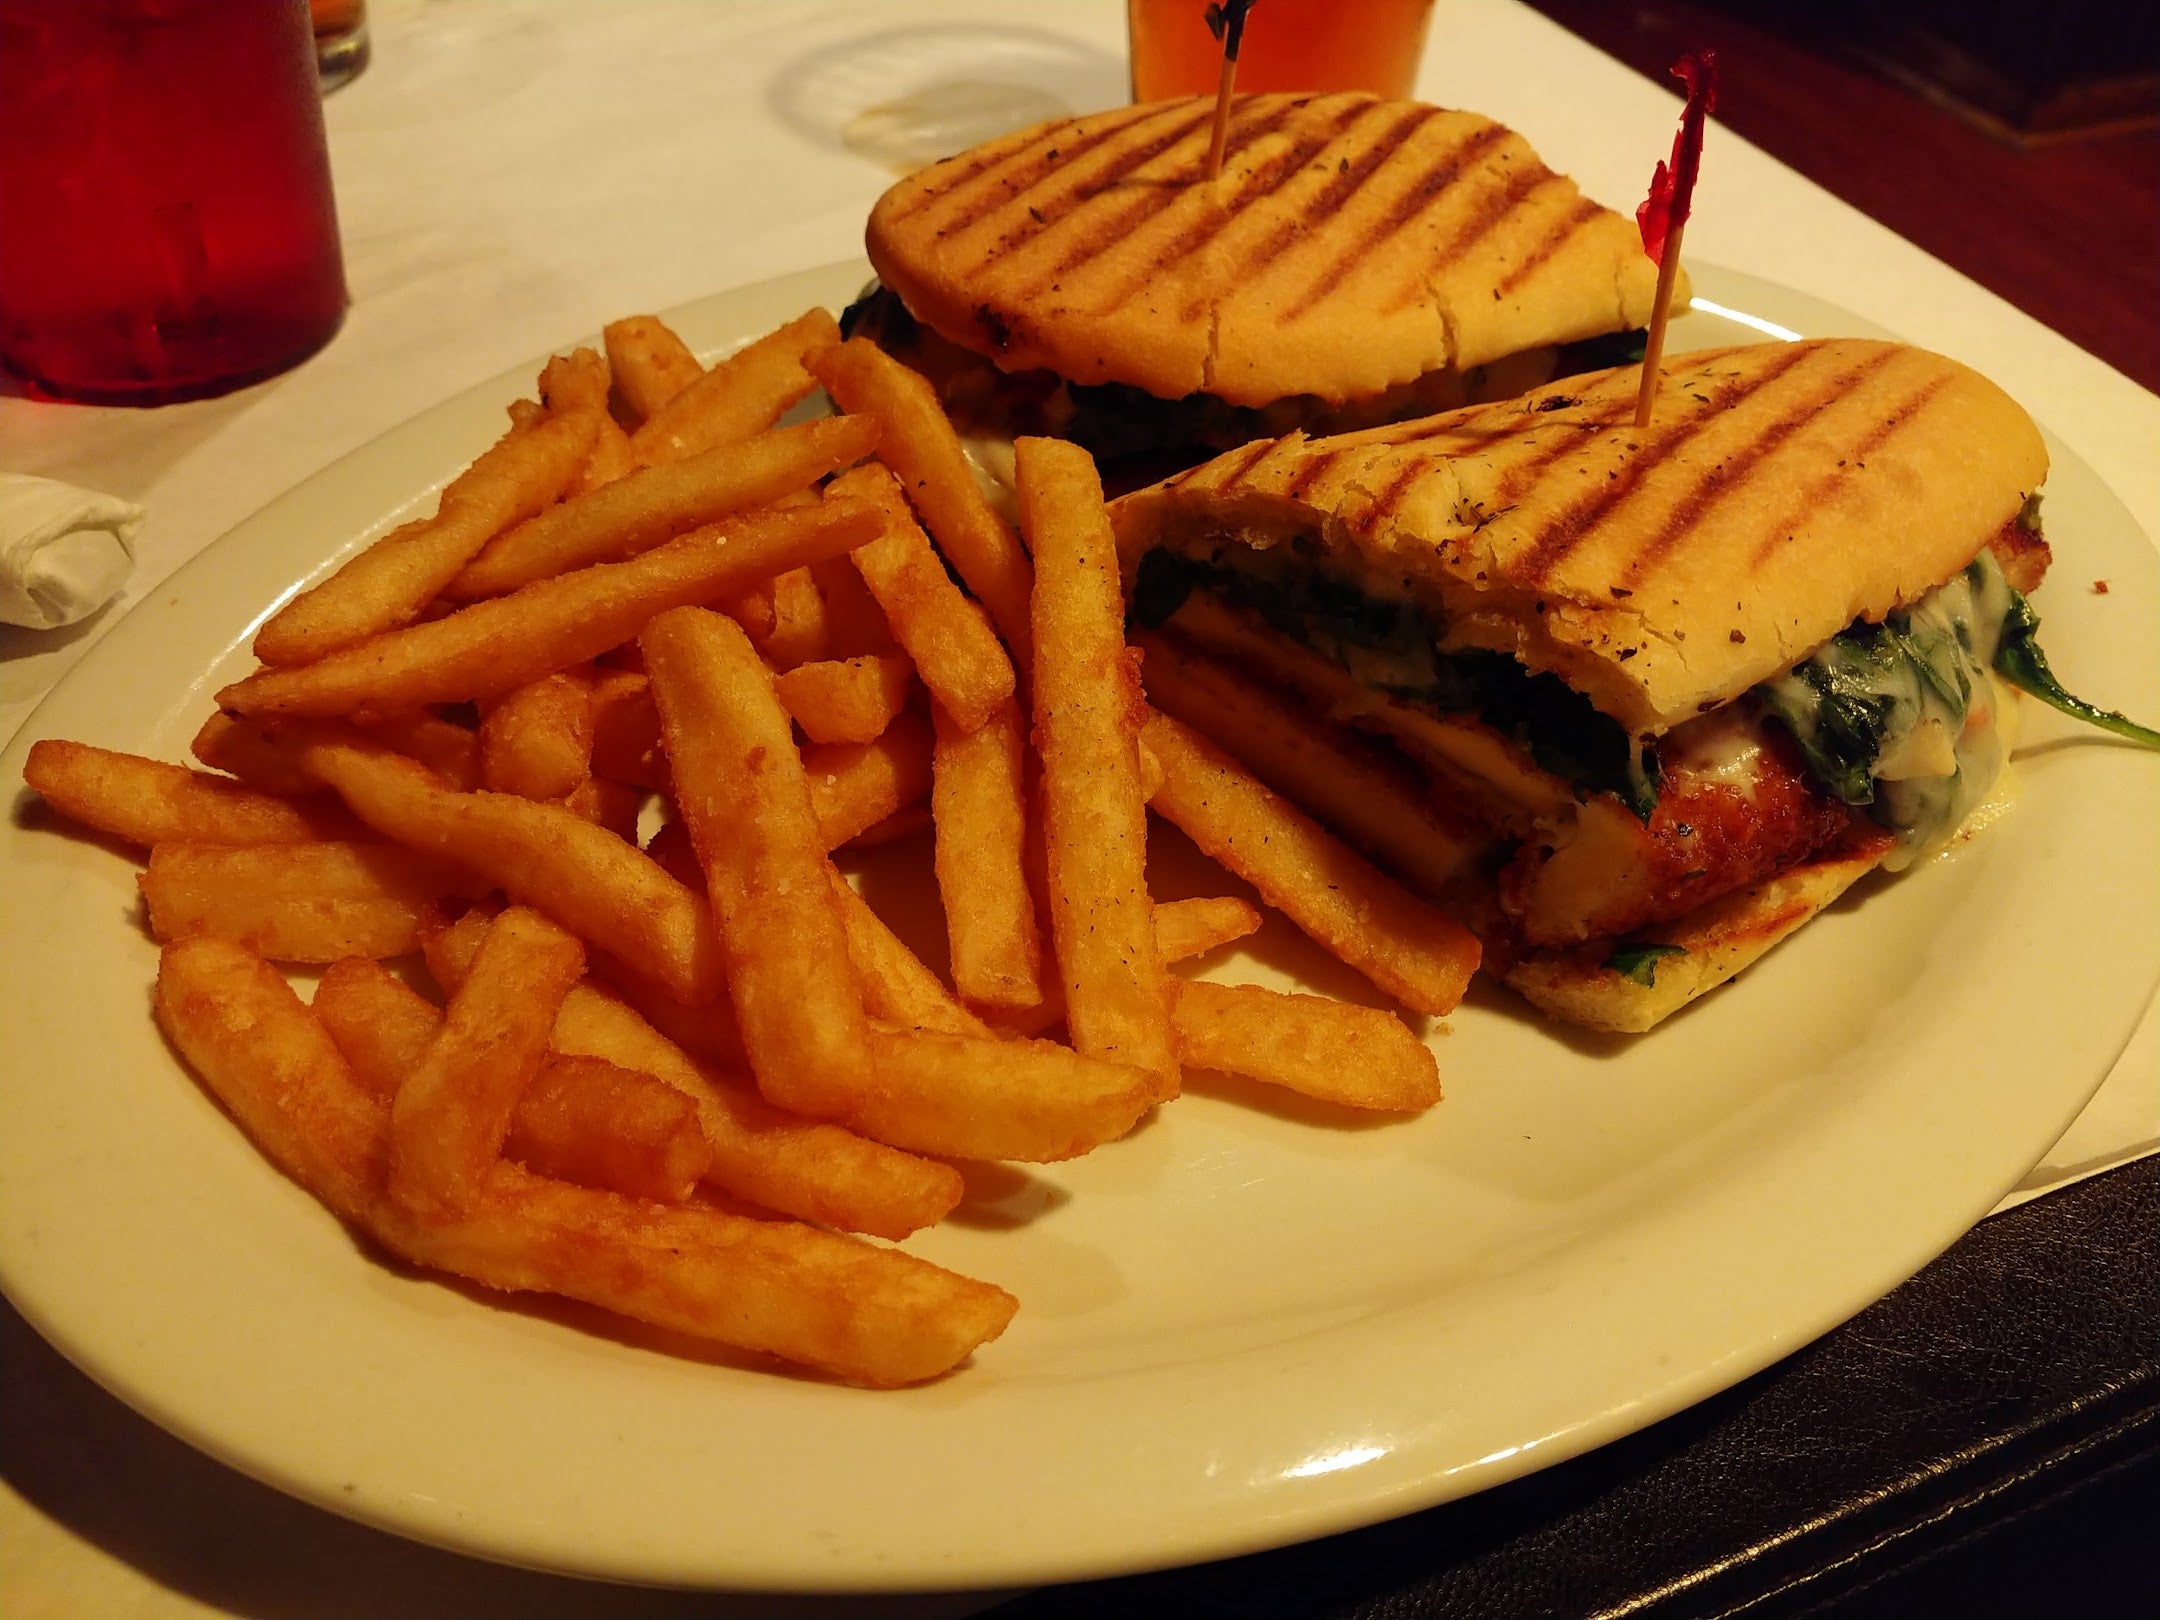
If there's optical zoom, use it
When you want to fill your frame with what you're about to eat using your smartphone's camera, it generally requires you to hover very closely over it – almost to the point of finding yourself blocking the light source. Now, depending on how the light is hitting the dish, moving closer can cause your phone's shadow to interfere with the overall composition. Trust me, you don't want to see shadowed areas in your photo because you're moving closer to fill the frame. It's distracting and takes away from the focus of the dish.
When moving closer to take a shot, there's a higher chance of introducing unwanted, distracting shadows.
That's where optical zoom comes into play, if your phone offers it of course. Having this allows you to still stay at a decent distance away from the dish without introducing nasty shadows – while also retaining the same level of details capture. It really helps if you have this available with your smartphone's camera. However, as we all know, this feature is generally reserved for premium phones. If you're one of the many that doesn't have it, you can still utilize a digital zoom to compose the shot – just don't overdo it though!
Notice how using an optical zoom in the second shot eliminates the shadows from creeping into the shot.
Use specific "food" modes with your camera app
On some phones and camera apps, you might find a dedicated mode for shooting food specifically. Don't be afraid to use them, just because they can absolutely sprinkle in some additional "pop" to make your foodie pics look even more amazing than they are in real life.
Some phones offer dedicated "food" modes.
Take for example the Samsung Galaxy S8's food mode, which not only applies a radial blur to the shot, but it also offers you the ability to adjust the color temperature of the shot. A warmer color temperature can do nicely for comfort foods, while a cooler temperature can complement a frozen dessert. Add to that, the radial blur helps to guide you, but just make sure it's centered right over your dish.
In other food modes, it'll even automatically adjust parameters like the contrast, exposure, and sharpness, in order to give foodie pics that much-needed pop.
Examples of using the 'food' shooting mode. In the case of Samsung's Galaxy line, it produces a radial blur combined with slightly saturated colors.
Contrast the scene properly
Capturing expressive foodie shots helps to garner more attention, versus something bland looking. In order to achieve this, you'll need to keep in mind how important it is to maintain a certain level of contrast. Therefore, you'll need to look at your composition and figure out if it has enough contrast to make a perfect shot.
As for the actual contrast of the photo, it'll most likely be determined by the phone, seeing that few camera apps allow users to manually adjust parameters like contrast. Still, you can use photo editing apps to adjust them accordingly to your liking.
You'll need to look at the scene to achieve the best contrast. These examples show how lighting plays a role in it, specifically its uneven distribution on the dishes.
The single hand portrait shot
You might be wondering what this one is, but it's probably something you've seen countless times already. The single hand portrait shot is basically showing off your dish using one hand to hold it in place, while the other is used to hold your smartphone and to take the shot. It's simple and straightforward for the most part, but you'll have to bear in mind that this method doesn't necessarily work with all dishes. If it's a simple dessert, like an ice cream cone, you can use this single hand portrait shot to capture it in all of its glory – just because it's uniform, whereby the textures remain consistent at every angle.
In contrast, if you're staring at a dish that's filled with a variety of things on it, the portrait shot isn't really the most ideal way of capturing its beauty. For one, you'll need to figure out which side would be best to shoot – disregarding some of the other things on the plate at the same time. So yeah, this type of shot is best reserved for compositions that would highlight profile angles more than anything else – or as I'd like to call them, uniform one-dimensional foodie pics.
Take your dish, place it in your hand, and then snap the shot to achieve these single hand portrait foodie pics.
Low-profile shots add depth
Expanding upon the single hand portrait foodie shot, don't be afraid to experiment with other low-profile shots, simply for the fact that they add a layer of depth. Specifically, if you're to place your dish on a table, angle your smartphone a little bit so that so that you cover most of the plate in your shot, but still capture some of the background in the far distance.
Getting closer to do this kind of low-profile shot yields some creamy bokeh to the background, which emphasizes the focus more on the plate. And if you have a phone with some kind of wide aperture mode, much like what you get in some of Huawei's phones, you'll be able to blow out more of the background – while still retaining all of the sharp focus on the dish.
You'll want to take these shots by angling your phone slightly to keep the dish in the center of the frame, while still capturing some of the background.
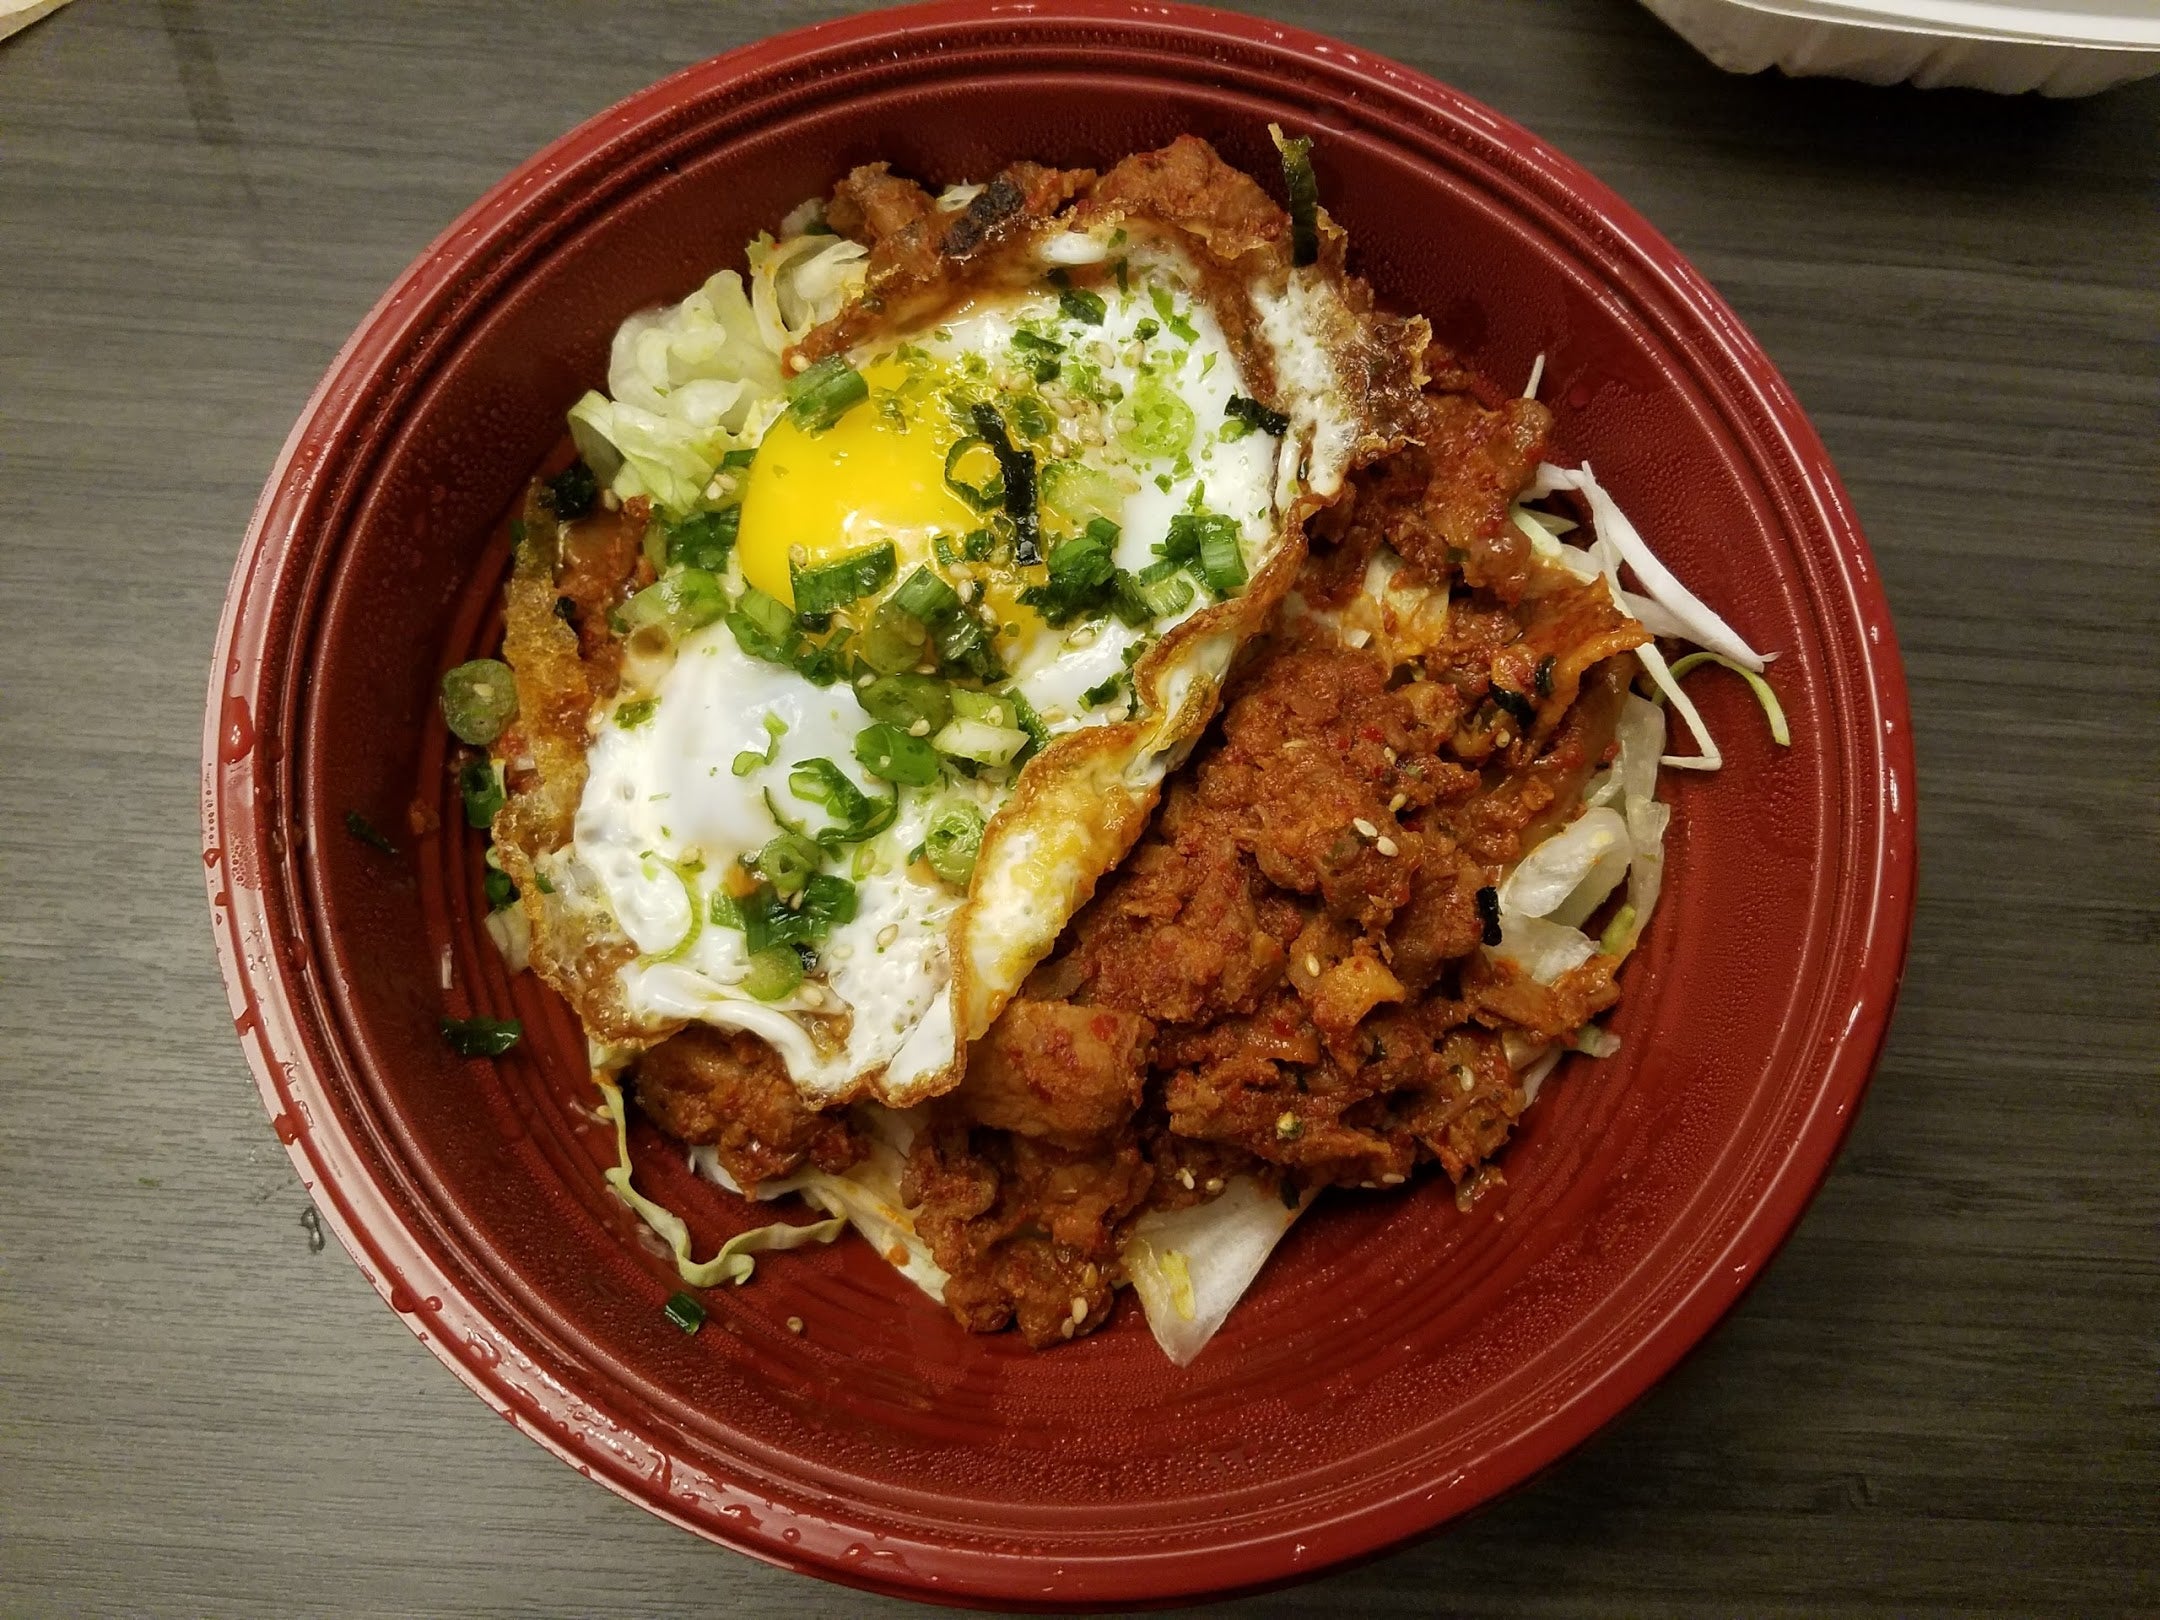
Take the Macro shots
Seeing the whole picture is generally a good rule of thumb when it comes to snapping foodie pics, but when you want to isolate or highlight something in more detail, that's when you want to get up-close and personal with some macro shots. For this shot, however, you're going to want to shoot your foodie pics from a profile view more than anything else, since it won’t cast as many shadows if you're to capture them pointing the camera down towards the plate.
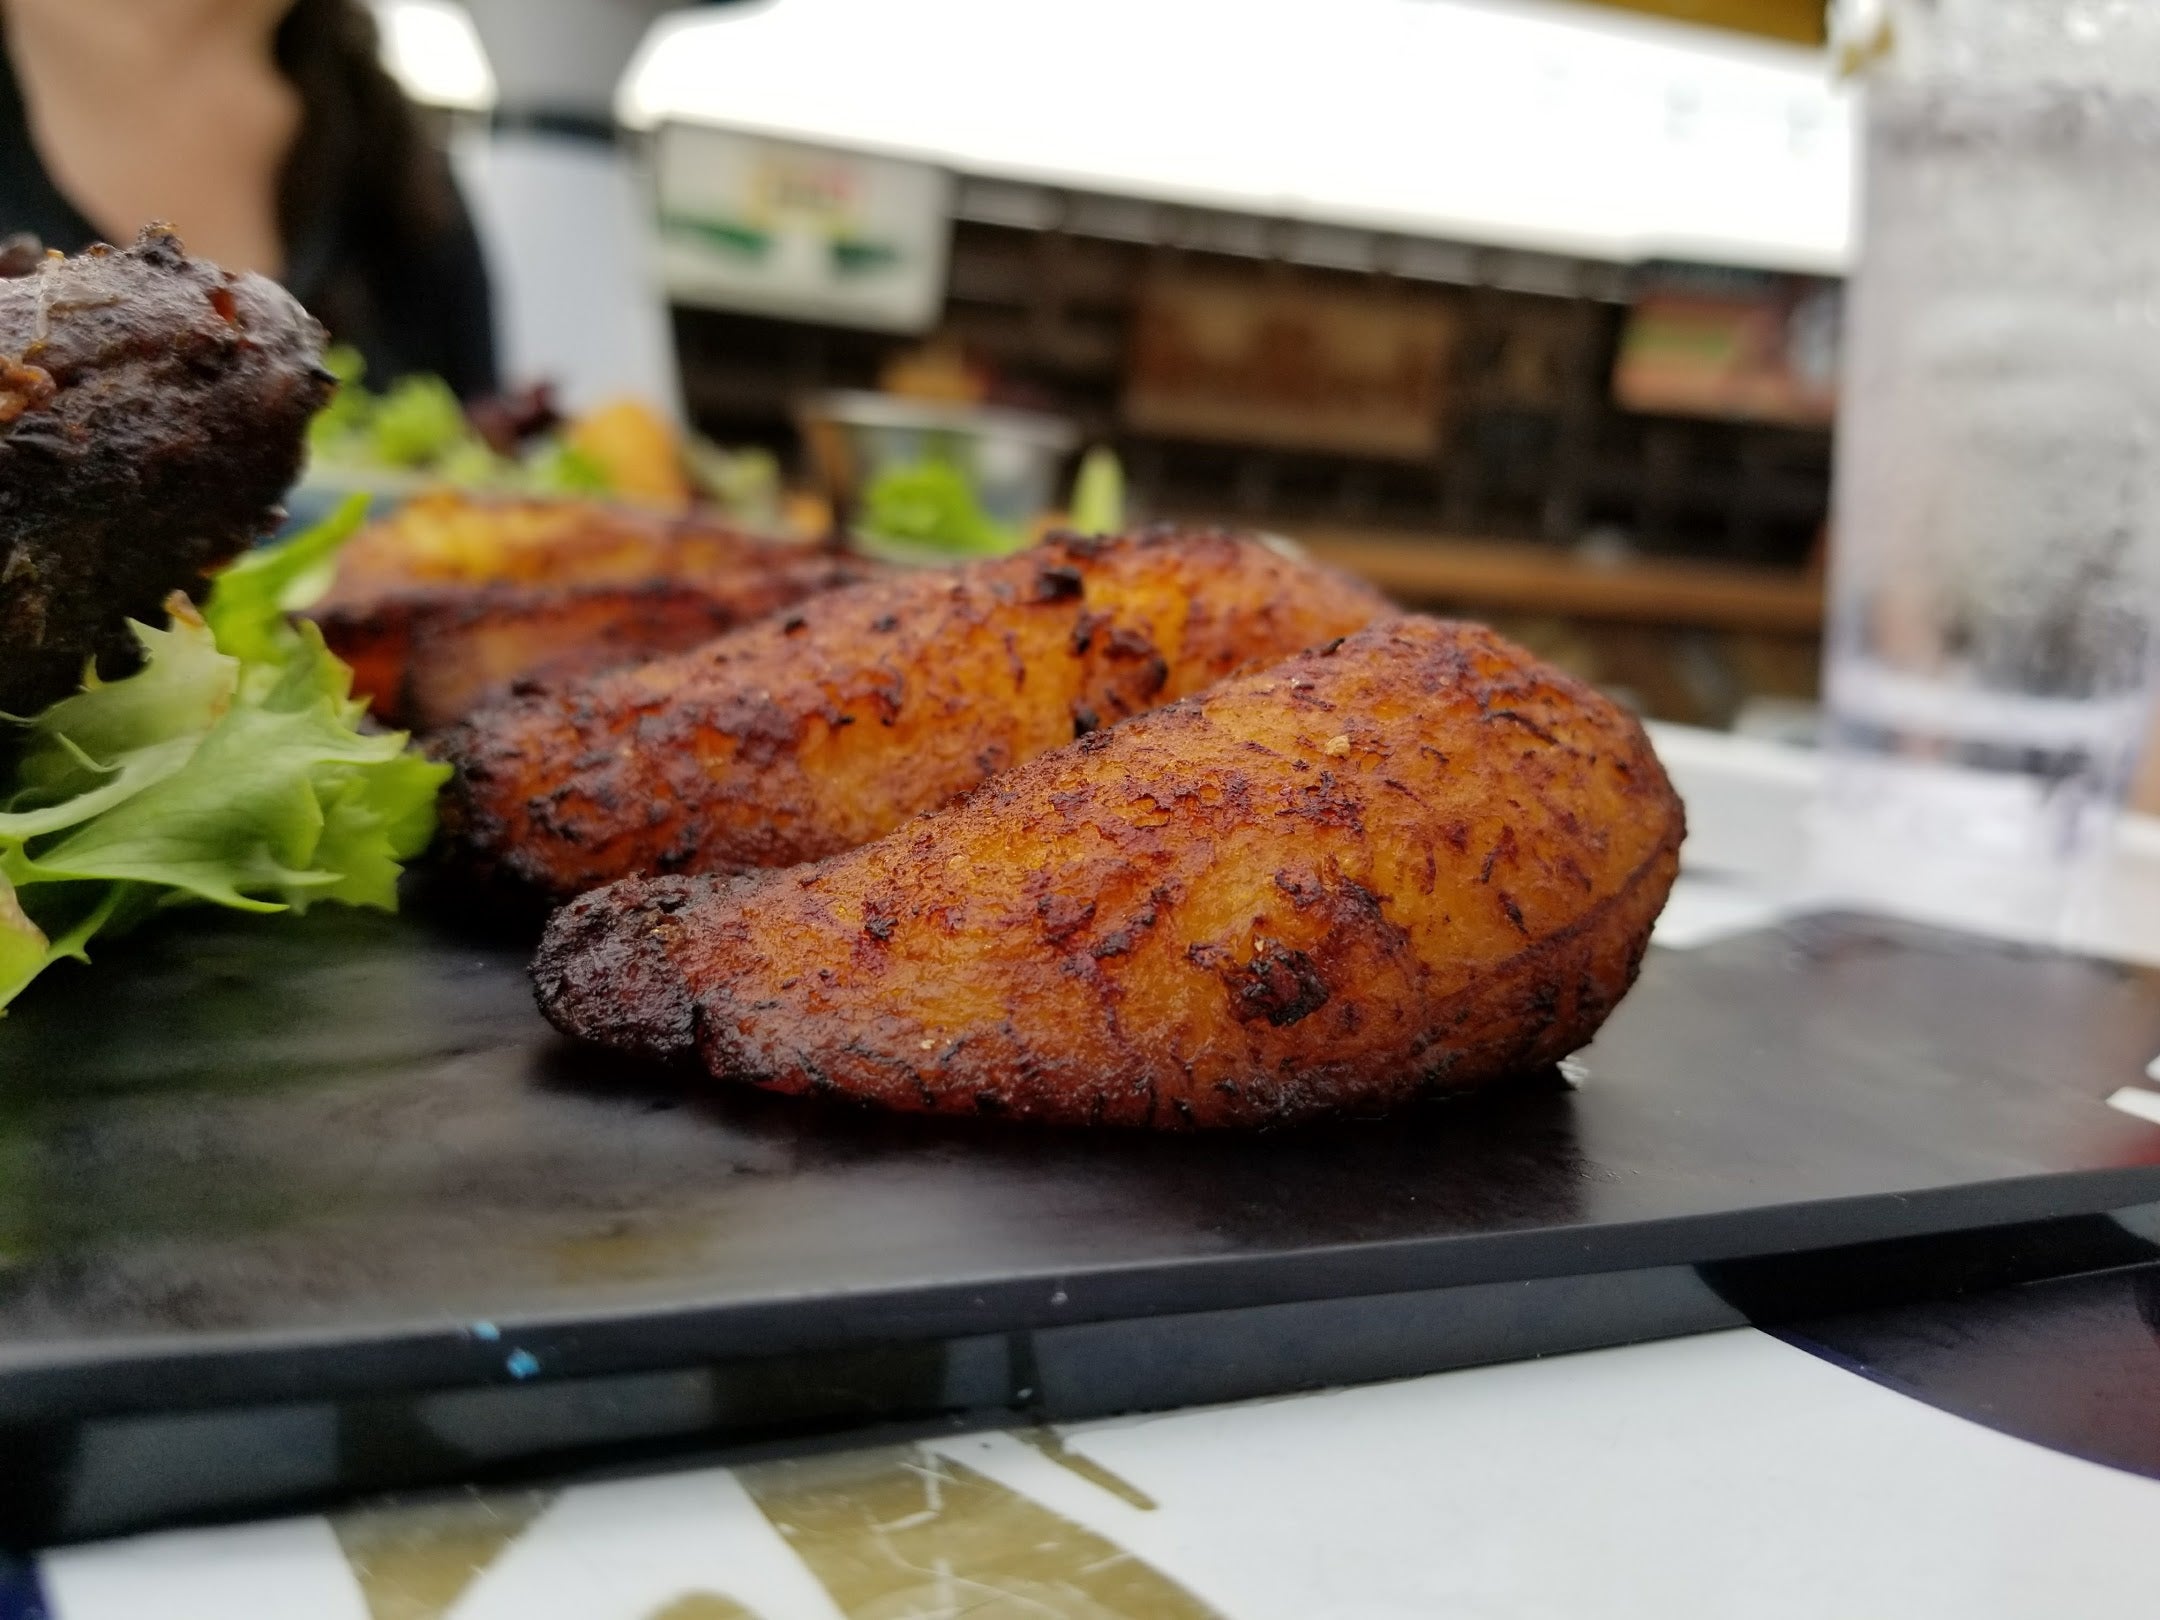
Details get exposed even more with macro shots.
These macro shots do nicely to draw out details that are otherwise hidden when you're just snapping an overview sort of shot. For example, it helps to magnify qualities like the glistening look of the BBQ sauce slathered all over a piece of chicken – or even the crispy texture of those well-done French fries. Fine details can be extracted from these macro shot, which can be further intensified by cropping them later on.
Don't be afraid to use a slight digital zoom, or even crop your photos afterwards, to accentuate macro shots even more." 
Photo collage it up
Once you've gathered all of your favorite foodie shots, we suggest generating a collage that would showcase your meal. Variety is integral in achieving a collage that's drool worthy, so it's important to have most of the focus on the overviews – whichever one that ends up being. It could be the typical top-down shot under natural light, or maybe a low-profile one, but regardless of which one you choose, just complement it with other shots from different angles.
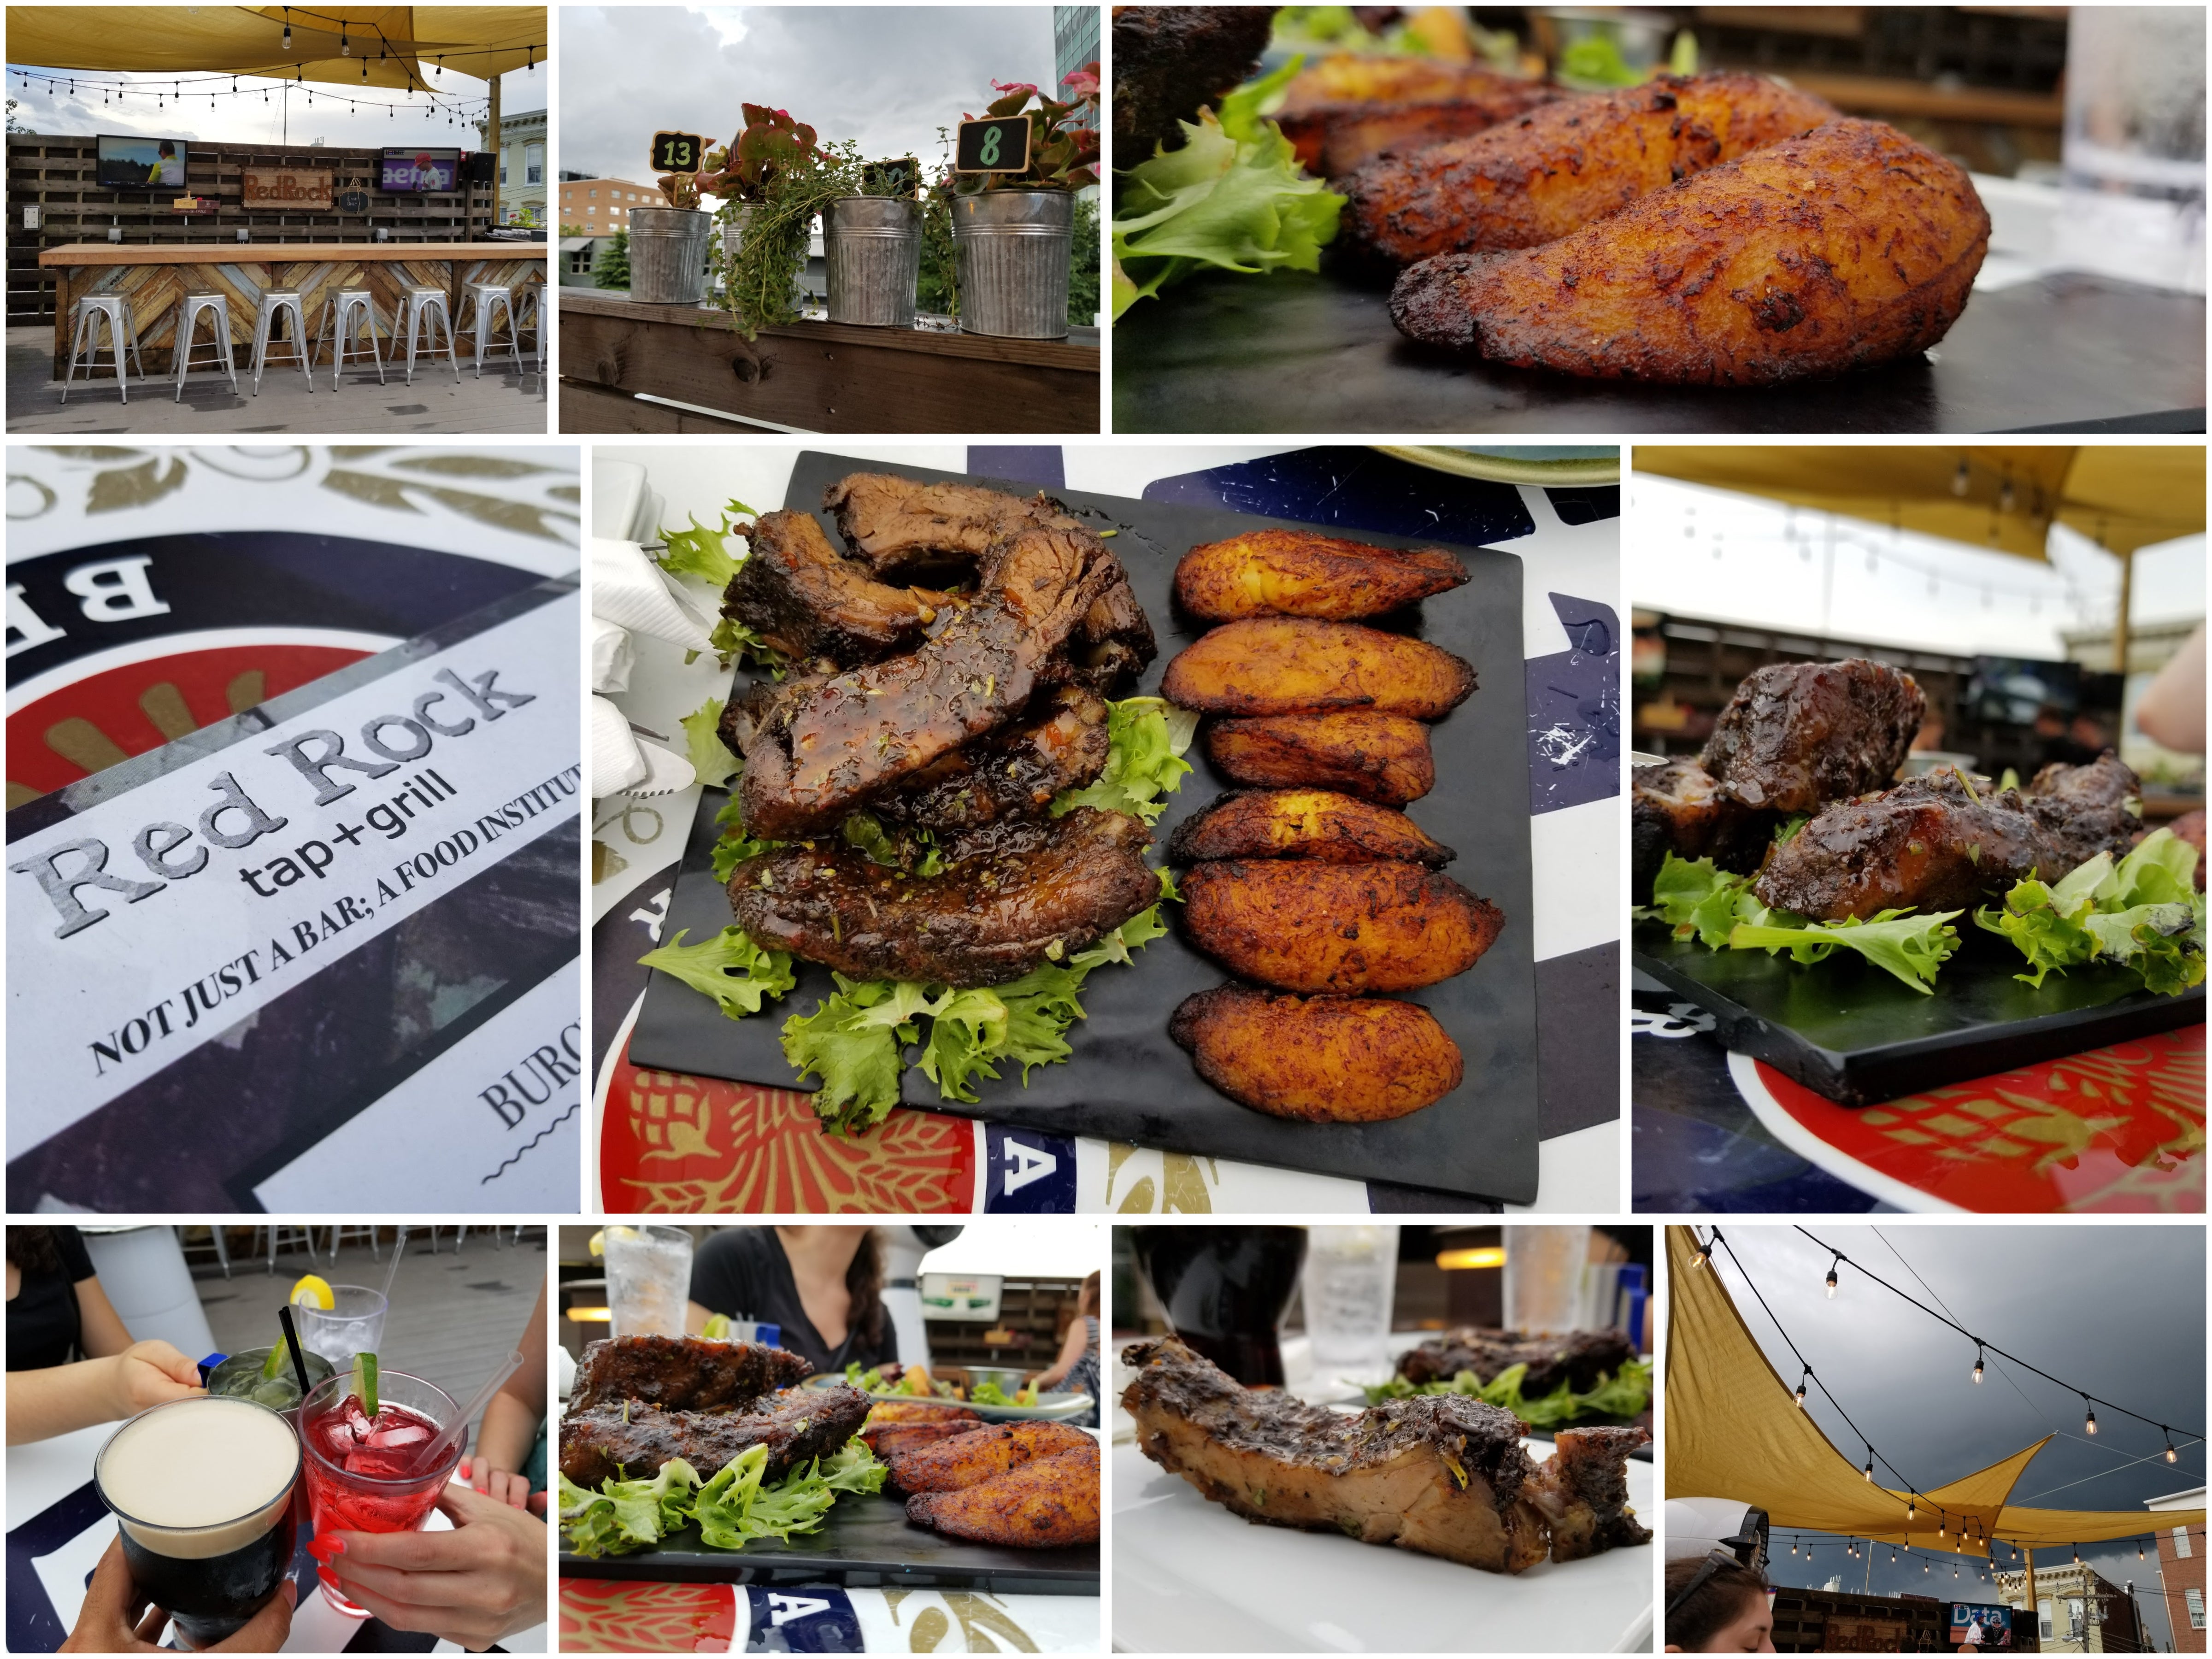
Making a collage helps to showcase an overall dining 'experience.
Those macro shots I talked about earlier on do nicely to surround your main image, seeing that they provide valuable details that don't overwhelm your main shot. The end result should consist of a few macro shots combined with some other angles, while the overview shot should remain the most visible out of the bunch – so that the focus remains there. Also, you can add a little bit of diversity by introducing complementary additions found already on the table - like salt and pepper shakers, signage, utensils, and much more.
Be in the action shot
Out of all the ones I've talked about, this is probably the toughest foodie tip to execute because it involves you (the shooter) to be in the actual shot. For this, it may require some trial and error before the perfect shot is captured, but if it's pulled off flawlessly, it can make for a memorable foodie pic. In order for this one to work, we still suggest using the rear camera due to the fact that they're simply superior in terms of overall performance. Front-facing cameras make it more convenient, but you don't want to soften the results.
The dynamics of this shot make it a bit more personal, different from just the typical fanfare of having the dish pictured alone and by itself. Once mastered, you can work other angles to give each shot its own unique look.
It's tough to master, but being in the shot offers a different take at foodie pics.
Under low light, ask a friend to shine their flash
Snapping foodie pics under low lit situations is one of the toughest challenges out there, simply for the fact that poor lighting automatically will cause the phone to shoot at a higher ISO – resulting in a lower quality performance. My advice for this challenging situation is to ask a friend to continuously shine the LED light in their phone towards your dish.
Colors can distort when shooting under low-light, while using the flash introduces severe and harsh lighting.
This harsh lighting is problematic on its own, especially in how it introduces shadows, but you can lessen that by just positioning yourselves on opposite sides. While it's not the perfect solution, it's still better than simply firing off the flash on your own phone – or worst yet, increasing the sensor's sensitivity. Using a third-party app that allows you to adjust the light intensity from the flash will help, as well as implementing a napkin to help diffuse or soften the light before it reaches your dish.
Find stronger light sources to help better capture photos.
Low light shots are always tough to pull off, but if you're able to master this technique, you can still achieve reasonable results. Then again, if you can find stronger light sources elsewhere, it'll be more helpful than using the flash on another smartphone.
What a difference you'll get by using the flash on another phone to help illuminate the frame.
Follow us on Google News


Things that are NOT allowed:
To help keep our community safe and free from spam, we apply temporary limits to newly created accounts: