"Mobile photography" and "camera phone" are catchphrases so overused nowadays that people have stopped paying attention to the essence of the matter. And that essence is the fact that our smartphones are perfectly capable of capturing stunning photos worthy of an art exhibition.
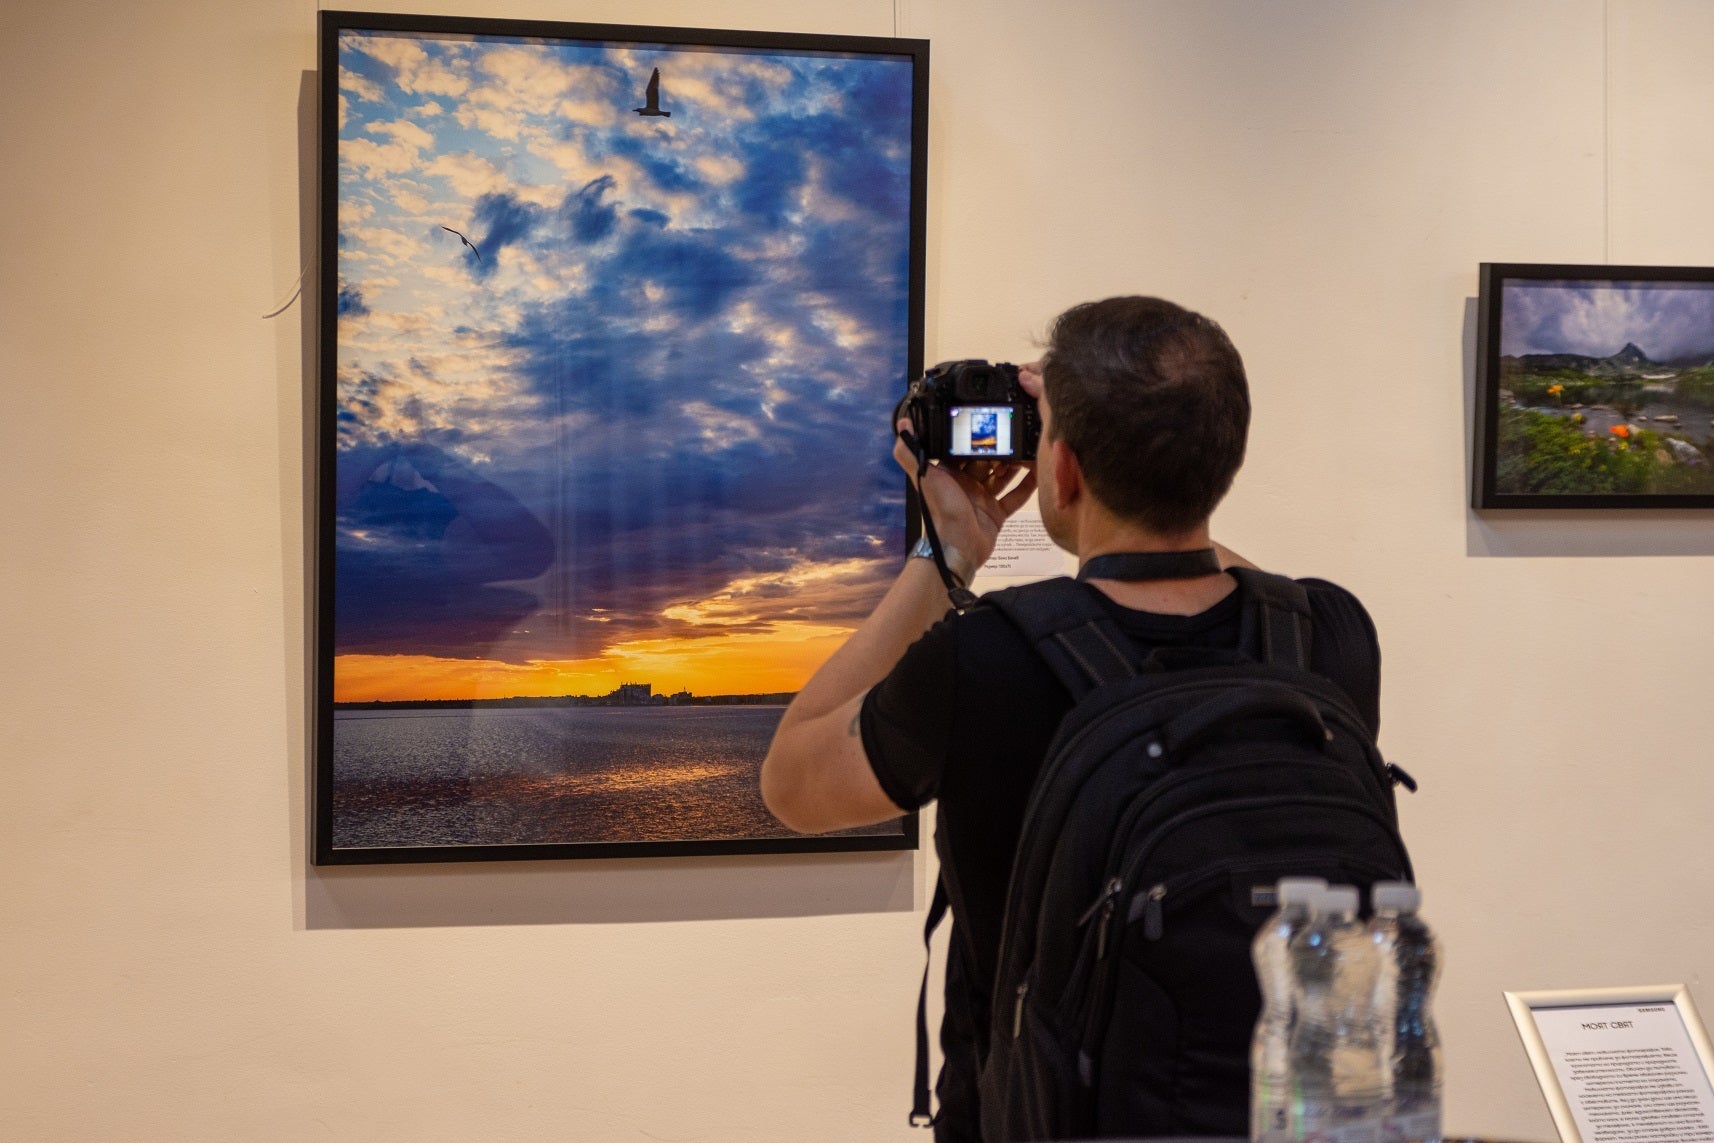
Samsung decided to show just that with its "My World" photo exhibition, shot solely with the Galaxy S23 Ultra. Now, that may or may not be a PR stunt, that's irrelevant. The important thing is that some of the pictures I saw at the art hall were amazing. And what's even more important is that most of you could achieve similar results with your S23 Ultra, or any other modern phone, for that matter, with just a little effort.
I know what you're thinking right now: "Art exhibitions are booooring." And you're right to some extent. I'm not going to bore you with a sophisticated breakdown of every photo and try to find words in the dictionary that are super hard to pronounce and understand just for the sake of it. I'm going to do something completely different here. Try to share tips and tricks from the kitchen and help you snap the same amazing photos I saw at the exhibition.
The beauty of it is that I'm not a photographer—not even close. I suck at taking good photos, even with a DSLR. My source and guru is Boni Bonev, one of the most famous modern Bulgarian photographers. You'll be excused if you haven't heard of him, but his work speaks for itself. And unlike many other famous artists, he doesn't mind sharing all his little secrets when it comes to mobile photography. So, let's get to it, shall we?
How to make stunning landscape shots with your smartphone
Landscape photography is one of the most popular among amateurs and professionals (we'll leave pet photos out of these statistics). So, how do you snap a perfect landscape photo with your phone?
Composition: This is the most important thing in landscape photography. Most of the time, the objects you photograph are static, so you have some freedom to arrange the shot as you like. Don't fill your shot with too many objects, use negative space—large open areas of sky, sea, or something plain with not a lot of details. Using negative space emphasizes the other (and more important) objects in your shot.
Rule of Thirds: This is a very important aspect, so it deserves a separate bullet point (even though it's technically part of composition). When you have land and sky (or sea and sky) in your shot, you need to balance the part that you want to emphasize. If there are birds in the sky as your main element, the horizon should, in general, be placed in the lower part of the shot. If you're focusing on a range of mountains or some majestic trees, the horizon should be drawn higher, leaving roughly two thirds of land and one third of sky in the shot.
The Golden Hour: Lighting is super important when it comes to photography, and even more important when your sensor is as tiny as your fingernail. Smartphones can snap some amazing photos if there's enough light at the scene, but it's important to know that there's a specific time of the day called the "golden hour", which is just after sunrise and before sunset. Shadows are soft, and light falls at an angle, creating distinct shadows and emphasizing objects you photograph.
Reflections: A very powerful tool in every photographer's arsenal. When shooting landscapes, you can make use of water or other reflective surfaces to add spice to your shot. Reflections create symmetry, which our brain automatically finds pleasing. You can also use reflections to show something that's not in your original frame.
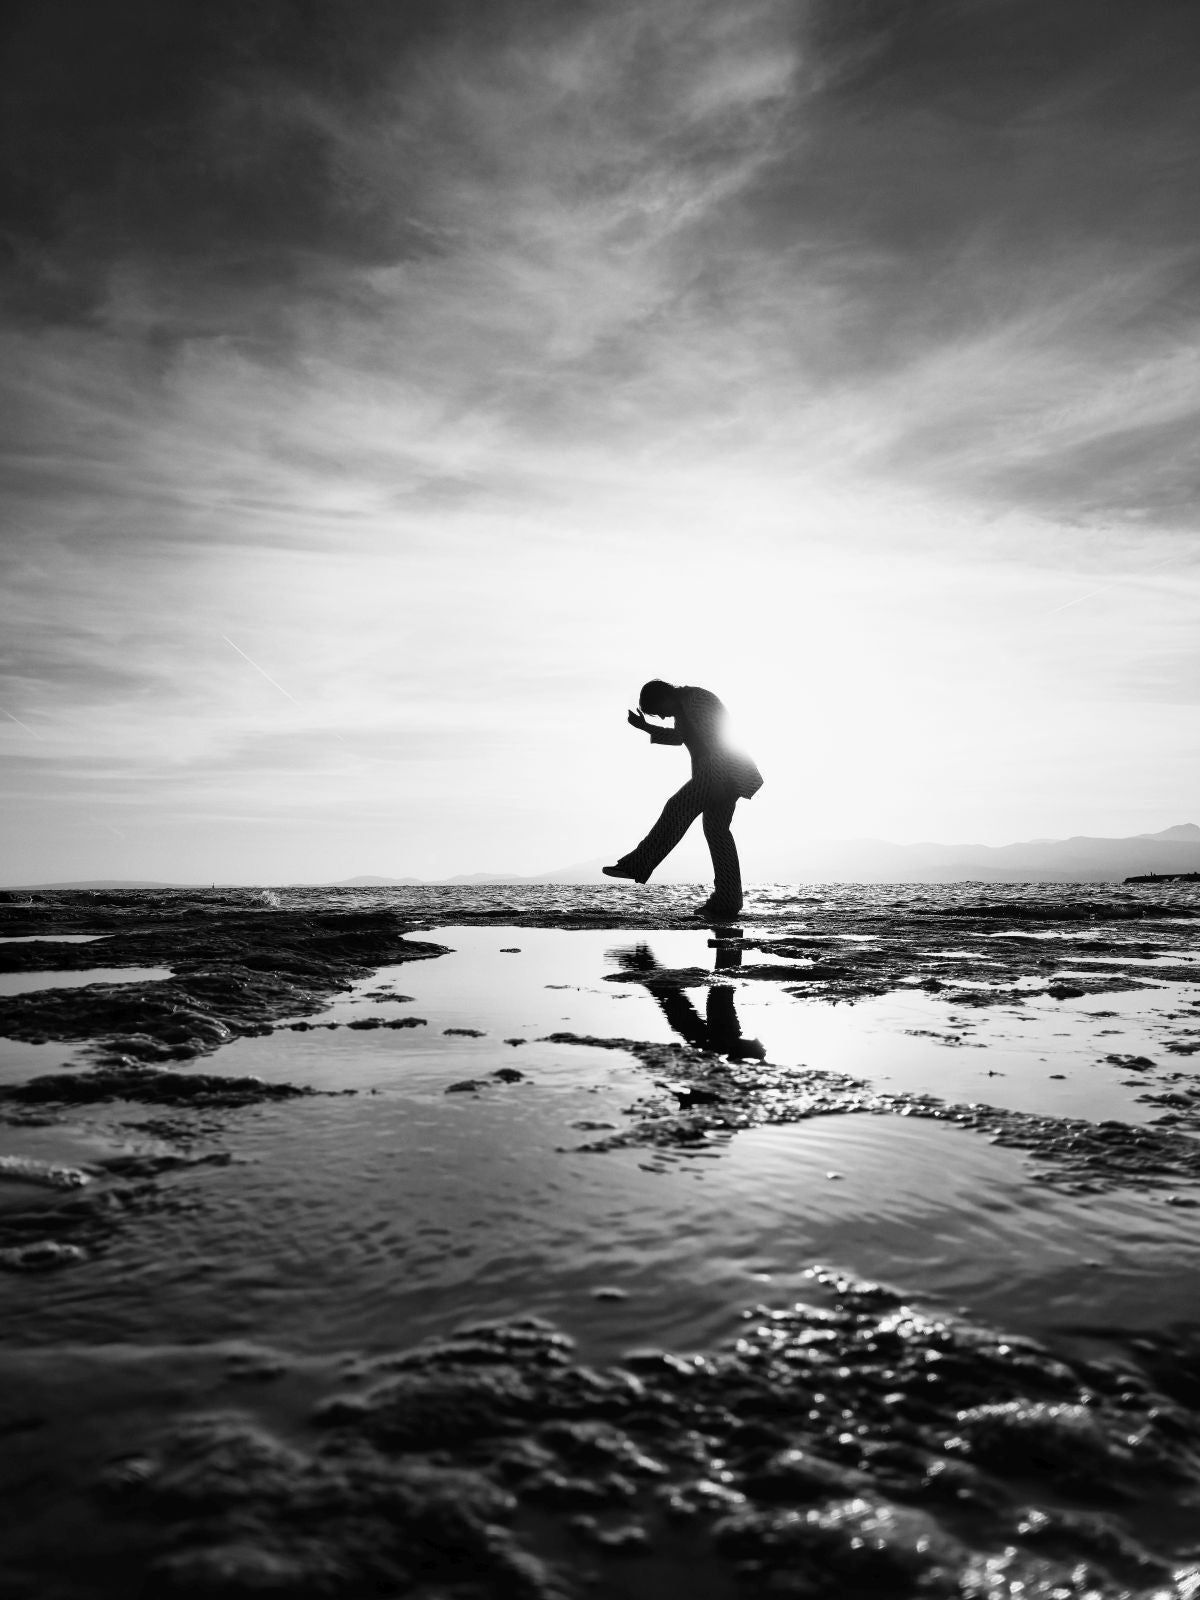
How to make stunning portrait shots with your smartphone
Easy! Just turn "portrait mode" on, and you're all set. I'm joking, of course, it's not that simple. Even though the "bokeh" effect (blurring the background) is a powerful portrait tool, it's not the only one. You can make your portraits stand out even if your phone doesn't support bokeh or the aforementioned portrait mode is not very good. Here's how.
Use the light: The sole purpose of bokeh is to emphasize the object you're shooting. This can be done using light alone. Make sure the face of the person you're photographing is well lit while the background is darker.
Background colors: Sometimes you can't play with light, that's where background colors come into play. You can use solid and soft colors for the background, or do it vice versa—use something extremely bright. The goal is to create the necessary contrast to emphasize the face you're photographing.
Mind the distance: The best portrait shots (the ones you see at art exhibitions) are shot from a pretty close distance. Don't be afraid to move in closer, this will allow you to leave distractions off your shot and focus on the face of the person you're shooting.
Go monochrome: Another great tool that must be used with caution. Removing colors from your portrait shot could remove distractions and bring out shadows and other composition elements in your shot.
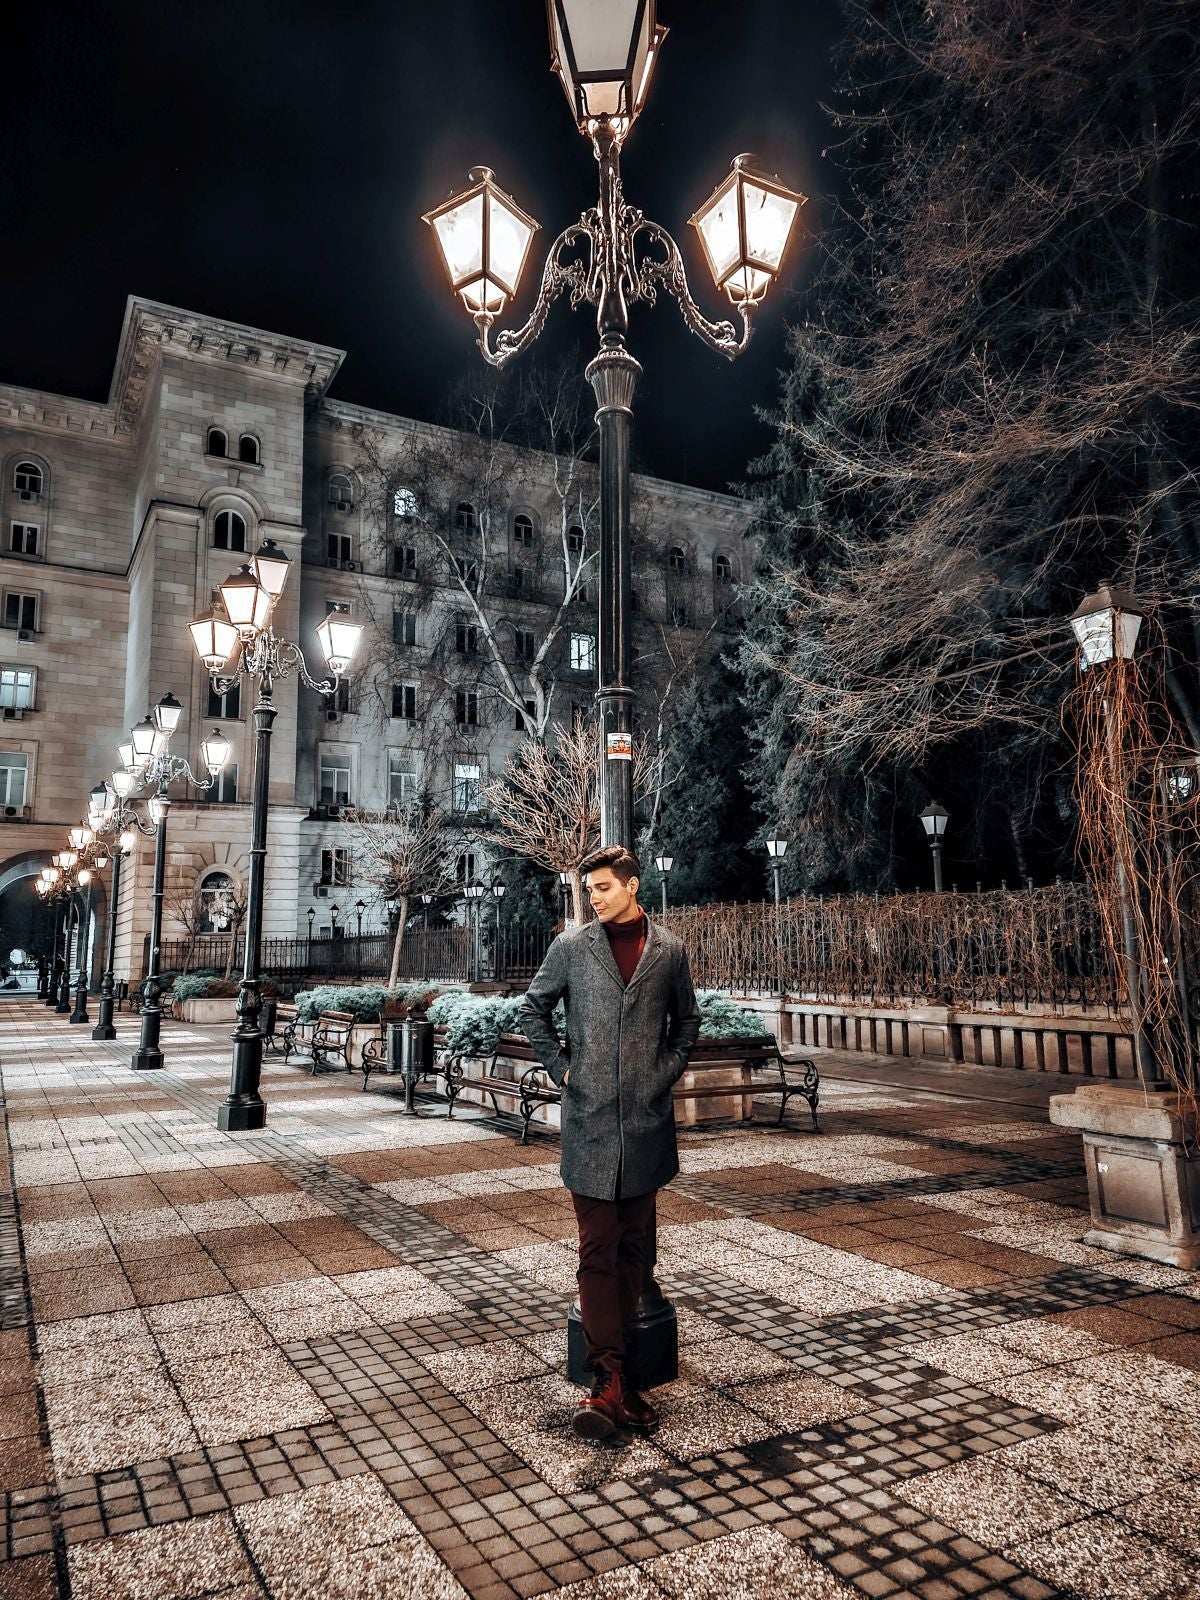
How to make great night shots with your smartphone
That's a tricky one! Some people argue that smartphones now have better algorithms and software for HDR stitching than regular cameras and can produce better shots. It really depends on what you're looking for. If you want to delve into night photography at the semi-pro or pro level, you'd be better off turning that night mode off.
Bring a tripod: This is probably the most important thing here, night shots require a steady hand due to the long exposure. Bringing a portable tripod or even a selfie stick you can mount somewhere will dramatically improve your nighttime results.
Use a timer: If you don't have a Bluetooth remote shutter, use a timer (if you can) when making nighttime shots. Touching the phone will result in movement, and at long exposures, this will ruin your shot. All of the aforementioned composition tips apply here as well.
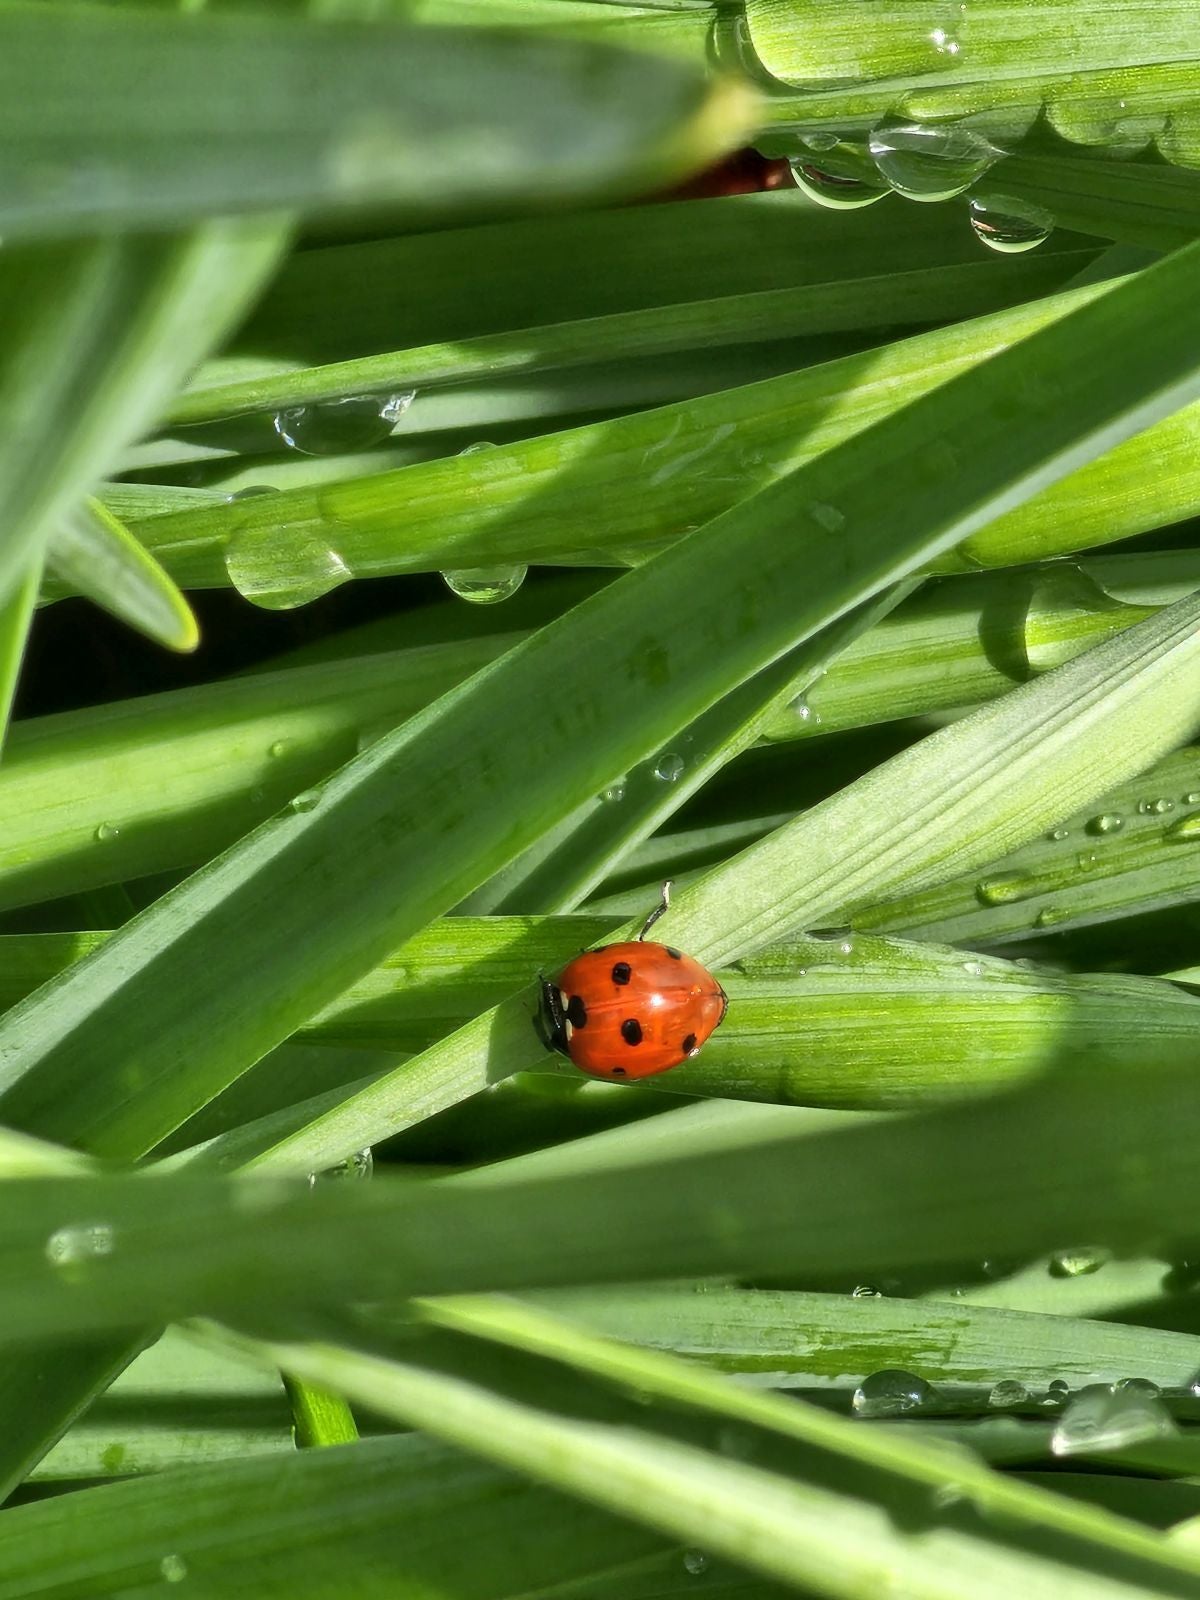
How to make great macro shots with your smartphone
Smartphones are great at macro shots due to the depth of field of their cameras. Most modern smartphones can focus at distances as close as 2–4 cm.
Use manual focus: When you're trying to photograph objects that are close to your phone, autofocus can and will play tricks on you. The best way is to use a stand or a tripod and manually focus on the part you wish to emphasize in your shot.
Pick your object: When going down the magnifying route, picking the right object is maybe the most important thing. Take an everyday object and make it mysterious and indistinguishable by shooting it in macro mode. Flower buds could look like mushrooms, sand could turn into a mountain range, use your imagination.
Start tapping on that shutter button
These tips and tricks only scratch the surface of photography and mobile photography. But it's better this way, most people would instantly close the article the moment they saw shutter speeds, exposure times, and ISO settings.
I hope these simple tips and ideas were helpful, and next time you take out your phone to make a shot, you remember one or two of them. All this goes with the disclaimer that photography is an art form full of complexity, and it's not an easy thing to master, whether a smartphone or a real camera is involved.
Six-month unlimited plan is now 57% off
$90
$210
$120 off (57%)
Mint Mobile is now allowing you to get whichever plan you like for either three, six, or 12 months for just $15/mo. If you go for the six-month unlimited service, for instance, you'll now have to pay just $90 upfront instead of $210.
Mariyan, a tech enthusiast with a background in Nuclear Physics and Journalism, brings a unique perspective to PhoneArena. His childhood curiosity for gadgets evolved into a professional passion for technology, leading him to the role of Editor-in-Chief at PCWorld Bulgaria before joining PhoneArena. Mariyan's interests range from mainstream Android and iPhone debates to fringe technologies like graphene batteries and nanotechnology. Off-duty, he enjoys playing his electric guitar, practicing Japanese, and revisiting his love for video games and Haruki Murakami's works.
A discussion is a place, where people can voice their opinion, no matter if it
is positive, neutral or negative. However, when posting, one must stay true to the topic, and not just share some
random thoughts, which are not directly related to the matter.
Things that are NOT allowed:
Off-topic talk - you must stick to the subject of discussion
Offensive, hate speech - if you want to say something, say it politely
Spam/Advertisements - these posts are deleted
Multiple accounts - one person can have only one account
Impersonations and offensive nicknames - these accounts get banned
To help keep our community safe and free from spam, we apply temporary limits to newly created accounts:
New accounts created within the last 24 hours may experience restrictions on how frequently they can
post or comment.
These limits are in place as a precaution and will automatically lift.
Moderation is done by humans. We try to be as objective as possible and moderate with zero bias. If you think a
post should be moderated - please, report it.
Have a question about the rules or why you have been moderated/limited/banned? Please,
contact us.


Things that are NOT allowed:
To help keep our community safe and free from spam, we apply temporary limits to newly created accounts: