While the world is still in the clutches of the coronavirus (stay safe, everyone!), avid Galaxy fans are about to receive their Galaxy S20-series pre-orders. All the new Galaxy flagships that Samsung announced last month are officially hitting the shelves on March 6, but some lucky few have already received, unboxed, and are currently enjoying their flashy new Android phones.
There's a ton to be excited about, namely the super-speedy chipset, super-smooth 120Hz display, and the huge batteries, but the most intriguing new feature is undoubtedly the supercharged camera package, which albeit slightly misleading, is still quite impressive.
Here are a bunch of useful camera tips and tricks that will help you make the best out of your new phone's camera app!
Single Take is available on all three S20 phones and allows you to just hold the camera shutter while the phone will shoot photos and videos with all of the cameras, and then magically pull out the best shots and moments in one album. It works best when you do something fun, jump or scream, be creative, and capture it. You will automatically get a short movie, a few GIF like funny animations, a bunch of stylized photos and a lot more in just one take. Single Take will use AI to do its magic and highlight the best videos and still images, as well as create some custom videos and tuned images that you might enjoy.
Recommended For You
To take a Single Take photo, simply swipe to the right to enter the new camera mode and promptly start capturing a video. You will be urged to take the video from different angles so as to capture as much meaningful moments as possible. Once you're done, you will be presented with a bunch of videos and pictures hand-picked by AI. Have in mind that pictures taken with Single Take are with inferior quality in comparison with regular photos taken with the device.
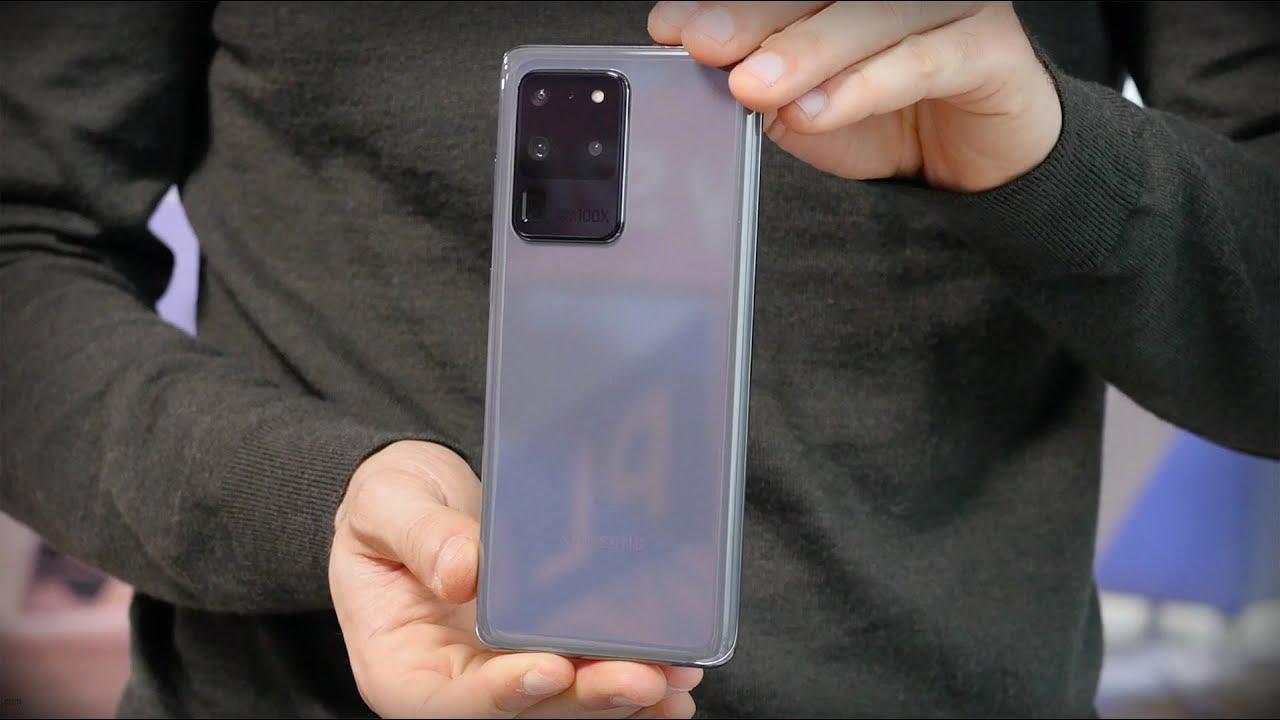
Here's how we did it the first time we were handed an S20 Ultra:
2. Augmented reality on the Galaxy S20-series
Any and all AR-related camera features have been migrated to a new section within the camera interface. To access these, swipe right until you get to the "More" section on within the camera app, and lo and behold, the AR Zone menu will be visible at the top row. From there, you can access various AR-related features. AR Emoji Camera, AR Doodle, and AR Emoji Stickers are certainly well-known to long-time Galaxy owners, but 3D Scanner and Quick Measure are arguably a bit more useful and exciting. The former lets you capture a three-dimensional scan of a real-life object by rotating your phone around it to capture a quick scan, whereas Quick Measure lets you... measure distances using the ToF camera at the back. Fairly reliable, but don't count on it when purchasing a new sofa.
AR Zone on the Galaxy S20 Ultra
3. Take Live Focus video
That's not a tip in the traditional sense of the term, but more of a public service announcement - Live Focus videos on the new Galaxies are now actually usable. Unlike previous iterations of the feature, which were mostly hit or miss, the Galaxy S20, S20 Plus, and S20 Ultra now consistently isolate the subject from the background and apply the bokeh effect evenly. Here's a sample that we took a while ago:
Aside from regular bokeh, Samsung also lets you take videos with a quirky RGB split effect, but we wish the selection was greater.
4. Enable Zoom-in mic
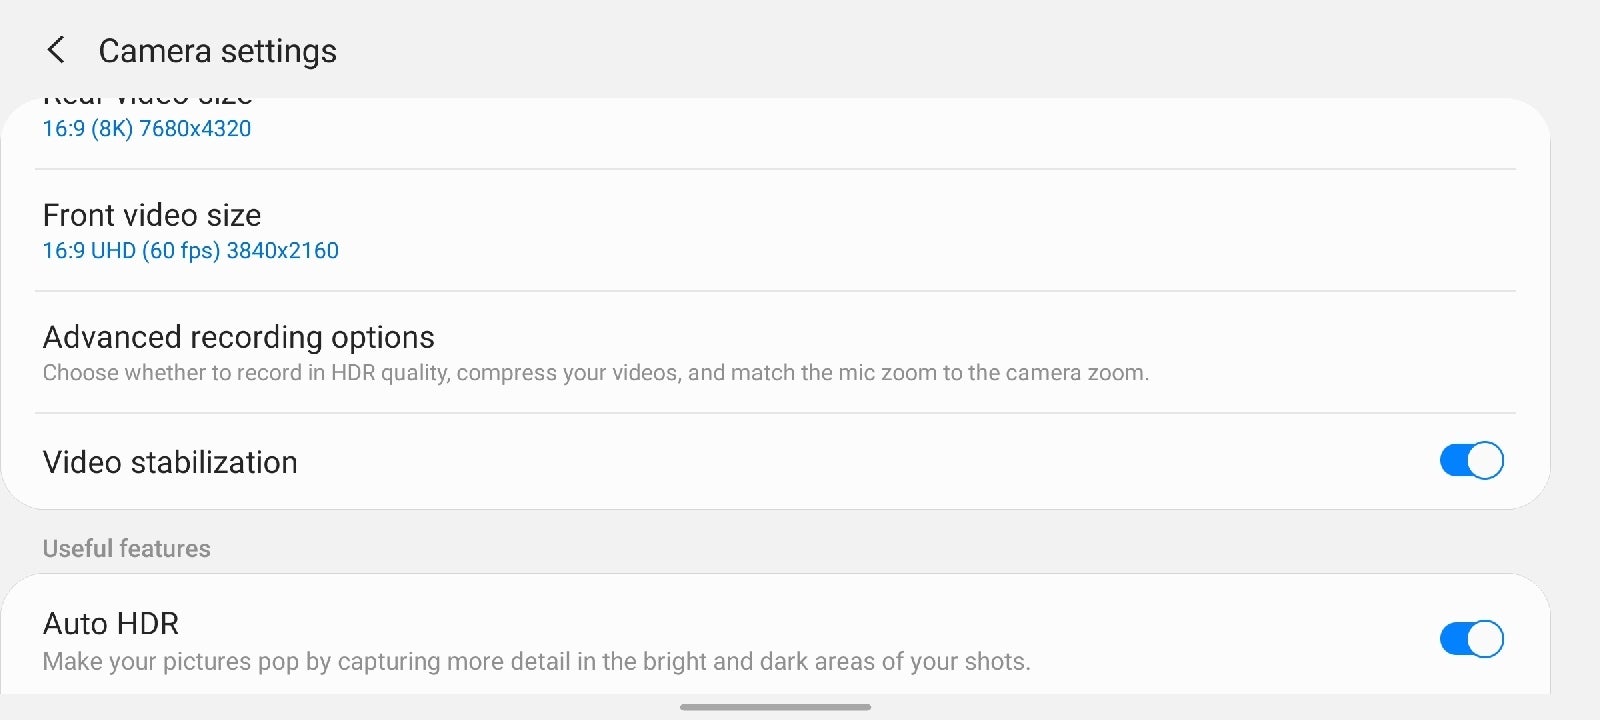
Zoom-in mic is a great feature that amplifies volume and reduces background noises as you zoom in on while shooting video. It's great and it's definitely better to leave this one enabled rather than disabled, but do have in mind that this feature cannot be used with Live focus video, Super steady, or with the front camera. To enable this feature, open the camera in video mode, hit the settings cog at the top bar, then head to Advanced recording options. From there, simply toggle the zoom-in mic feature at the bottom.
Go into Advanced recording options...
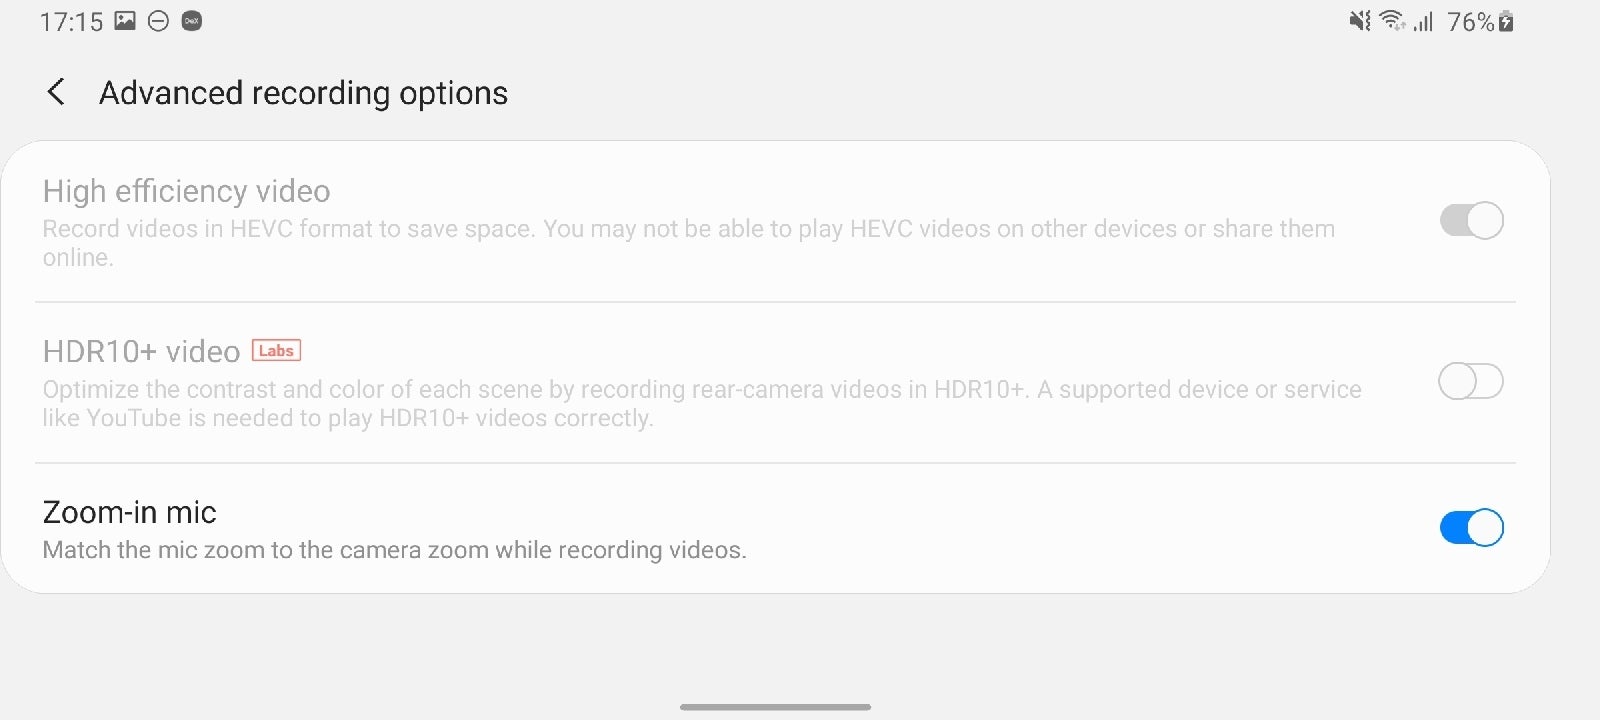
Enable zoom-in mic
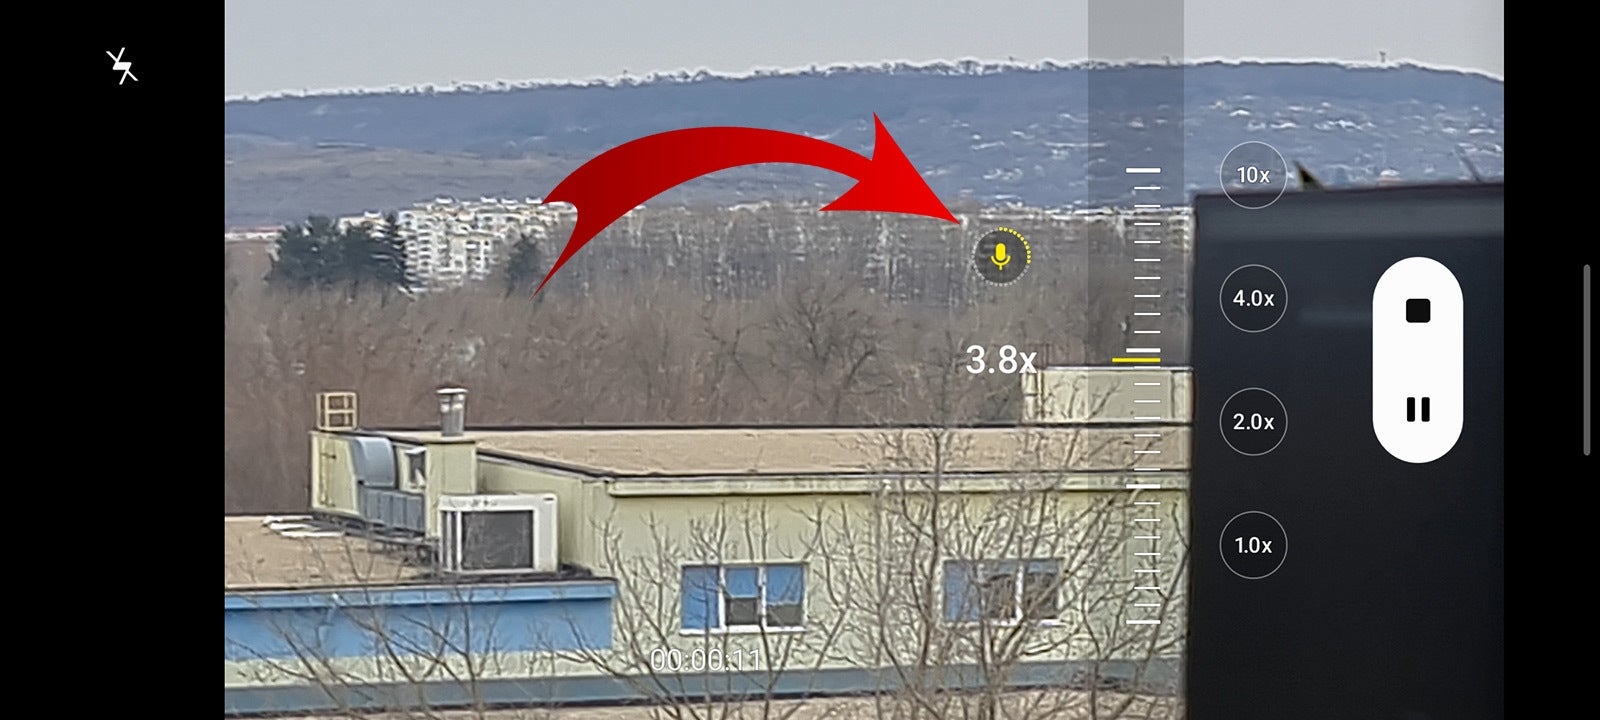
Now, whenever you zoom in while recording a video, you'll notice a mic gain icon appear near the camera shutter, indicating that the feature is trying its best to isolate sound coming in from that direction.
Zoom-in mic is enabled
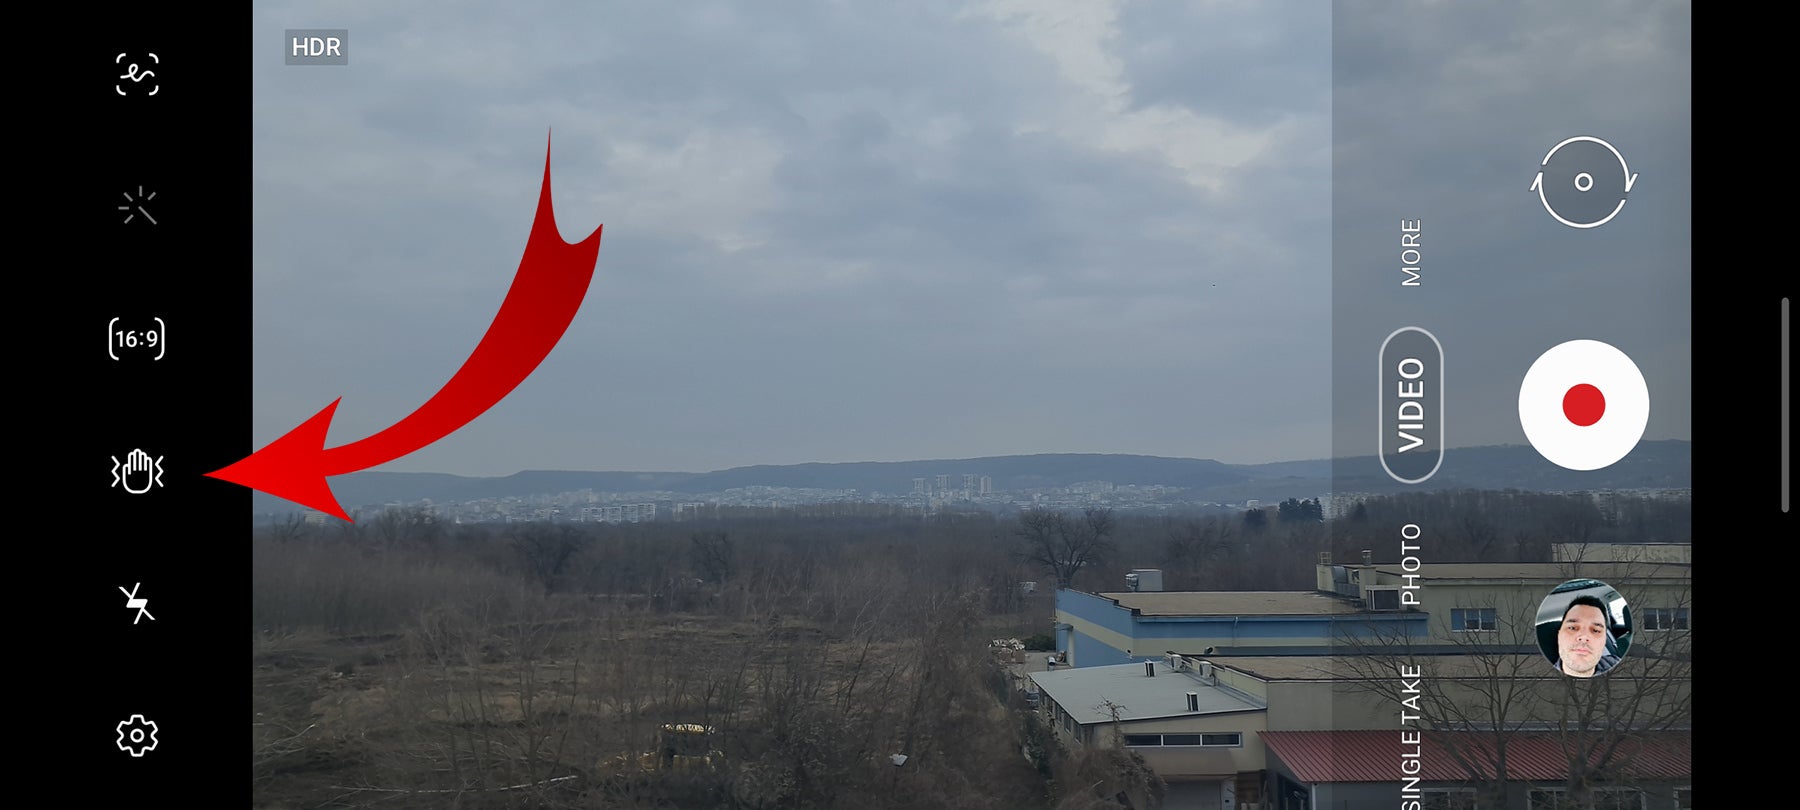
5. How to take Super steady video
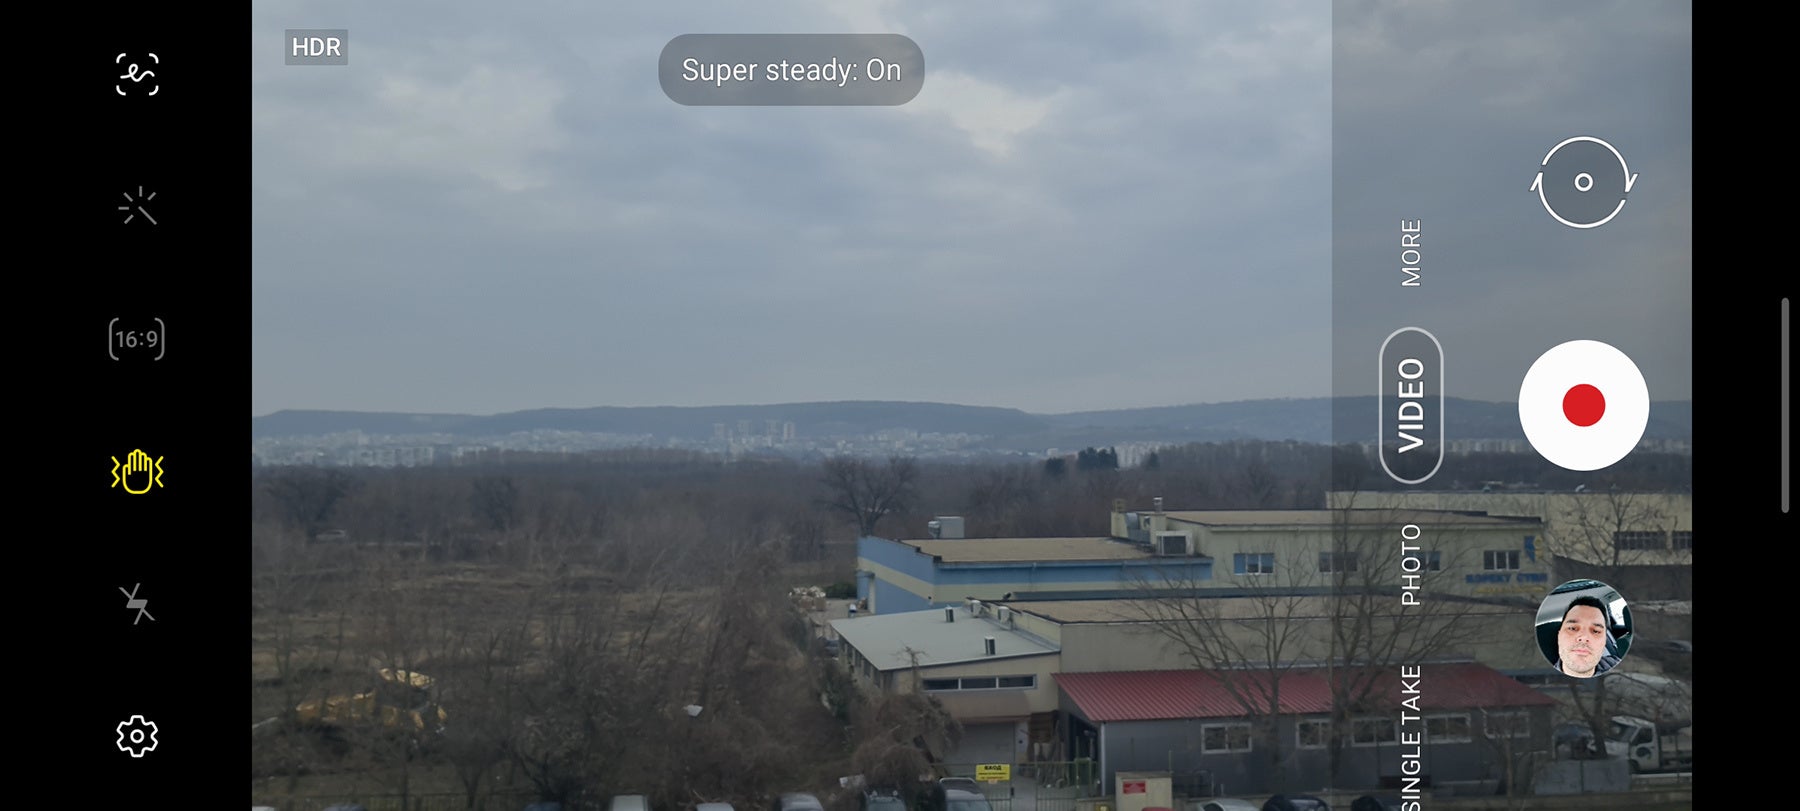
The default video stabilization of the Galaxy S20-series is already excellent, but to achieve an ever more stunning result, make sure to enable Super steady video. It's great, but as we already mentioned in our review, Super Steady uses a crop of the ultra-wide camera to achieve that, and with that decision comes a slightly degraded camera compared to regular video.
To enable Super steady, simply tap the "electrocuted hand" icon at the top of the camera interface.
How to enable Super steady stabilization on the Galaxy S20
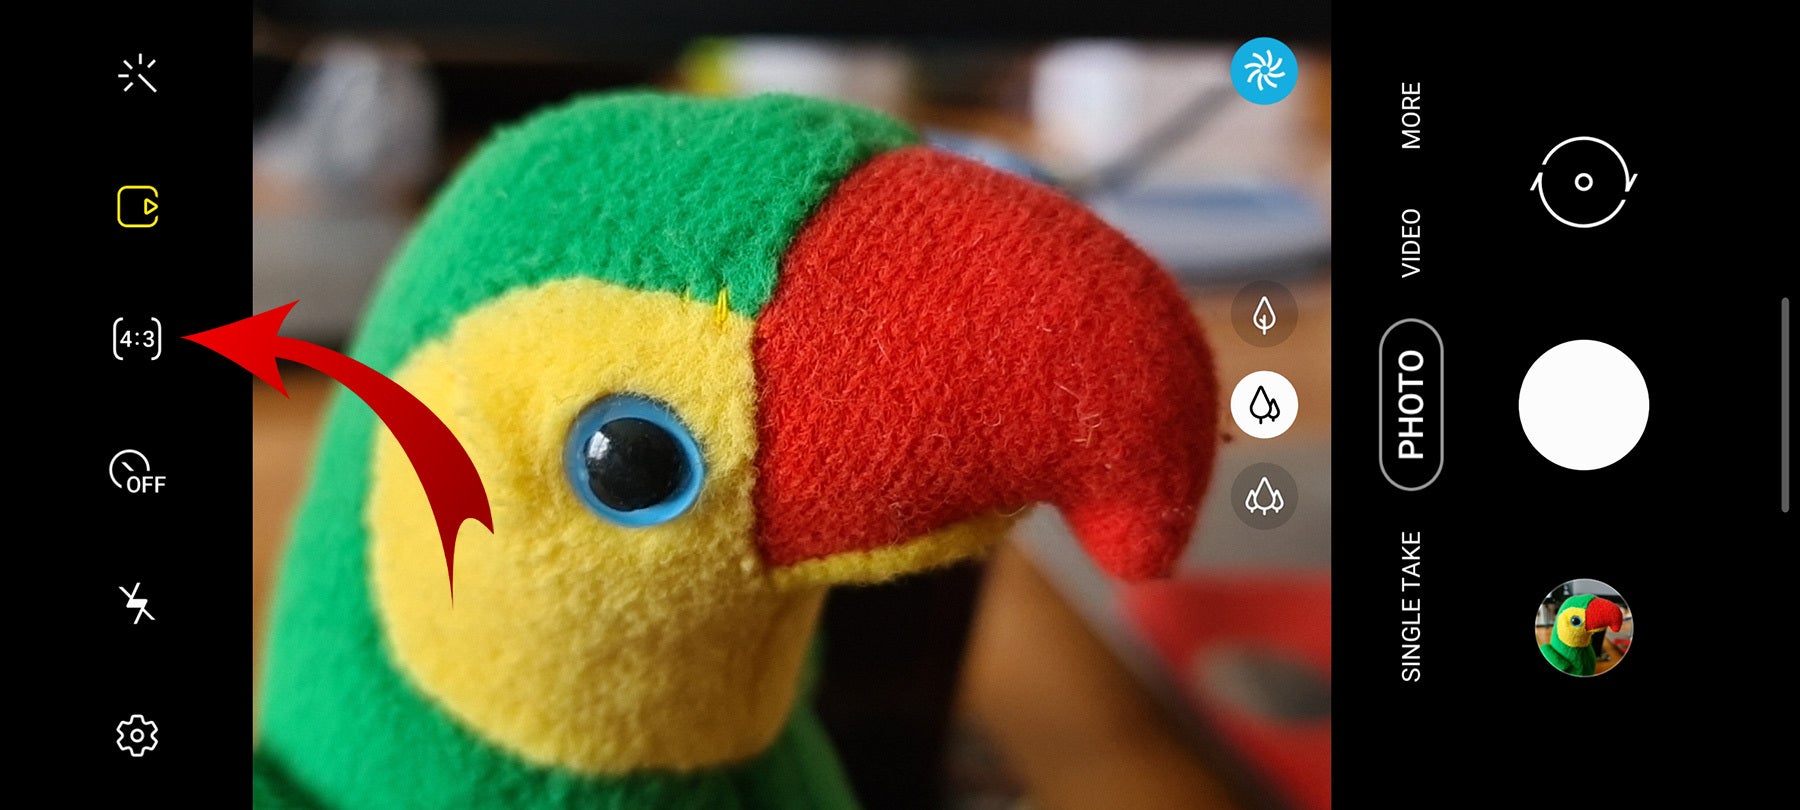
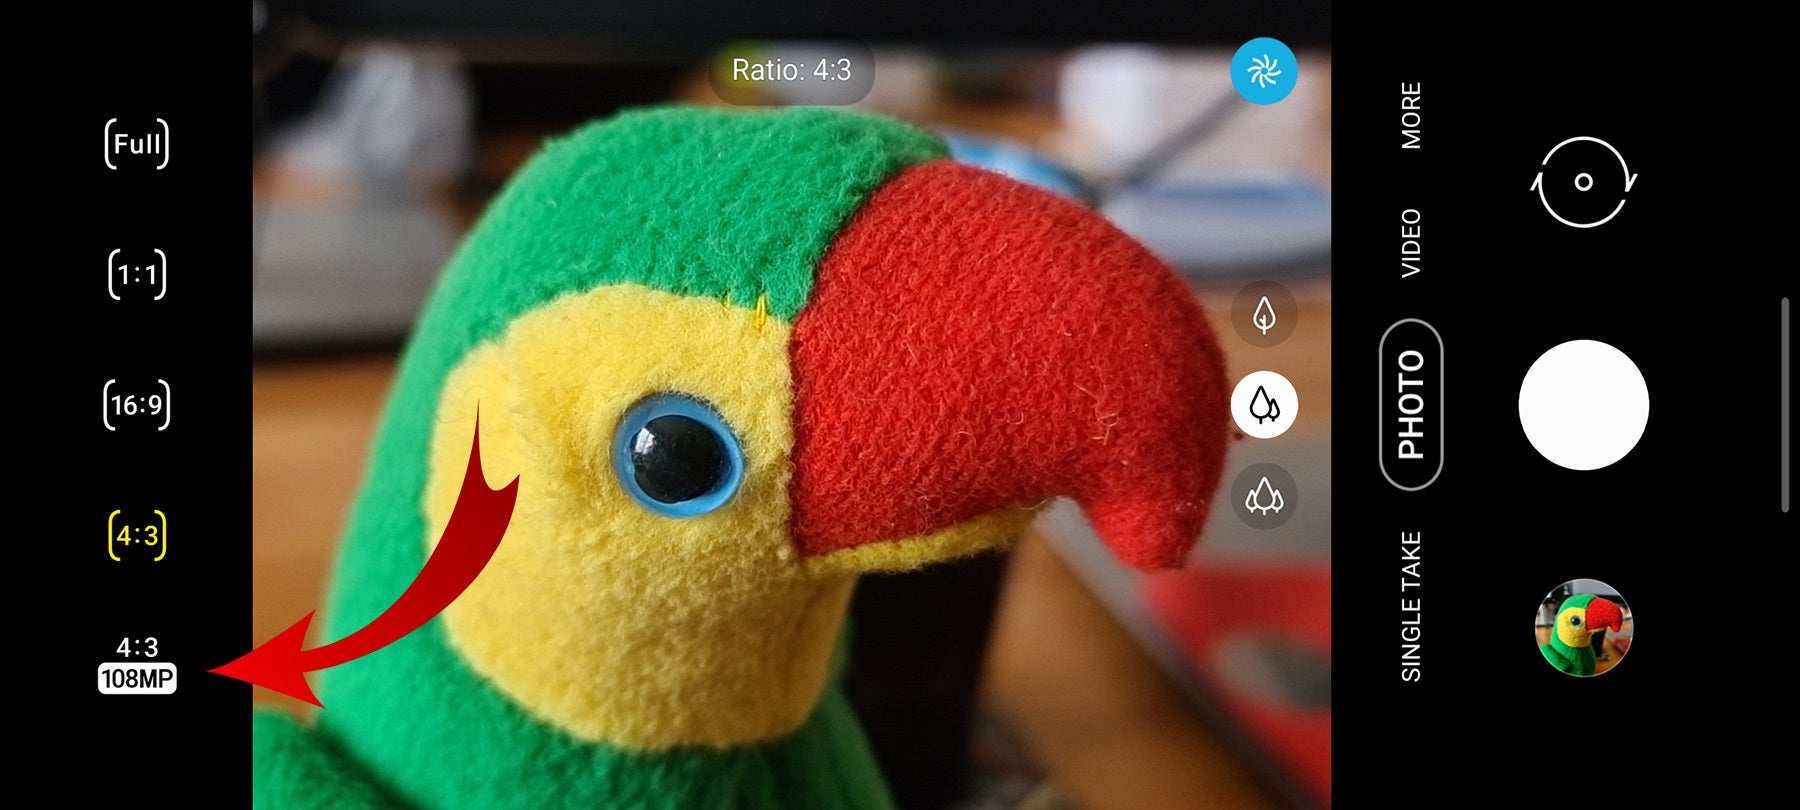
6. How to take a 108MP photo with the Galaxy S20 Ultra
The big deal about the Galaxy S20 Ultra is its main 108MP camera sensor. However, you don't take 108MP pictures by default - you have to manually enable this camera mode. To do that and take a 108MP photo, simply tap on the aspect ratio icon at the top bar of the camera interface and choose the respective capture mode. Have in mind that 108MP take up significantly more space than regular images and you can't zoom in or out while in 108MP shooting mode.
7. How to take a 40MP selfie on the Galaxy S20 Ultra
Aside from a brawny 108MP main sensor, the Samsung Galaxy S20 Ultra also has an impressive 40MP selfie camera, which is capable of producing images with exceptional detail. It's true that selfies are often better when they show as little detail and imperfections as possible, but technology is moving forwards and it's not really worth it to be left behind, so better get along with the times. To take a 40MP selfie, hit the aspect ratio button on the top bar of the camera interface, then select the respective capture mode.
Take 40MP selfies on the Galaxy S20 Ultra
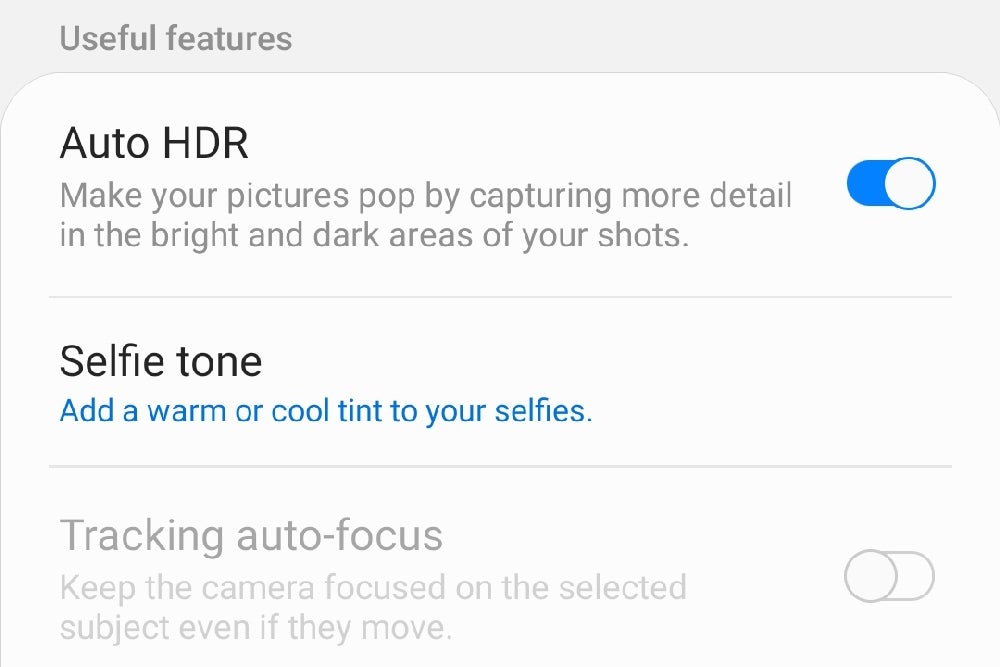
8. Selfie tone
Selfie tone is a neat new hidden feature that lets you tint the overall tone of your selfies with a cool, warm, or a neutral tint. Which one you like the most ultimately falls down to you though the overall change is quite subtle. What's more, the same effect can be achieved with any third-party image-editing app as well. Still, it's nice of Samsung to include this feature.
To change Selfie Tone, open your selfie camera, then scroll down to Useful features, where you'll find the Selfie tone menu.
Galaxy S20 selfie tone
9. Create GIFs with a swipe
First of all, it's pronounced with a hard "G" (just like gift, but without the "T"), and secondly, all new S20 models allow you to quickly create a GIF by simply flicking down the shutter button. The resulting GIF is pretty low-quality one, but hey, more power to you!
To enable this feature, open your camera app settings, then look for "Swipe Shutter button to edge to" under the Pictures submenu. By default, it should be set to "'Take burst shot", but tapping it would led you change it to "Create GIF".
To enable HEVC video, go to camera settings and then hit Advanced Recording options under Pictures. Flip the HEVC toggle and you're good to go, but have in mind that you might run into compatibility issues
How to enable HEVC video recording on the Galaxy S20
11. Rearrange camera modes
Feeling like changing up the camera interface layout? Samsung's got your back! Simply swipe all the way left until you reach the More submenu where all non-essential camera modes are situated and hit the pencil icon. After that, you can simply drag and rearrange the different modes that appear as large icons down where they'd be more easily accessible.
How to rearrange the camera modes on the Galaxy S20
Six-month unlimited plan is now 57% off
$90
$210
$120 off (57%)
Mint Mobile is now allowing you to get whichever plan you like for either three, six, or 12 months for just $15/mo. If you go for the six-month unlimited service, for instance, you'll now have to pay just $90 upfront instead of $210.
Peter is a skilled writer with over 13 years of experience at PhoneArena. He has published nearly 300 phone reviews and comparisons. This vast experience helps him navigate the mobile tech landscape with ease. He enjoys everything Android but relies on a MacBook Pro daily.
A discussion is a place, where people can voice their opinion, no matter if it
is positive, neutral or negative. However, when posting, one must stay true to the topic, and not just share some
random thoughts, which are not directly related to the matter.
Things that are NOT allowed:
Off-topic talk - you must stick to the subject of discussion
Offensive, hate speech - if you want to say something, say it politely
Spam/Advertisements - these posts are deleted
Multiple accounts - one person can have only one account
Impersonations and offensive nicknames - these accounts get banned
To help keep our community safe and free from spam, we apply temporary limits to newly created accounts:
New accounts created within the last 24 hours may experience restrictions on how frequently they can
post or comment.
These limits are in place as a precaution and will automatically lift.
Moderation is done by humans. We try to be as objective as possible and moderate with zero bias. If you think a
post should be moderated - please, report it.
Have a question about the rules or why you have been moderated/limited/banned? Please,
contact us.


Things that are NOT allowed:
To help keep our community safe and free from spam, we apply temporary limits to newly created accounts: