Here's a cheap and easy way to make your own capacitive stylus

“If you see a stylus, they blew it.” This famous quote belongs to none other but Steve Jobs who was adamantly opposed to styli on tablets. And we can’t agree more - if a tablet or a phone requires you to use a stylus with it, this limits the user interaction a great deal. Yet there’s another scenario - where the stylus is not absolutely necessary but rather augments the user experience. For drawing for example. That’s one reason why you might want to get a stylus.
But what is a capacitive stylus? Usually it’s not a super-sophisticated piece of technology. In order for a stylus to work with capacitive displays it needs to transport the static electricity of your finger to the display. There’s plenty of cheap options out there, so keep on reading and get ready as today we’ll teach you how to make a capacitive stylus in just a couple of minutes and spending almost no money at all on it.
One disclaimer. This is more of a project for the fun-loving experimenters rather than for professionals or artists who’d be better off with a more solid stylus. But it will save you the long time waiting for an online order and save you some money if you just want to play around.
So with no further ado, here’s what you’ll need to make your own stylus:
- a pen
- a sponge (Scotch Brite sponge to be sure it’ll work)
- craft wire
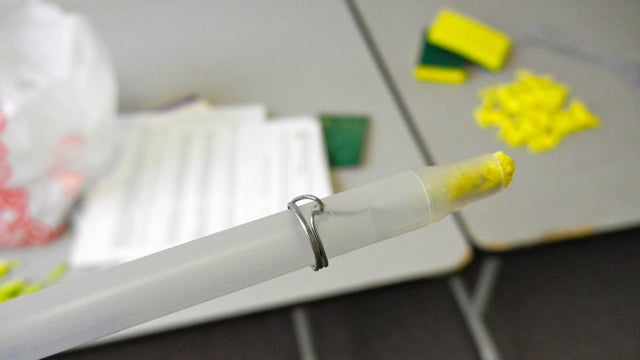
1. Take the ink out of the pen. Drill a hole near the end of the pen.
2. Cut the sponge in small wedges. Place a wedge at the tip of the pen.
3. Cut around 6-inches of wire. Fold a part of it at 90 degrees. Insert it into the hole near the end of the pen. Make sure it touches the wedge.
4. Wrap the rest of the wire around the pen.
5. To use the stylus, make sure your fingers/hand touches the wire that’s wrapped around the pen. And voila, ready!source: iLearnTechnology
Follow us on Google News










Things that are NOT allowed:
To help keep our community safe and free from spam, we apply temporary limits to newly created accounts: