We may earn a commission if you make a purchase from the links on this page.
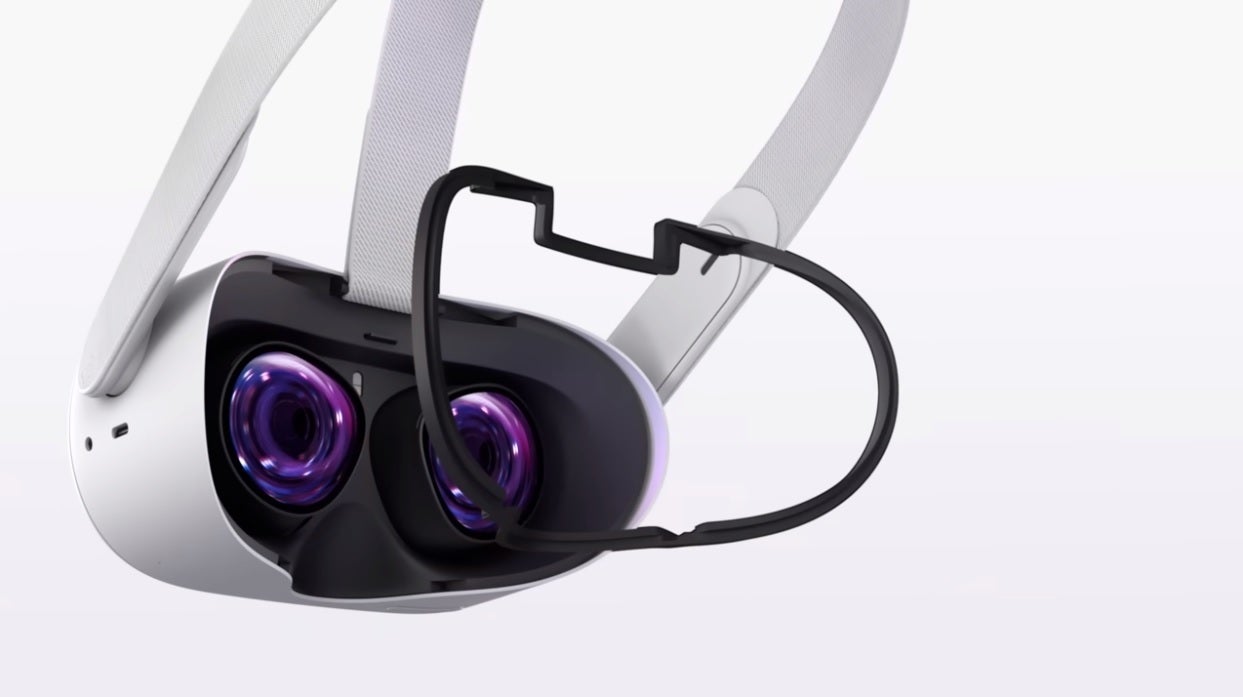
Are you planning to get, or did you already get the most popular VR headset in the world? The Meta Quest 2 (formerly Oculus Quest 2) is nearly 3 years old, and about to be succeeded by a Quest 3, but it remains a top seller in the world of consumer virtual reality.
Whether you plan to get it, or you already have it – you may be interested in what your first steps should be – and we're here to help! Let's get into how to set up your Quest 2 for the first time in just a few easy steps.
Meta Quest 2 (256GB) + 2 GAMES, SAVE $64 NOW
$64 off (13%)
This deal gets you a new Quest 2 with twice the base storage, and two games - GOLF+ and Space Pirate Trainer DX - with a clean discount.
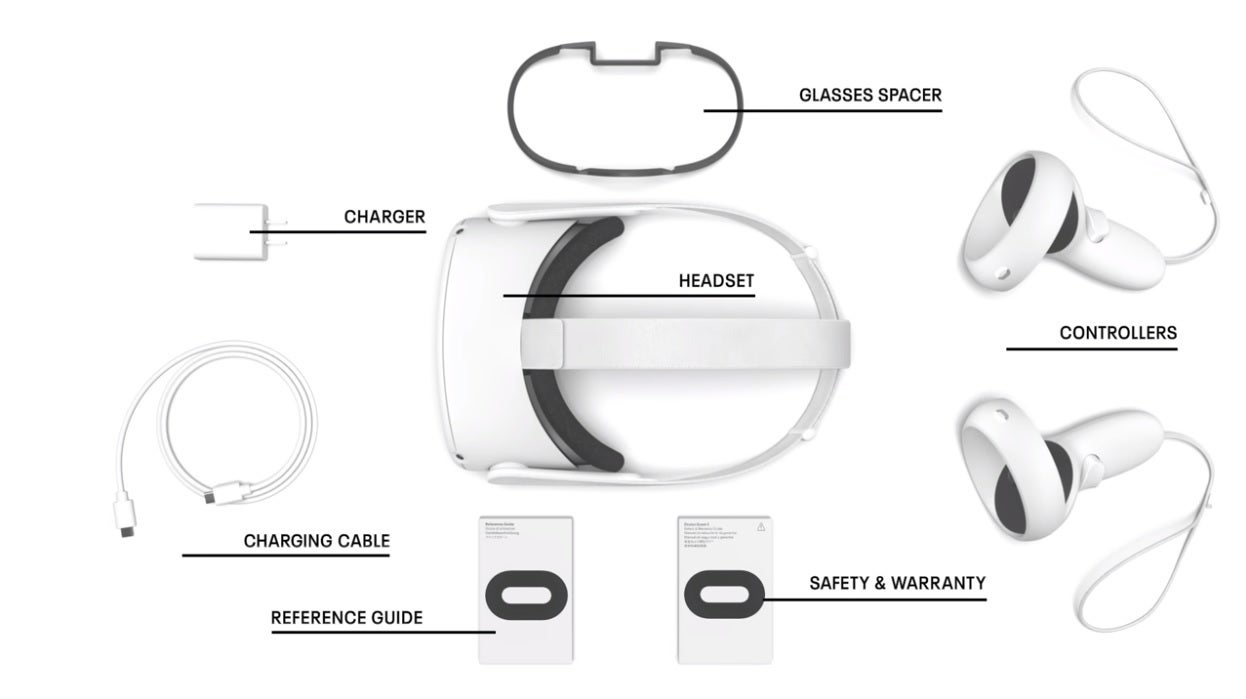
Everything a new Quest 2 comes with out of the box
Fear not, the Quest 2 is arguably the easiest VR headset to set up, so this should be quick and easy.
We'll assume you've unpacked your new Quest 2, and now have it ready, along with its two controllers and its charging cable.
Step 1: Charge your new headset, because its battery may be at 0%
The Quest 2 was first introduced in late 2020, so there's a good chance yours was sitting in a warehouse somewhere for a couple of years before it finally reached you – its new owner – so its battery is likely to need charging.
So the first step you should take is to plug the charging cord that came with your Quest 2 into it, and into a power source. The Quest 2 has a charging port on the left side – it's the rounded-rectangle one (the other port is a headphone jack).
Recommended For You
The Quest 2 may need a minute before you can fire it up, or it may be able to boot as soon as you do that, and you can continue the setup process while it's charging. But first…
Step 2: Pull the battery tabs out of the controllers
If your Quest 2 is new, it would've arrived wrapped in plastic (around the headset, over the lenses, etc.) – make sure to remove all that.
You'll also notice two pieces of cardboard sticking out from under each controller. The Quest 2's two controllers are powered by a single AA battery each, and in order for them to make contact with the controllers and power them up for the first time – pull those cardboard pieces out.
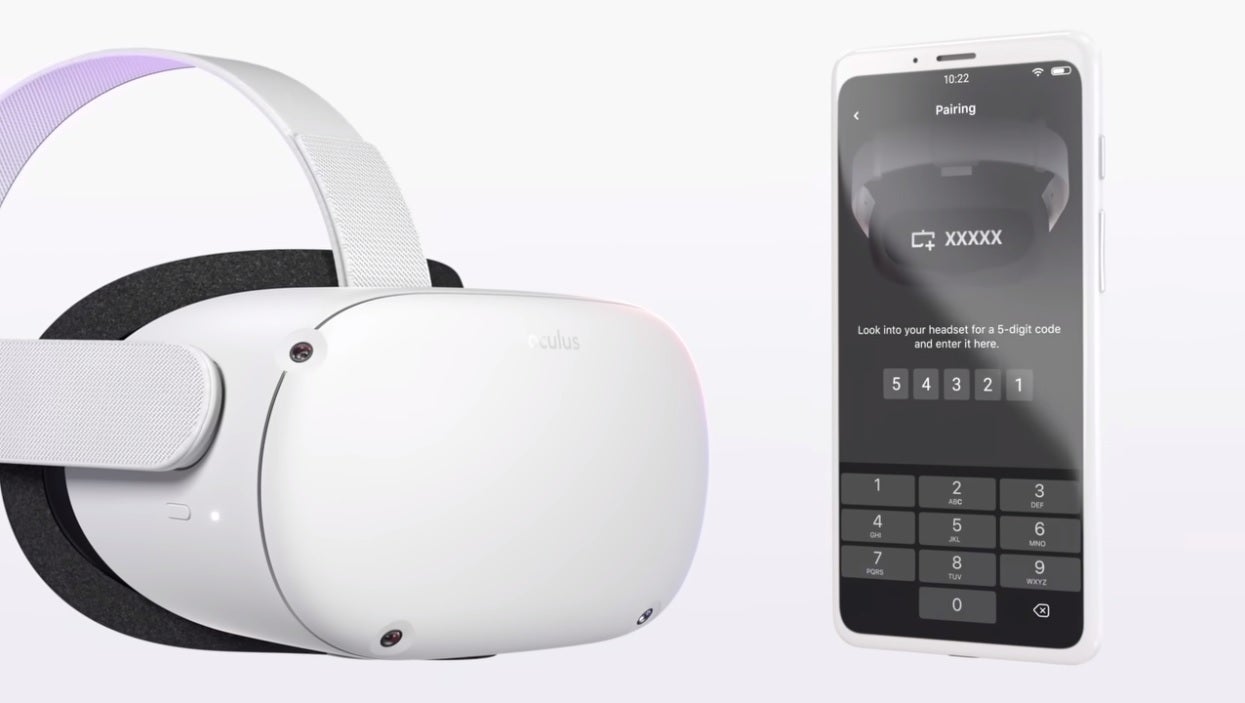
Step 3: Download the Meta Quest mobile app on your phone
You'll need to create a Meta account if you don't have one, and the app will guide you through doing that. So while your Quest 2 is charging, open the app and set up your account.
The app will ask you to log in, or create an account with Meta, and, in order for you to start buying games for your Quest 2 – you'll want to add your credit card details too. Keep in mind that demo games, as well as a few free games can be found in the Oculus store, so if you don't want to rush into that – you don't have to.
Step 4: Power on your Quest 2 and watch the introductory and safety videos
Notice the Quest 2's power button, located on the right of the headset, next to an LED light. Press and hold it to power on your headset (if it's not on already), and put it on.
You'll then need to watch a few unskippable, but important videos that'll teach you visually about your new headset, and how to use it safely. Follow the instructions and safety tips carefully.
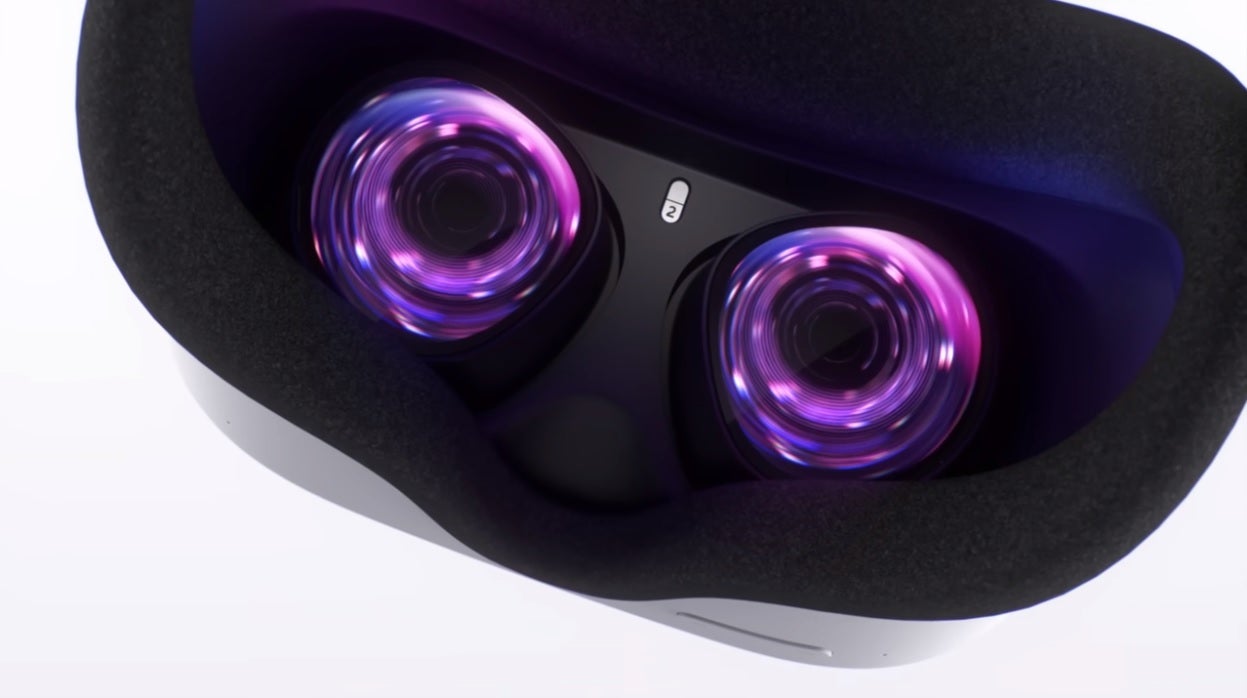
Step 5: Adjust your Quest 2's lenses so your eyes can focus easily
If you haven't already, be sure to make the Quest 2 comfortable for yourself. First and foremost, you'll want to adjust its lenses. They are the little "screens" that rest right in front of your eyes when you have the headset on.
You can gently push them together or apart, in order to snap them into three different IPD positions. IPD stands for interpupillary distance, and it means the distance between your eyes. Make sure the headset's lenses are at a distance from each other that closely matches the distance between your eyes, so you won't have any issues focusing while in VR.
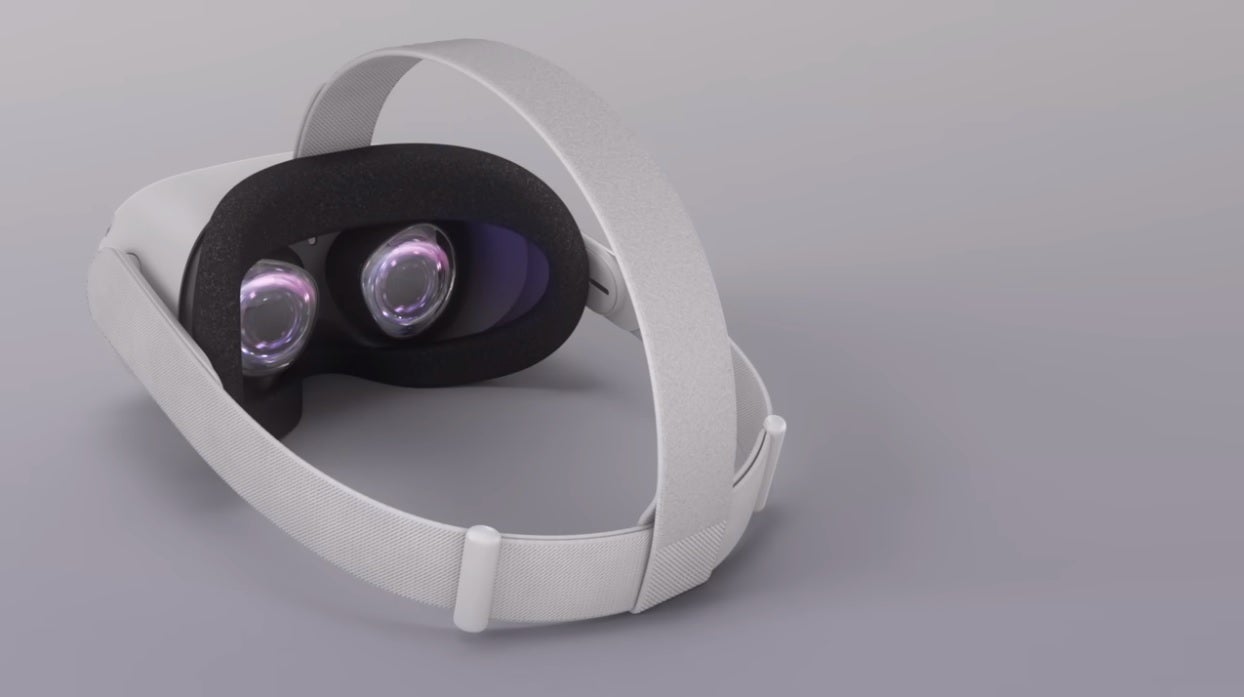
Step 6: Adjust your Quest 2's head strap so you can wear it comfortably
It's time to make the Quest 2's head strap fit you comfortably. These are Meta's exact instructions on how to do that for the first time:
To loosen the side straps, move the sliders toward the top strap. To tighten the side straps, move the sliders away from the top strap.
After you move the sliders, re-center the top strap between the sliders so that the two sides are equal, and the top strap is centered on your head when you put the headset on.
Keep in mind, you'll need to remove the headset from your head to re-adjust the side straps with the sliders.
The head strap should hold the headset securely on your head, without being overly-tight or letting it hang lower than your eye level.
Optional: Inset the glasses spacer accessory if you wear glasses
If you need to wear glasses while using your VR headset, the Quest 2 does come with a plastic piece Meta calls a glasses spacer for that exact purpose – to add extra space between the lenses and your eyes, enough to fit glasses comfortably.
Before installing the glasses spacer, make sure the width and height of your frames are the following sizes:
Width: 142mm (or less)
Height: 50mm (or less)
To install the spacer:
Gently remove the facial interface foam from your headset.
Take the glasses spacer that came with your headset, and attach it to your headset by pressing it into place where your facial interface foam just was.
Re-insert the facial interface foam back into place on top of the glasses spacer.
Now there should be enough space between the Quest 2's lenses and your eyes for you to comfortably wear your glasses while using it.
Optional: If you plan on playing PCVR games, get your PC ready for your Quest 2
The Quest 2 is a fully standalone VR headset, so you don't need a computer at all. However, it does have the option to connect to a gaming PC running Windows 10 or 11, in order for you to use it to play PCVR games.
In case you plan on doing that, there are a few things you'll need to do on your PC, in order to prepare it for use with the Quest 2.
Mainly, you'll need to download the Oculus App for Windows here. You'll find it under "Air Link and Link Cable" – press "DOWNLOAD SOFTWARE" and a file called OculusSetup.exe will be downloaded. Launch and install it on your computer.
You can then use that app to pair your computer with your Quest 2, and use AirLink to play PCVR games completely wirelessly (as opposed to having to connect the Quest 2 to your PC with a cable).
To launch AirLink, put on your headset, and click on the battery indicator (it's to the right of the taskbar) to open Quick Settings. Then click "Quest Link" on the right, and enable the "Use AirLink" option.
If you've installed and launched the Oculus App on your PC, your PC should appear below, ready to be connected to.
Time to play some VR games! Check those out
Now that you're good and ready to fire up some VR games on your Quest 2, you may want to check out our best Oculus 2 games in 2023 list, and get yourself some of the most must-have ones!
And if you're interested in learning more about your new VR headset in general, you may find our Quest 2 long-term review informative.
Have fun in virtual reality!
Frequently asked questions
Do I need a Facebook account to use the Oculus Quest 2?
Yes, you'll need a Facebook (or Meta) account to set up and use your Quest 2. You'll be asked to log in or register as soon as you start.
How do I turn on my Oculus Quest 2 for the first time?
"How do I turn on my Oculus Quest 2?" – seems like a simple question, but it's completely understandable if you need help with that, as the Quest 2 is so minimalist in its design, that it can be a bit hard to find the power key. And even if you do find it, the headset may have no battery, so it may not start anyway.
First, you'll want to make sure your Quest 2 has battery life. Plug it into an outlet, give it a few minutes, and then press the power button located on the right side of the Quest 2. There's an LED light right next to it, which should be green if it's plugged in.
Hold the power button until you see the Quest 2's lenses lighting up, which means the screen is now active, and the headset is powering on.
How long does it take to charge the Quest 2's battery for the first time?
The Quest 2 isn't exactly quick to charge, and it's likely to be at 0% battery power the first time you try to start it. It could take anywhere between an hour and two for it to fully change to 100%.
However, you can start using it while it's charging if you can't wait that long – as long as the battery isn't completely drained. If that's the case, you'll need to give it a few minutes before it will power on at all.
How do I pair my Oculus Quest 2 controllers for the first time?
Make sure to pull these tabs off, and the controllers will power on for the first time, and automatically pair with your headset during the initial set up process.
How do I cast my Oculus Quest 2 to a TV or phone?
Letting others spectate on your virtual reality experience is quite easy on the Quest 2.
To cast your Quest 2 to a TV, open a game, press the Oculus button on the right controller (it has a little elongated O-like icon), and a popup menu will appear.
The third button from the left is the Cast button, from which you can easily cast your Quest 2 to any supported smart TV that's connected to the same WiFi network.
Open the Oculus app on your phone, then navigate to Cast, and you should see your paired Quest 2 in there.
Six-month unlimited plan is now 57% off
$90
$210
$120 off (57%)
Mint Mobile is now allowing you to get whichever plan you like for either three, six, or 12 months for just $15/mo. If you go for the six-month unlimited service, for instance, you'll now have to pay just $90 upfront instead of $210.
Rado is a former tech writer for PhoneArena. His tech journey began with MP3 players and has evolved to include tinkering with Android tablets and iPads, even running Linux and Windows 95 on them. Beyond tech, Rado is a published author, music producer, and PC game developer. His professional work on iPads, from producing songs to editing videos, showcases his belief in their capabilities. Rado looks forward to the future of mobile tech, particularly in augmented reality and multi-screen smartphones.
COMMENTS (0)
COMMENTS (0)
All comments need to comply with our
Community Guidelines
PhoneArena Community Rules
A discussion is a place, where people can voice their opinion, no matter if it
is positive, neutral or negative. However, when posting, one must stay true to the topic, and not just share some
random thoughts, which are not directly related to the matter.
Things that are NOT allowed:
Off-topic talk - you must stick to the subject of discussion
Offensive, hate speech - if you want to say something, say it politely
Spam/Advertisements - these posts are deleted
Multiple accounts - one person can have only one account
Impersonations and offensive nicknames - these accounts get banned
To help keep our community safe and free from spam, we apply temporary limits to newly created accounts:
New accounts created within the last 24 hours may experience restrictions on how frequently they can
post or comment.
These limits are in place as a precaution and will automatically lift.
Moderation is done by humans. We try to be as objective as possible and moderate with zero bias. If you think a
post should be moderated - please, report it.
Have a question about the rules or why you have been moderated/limited/banned? Please,
contact us.


![T-Mobile is down for many users across the nation right now [UPDATED]](https://m-cdn.phonearena.com/images/article/181747-wide-two_350/T-Mobile-is-down-for-many-users-across-the-nation-right-now-UPDATED.webp)


Things that are NOT allowed:
To help keep our community safe and free from spam, we apply temporary limits to newly created accounts: