Every product we review or recommend is thoroughly tested by our in-house experts in real-world conditions, following our
review methodology
and
ethics statement
to ensure honest, independent, and data-driven results.
Introduction:
Jabra, being a company, which specializes in development and elaboration of mobile phone headsets, has always demonstrated devices that capture the attention of broad user circles.
Today we are going to make a more detailed presentation of Jabra BT350. This model is identical in shape and size with two other „representatives“ of the manufacturer's range of products, namely BT150 and BT160, and belongs to the same „entry level“ class as well.
In case you decide to stay with us, you will find out what the actual difference between them is: is it only color design that marks the 350 off, or there is something more intriguing to it.
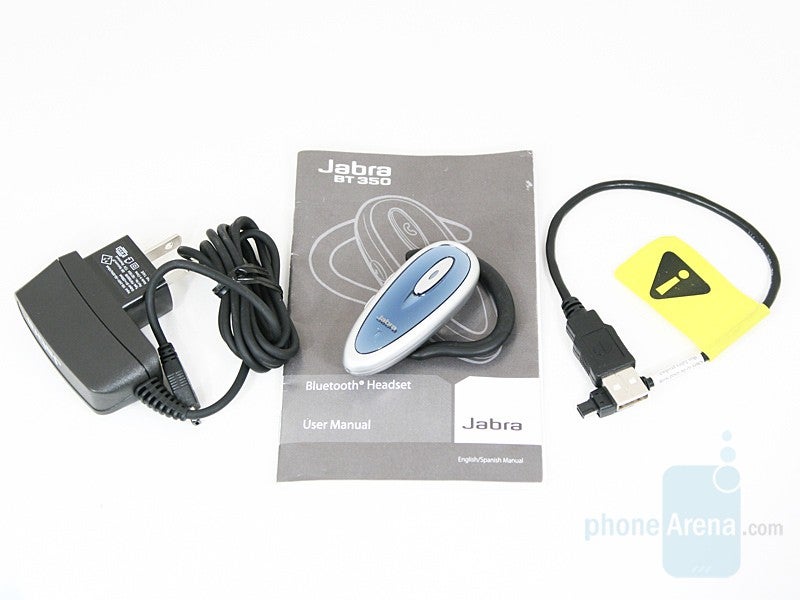
Included in the kit you'll find the following items:
Jabra BT350 Bluetooth Headset
User Manual
AC power charger
USB charging cable.
We cannot miss the presence of an „extra“ one - the USB charging cable – in addition to the traditional items (User Manual and power charger).
Design:
Jabra BT350 features a harmonious combination of two colors: blue and silver. The front panel is made of glossy blue plastic and the rest of the headset is of matte silver. The rubber-coated earhook is black and it fastens to the headset – secure and with high-quality concept.
We mentioned above that the shape and size of BT350 match these of Jabra BT150/BT160, namely 63 x 26 x 12 mm / 2.5 x 1 x 0.5 inch. As for the unit’s weight, it has grown by 2 grams to reach 18.
The device is designed in such a way that it is possible to be attached on either ear. All you need to do is to raise and turn the earhook to180 degrees to change its position. After several turns, we noticed that the attaching mechanism of the earhook loosened and it started to turn easier than before.
Not only the attaching mechanism of the earhook, but also the speaker is located at the back of the headset. It protrudes a bit in order to be closer to your auditory canal so that you can hear better. The microphone is located at the bottom of the device and its position is as close as possible to your mouth. The charging connector is located opposite the microphone and it would have been a nice to have a removable cove to protect it from dirt.
There are 3 control buttons: answer/end button and volume up and down buttons and you can activate different functions of the device by combinations of this buttons.
On the front part of the headset is located the answer/end button, which has an oblong shape and can be pressed easily even with the soft part of your finger.
The volume up and down buttons are placed on one side of the device and their location can be felt very well because they are raised from the flat surface of the device. They also have an oblong shape and the signs “+” and “-” are carved on them and if your fingers are sensitive enough, you can even feel which one is the volume up and which one is the volume down button. All buttons have a very good tactile feedback and because of that they are really easy and comfortable to use.
The LED indicator is located in the middle of the answer/end button and it informs you for the headset status and depending on that it lights in blue, red or green color.
Functionallity:
Setting the headphone in pairing mode is done by simultaneously pressing the answer/end button and volume up while the unit is off, until a vibration followed by switching of a solid blue light on is felt. The subsequent procedure is the standard one and so is the required code – 0000.
The full potential of the headset will enable you to do the following: answer/end/reject calls, voice dialing, last number redialing, call waiting, put call on hold, mute or use call vibrate alert. The user should bear in mind that the functions of the headset depend on the type and the capabilities of the phone it has been paired to.
The built-in vibration is an interesting innovation, allowing the user to realize that there is an incoming call, even when the headset is not being worn on the ear.
Performance:
Besides the attractive appearance, a headset should present itself well in communication. When you use BT350 to talk, you can hear the other side of the line hollow and unclear and sometimes this can be the reason that you don not understand what is said at all. The situation on the other end of the lane is identical.
Talk Time
Range
Just to check the range of the good quality connection that you can count on, during a phone call, we did a test and the device showed the result of 26 meters (85.3 feet) – a distance, similar to the one achieved by Nokia’s BH-700 and BH-801.
According to the official specifications of the manufacturer, you should be able to use Jabra BT350 up to 7 hours of talk time and up to 220 hours of standby time. We tested the device by means of a continuous phone call and sound volume set on maximum – after the test it stood up to 8 hours. This is a very good result and we are happy that the real results are better than the official ones. By this parameter, the headset’s performance exceeds that of BT150 – a unit, which endures 6 hours and 10 minutes, and has been included in this class as well.
Comfort:
Attaching the headset is easy, even if you have never used a Bluetooth headset before you will hardly have any problems. You have to slide the earhook behind your ear and then to adjust the headset to the most comfortable position for you. The hook is soft and flexible and that enables you to “shape” it into a form that will best fit to your ear and will be comfortable for you.
The stable attaching of the device, to a great extend, depends on the type and size of your ear. If you have a smaller ear, the headset is loose and when you bend down or make abrupt movements it sways and it could even fall down. If your ear is bigger, then you can put the back part of the headset in it, right on the entrance curve of the auditory canal. The headset is a little bit more stable in this way but still its stability greatly depends on your movements. We find that in both cases the attaching mechanism of BT350 is rather unstable and this is a serious reason for you to try the device very carefully if you like it and want to buy it.
We did not feel any discomfort after the extended wear of Jabra BT350 (for about 2-3 hours) and we can say that it is a very comfortable and pleasant device to wear.
Conclusion:
Jabra has made some changes in BT350 compared to BT150 and we consider the former to be an improved version. Vibration, several extra functions, and an USB charging cable have been added, as well as an LED indicator that features three different colors (blue, red, and green).
However, sound quality during conversation remains as inadequate as before, so at times words of both collocutors are likely to be rendered incomprehensible. In our view, this is a serious drawback.
Still, if you have to make your choice between BT150 and BT350, the latter will be an undisputed favorite for the simple reason of offering more functions at the same price.
Pros
Comfortable during extended wear
Comfortable control buttons
Vibration
Cons
Sometimes the voices are unintelligible during a phone call
A discussion is a place, where people can voice their opinion, no matter if it
is positive, neutral or negative. However, when posting, one must stay true to the topic, and not just share some
random thoughts, which are not directly related to the matter.
Things that are NOT allowed:
Off-topic talk - you must stick to the subject of discussion
Offensive, hate speech - if you want to say something, say it politely
Spam/Advertisements - these posts are deleted
Multiple accounts - one person can have only one account
Impersonations and offensive nicknames - these accounts get banned
To help keep our community safe and free from spam, we apply temporary limits to newly created accounts:
New accounts created within the last 24 hours may experience restrictions on how frequently they can
post or comment.
These limits are in place as a precaution and will automatically lift.
Moderation is done by humans. We try to be as objective as possible and moderate with zero bias. If you think a
post should be moderated - please, report it.
Have a question about the rules or why you have been moderated/limited/banned? Please,
contact us.


Things that are NOT allowed:
To help keep our community safe and free from spam, we apply temporary limits to newly created accounts: