Switching from iPhone to Android: tips and tricks you should know
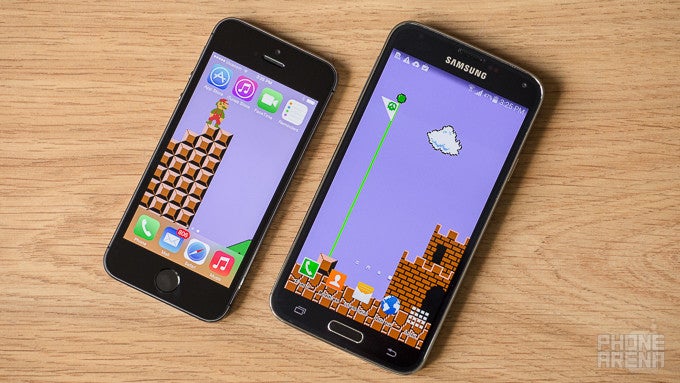
Hey there! We have a brand new guide on switching from iPhone to Android – and taking all your data with you. Refer to that instead for moving files from iPhone to an Android phone.
Apple's iPhone is an amazing smartphone. In fact, we won't be wrong if we say that it is, and always has been, among the best phones around, as millions of loyal iPhone owners would agree. Yet nonetheless, a fraction of iPhone users end up switching to Android sooner or later. Why? Well, for a number of reasons. Some could be drawn by the larger screen on phones like the LG G3 or by the awesome camera on the Galaxy S5, while others could be tempted by the water-resistant properties of the Sony Xperia Z2 or the outstanding design of the HTC One (M8). Either way, migrating from an iPhone to an Android smartphone can be a bumpy ride, especially if you want to move all of your personal data over to your new device. But with the help of our in-depth guide, the switching process should be less of a hassle.
First and foremost, you have to set up your brand new Android phone. During setup, you will be asked whether you have a Google account so log in if you have one already. You do if you're on Gmail – just use your email address as username and sign in with your password. If you don't have an account yet, go ahead and make one.
Having a Google account is a must for an Android user as that's what is needed to download apps, games, books, music, and movies from the Play Store. Also, the account provides access to Google's services and keeps your personal data stored safely in the cloud. It gets you free cloud storage on Google Drive, it lets you sync bookmarks in Chrome, it allows you to upload videos on YouTube, and much more. All in all, having a Google account is pretty neat. (Tip: follow this link if you'd like to make a new Google account without signing up for a Gmail address. You may use an existing email address instead.)
With that out of the way, let's get down to business.
Let an app help you out
Perhaps the easiest way of moving your data is by using an app made for the purpose, and some of the popular smartphone makers offer such apps for their devices. Take Samsung for example – with its free Smart Switch application, you can move contacts, pictures, music, and calendar entries from an iPhone to a Galaxy smartphone. The app can even transfer your wallpaper and match all of your iPhone apps that have Android variants. The HTC Sync Manager works in a similar fashion and supports dozens of recent HTC Android smartphones. Have a Sony Xperia smartphone? No worries. Sony has its PC Companion for Windows users and Bridge for Mac owners. And for Motorola owners, there's the Migrate tool, which is compatible with the Moto X, Moto G, Moto E, and some recent Droid models.
Note that some of these applications may not work unless your information is stored in iCloud. If that's the case, Go to Settings > iCloud on your iPhone and make sure that your personal data is in sync with Apple's cloud service. Others may need an unencrypted iTunes back-up file stored on a computer in order to read your information. Either way, make a fresh back-up of your data, just to be sure that all of it will be copied over.
Download links:
The do-it-yourself method: contacts
Don't worry if the above method does not work, or if there's no data transfer app made for your Android smartphone's make and model. There is more than one way of moving your personal stuff from an iPhone to an Android phone, and in the following paragraphs, we're going to cover the ones we'd recommend.
First, let's transfer those contacts of yours. A fairly easy way of doing this is with the help of an iPhone app called My Contacts Backup. It works by generating a vCard file (.VCF) containing all of your contact information and exporting this file to an email account. Get the app from the App Store (link below), open it, and hit that big green "Backup" button. This will compile the said vCard file, which you're going to email to yourself. The next step is to open the vCard on your new phone – it will be attached to the email you just sent. And voilà! Your contacts will be automatically imported into your Google account.
- Download: My Contacts Backup for iOS (Free for up to 500 contacts)
If everything else fails, you may still export your iPhone contacts and add them to your Google account manually. To do this, open icloud.com in your computer's internet browser and log in using your iCloud username and password. You'll be taken to a page where you can access your iCloud data, including your contact details. From the Contacts panel, select the contacts that you want to transfer. You may use CTRL and a left mouse button click to select multiple items (Command + mouse button on Mac), or CTRL and A (Command + A on Mac) to select all contacts. Then click on the gear button in the lower left-hand corner and choose "Export vCard..." from the list of options. Your contacts will be saved as a single .VCF file, most likely in your browser's default downloads folder. Mac users may use the Contacts application to export a vCard file with their contacts information.
Alright! Now that your contacts are exported, it is time to import them into your Google account. You may send them to your phone as an email attachment, or you may import them by opening contacts.google.com in your computer's internet browser. Should you choose to follow the latter method, go to the said address and log in (if asked to do so) with the Google account in use on your Android smartphone. From the "More" drop-down menu, choose "Import..." and open the vCard file that you just exported. Within a few moments, your contacts should appear in your Android phone's contacts list. If they don't, make sure that the phone is connected to the internet and that syncing is enabled from its settings menu.
Transferring your emails and text messages (SMS)
Accessing your email account on your brand new Android smartphone is a straightforward process. If you're a Gmail user, your conversations should have already synchronized with the pre-loaded Gmail application, and if you're subscribed to a different email service provider, simply log in from the app labeled as Email. The latter is compatible with most email service providers and it even works with Apple's @icloud.com email accounts. If for some reason your account can't be set up automatically, however, you may have to set it up manually. Contact your email service provider if that's the case.
Transferring text messages from an iPhone to an Android phone is a lot trickier, but totally possible. One of your options is to try finding a third-party smartphone manager compatible with both Android smartphones and the iPhone. Unfortunately, there's no guarantee that the manager would be able to transfer the messages, even if it is a paid one.
But worry not as there's an alternative method – you may extract your iPhone's text message database from an iTunes back-up file and import it into your Android phone. Trust us, it isn't as complicated as it sounds, although it might take some time and patience. The first thing you want to do is to connect your iPhone to your computer and make a new, unencrypted back-up. Once the back-up process is complete, search your computer for a file named 3d0d7e5fb2ce288813306e4d4636395e047a3d28. If the search yields multiple files with the same name, find the most recent one. Now you have to copy the file to your Android smartphone's internal memory – when connected over USB, an Android phone appears as a USB drive so you can simply paste the file in there. You may now disconnect the Android phone from your computer.
The next step is to download a couple of Android apps from the Play Store – iSMS2Droid and SMS Backup & Restore. You'll need the former to convert the iPhone SMS database into an XML file, and the latter can import the XML file into your messaging application. Once you've downloaded both apps, start iSMS2Droid and tap "Select iPhone SMS Database". Find the file you just copied and let the app do its thing. When the conversion is complete, press "Start SMS Backup & Restore". Doing so will launch the second app. Now choose "Restore" and select the SMS database – a file named "iSMS2droid.xml" should be already highlighted. Hit OK and agree to make the app your default SMS application. Then hit OK once again and pick whether you want to restore all messages or only those past a certain date. After the app is done restoring your texts, make sure you open the phone's stock SMS application and make it default once again. Your old texts should be now listed there.
If your phone came with its own messaging application, but you have Hangouts enabled as your default SMS app, you may have to disable the feature by going to Hangouts > Settings > SMS for the above hack to work.
Download links:
- iSMS2Droid (Use the web version if app crashes)
- SMS Back-up and Restore
Transferring calendar events and Safari bookmarks
There's a fairly easy way of moving all your calendar entries from iCloud to your Google account, although you'll need a computer for it to work. Start by logging in at icloud.com from your internet browser and then open the Calendar panel. You'll see a list of all your calendars on the left. Next to the name of each one, there's a button for sharing the calendar – press it and make the calendar you want to export public. Doing so generates a unique web address, which you must copy and paste into your web browser's address bar. Don't open the address yet! Before you do that, change the beginning of the line from "webcal://" to "http://". Now press enter. This will download a file to your computer containing all items in your iCloud calendar. Rename this file to anything as long as you add the .ICS extension to it – iphone-cal.ics, for example. You may now disable the public sharing of your iCloud calendar.
Is your Bookmarks list in Safari full of links that you wish to have on your Android phone? Then here's how to sync them with Chrome on Android. What you need is a PC running Chrome, a PC application called iCloud Control Panel, and the iCloud Bookmarks browser extension for Chrome. We're assuming that your Android phone has Chrome installed already, that you're signed into Chrome with your Google account, and that your iPhone bookmarks are in sync with iCloud.
Start by launching the iCloud Control Panel and signing in with your iCloud username and password. You'll be given the option to synchronize the computer's bookmarks with iCloud. The list of compatible browsers includes Chrome, Firefox, and Internet Explorer, but you only need to make sure that Chrome is enabled. Now apply the changes and let the iCloud Bookmarks Chrome extension do its thing. In a few moments, your iCloud bookmarks will be merged with your Chrome bookmarks and will become available in Chrome on your Android phone.
Download links:
Transferring music, photos, and videos
As an iPhone user, you're probably managing your audio collection with iTunes. If that's the case, there are several easy ways of moving songs from your iTunes library to an Android phone. One of them is to use doubleTwist for Android – a free music player with lots of great features, including iTunes support. To use its iTunes syncing abilities, download the player app onto your Android phone and get the manager application for your computer. The latter will scan your computer and let you throw any iTunes music you want onto your Android handset. The data is transferred over USB, but you are free to go wireless with the purchase of the doubleTwist AirSync app.
While we're at it, the the doubleTwist desktop manager works for more than just music. It can also sync photos and videos with your Android device. Just go to the corresponding tab and tick the items that you'd like to have synchronized.
Download links:
Alternatively, you may move all your stuff the old-fashioned way – manually. For music, in particular, make a new folder and fill it with the songs you want transferred. You do that by dragging and dropping tracks from the iTunes library to the new folder. Then copy the contents of this new folder to your Android smartphone's Music folder. Of course, if you know exactly where music files are stored on your computer, just copy and paste them over. Similarly, videos and pictures that you have on your computer can be copied into their respective folders on your Android phone's storage.
Follow us on Google News



Things that are NOT allowed:
To help keep our community safe and free from spam, we apply temporary limits to newly created accounts: