
How to edit and enhance photos using Adobe Photoshop Lightroom
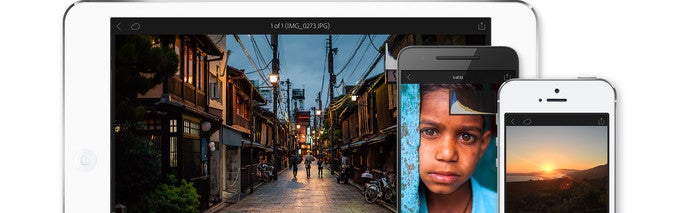
Introducing Adobe Photoshop Lightroom
There's this computer program you might have heard of – Adobe Photoshop. It is one of the most powerful image editing tools in existence, used by professionals, enthusiasts, and amateurs alike. Photoshop Lighthroom comes from the same bunch of fine folks at Adobe and is optimized for editing photos. While the software is most versatile on desktop, in this post we'll focus solely on how to use the free mobile version of it. You can get the app on both Android and iOS from the links below.
Screenshots used throughout the article are from the Android release of the app, version 2.0.2.
At this point you can import the photos you wish to edit into Lightroom. This is done from the big "Add Photos" button at the bottom, so go ahead and press it. In a few moments, your images will appear in the app's gallery.
We must mention that the app can shoot RAW images on some devices. To do so, you tap on the camera button in the right corner and choose the RAW option instead of JPEG. Since RAW images contain uncompressed image data, they are much more suitable for edits than regular JPEGS. They take up a lot more space, however.
Before we proceed, we'd like to clarify that Photoshop Lightroom has much more image editing tools that we can cover in a reasonably long post. That's why we'll go over only some of them – the ones you are most likely to need to turn mediocre images into catchy, like-worthy shots in no time. Once you master these, feel free to explore what else the app has to offer.
The basics: crop and rotate
Sometimes all that a photo needs is a little straightening and cropping. These simple tweaks can aid the viewer in focusing on the subject from the very instant they see your image. As we just said, Photoshop Lightroom has a lot more powerful tools in its arsenal, but we feel obliged to start by going over the basics. Of course, you're free to skip straight down to the next section if you're familiar with cropping and rotating photos.
Tip: you may rotate your phone horizontally when editing images.
Cropping and rotating in Photoshop Lightroom
Seeing in the dark: enhancing shadows
We've all taken photos that didn't look bright enough. For example, comrade Lenin looks fine in the photo below, but I am just a shadow reaching forth. Thankfully, we can fix that. There's a tool in Photoshop Lightroom allowing us to boost the dark areas of the image without affecting the bright ones. Here's how.
Tip: double-tapping on a setting or selection returns it to its original value.
Enhancing shadows in Photoshop Lightroom
Color fine-tuning: correcting white balance
Every once in a while, a camera might take a photo that appears too "cold" or too "warm". That is, it looks more blueish or reddish than natural. This might happen when the flash is used, when shooting outdoors on a cloudy day, when the sun's light changes color at sunset, or simply when the camera fails to set the balance on its own. Here's how inaccurate colors can be corrected.
Tip: When applying adjustments, tap on the image once to hide the tool selection bar at the bottom.
Adjusting white and color balance in Photoshop Lightroom
Seeing the clear picture: increasing contrast and clarity
There's a piece of glass covering the camera of most smartphones. Getting this piece of glass dirty has a negative – and quite obvious – effect on image quality, as you can see in the photo below. Detail that is lost can't be restored, but whatever is captured can be sharpened and enhanced to give the image a clearer look. Here's an example where we increased the Clarity and Contrast of a poorly captured photo.
Tip: tap the Export button in the upper right corner to save edited images to your gallery or to share them with your friends.
Increasing contrast and clarity in Photoshop Lightroom
Follow us on Google News


Things that are NOT allowed:
To help keep our community safe and free from spam, we apply temporary limits to newly created accounts: