How to make wallpapers optimized for Android

Sometimes you snap a photo or find an image on the web that you would love to display on your Android device, but it doesn’t fit quite right, it’s gigantic, or you just can’t get the right parts of the image to show on the center home screen. Today we’re going to talk about the anatomy of Android wallpapers so you can create your own that are a perfect fit for your device.
The first thing you will need is an image editor. Your computer may have come with one or you may already have an image editor of your choice ready to go. Some popular ones are Photoshop, Photoshop Elements, and Paint Shop Pro. There are also a handful of free editors that are wonderful and will work great for making Android wallpapers. A few you can check out are GIMP (Linux, Windows, OS X), Photoscape (Windows), Seashore (OS X), and, if you don’t want to install anything, Pixlr is completely web based.
Find your device's resolution
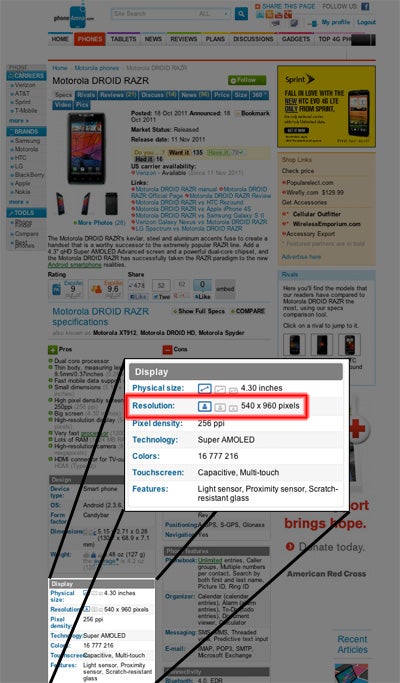
In order to start your image, you’ll need to know the screen resolution of your device. If you don’t know what yours is off hand, go to PhoneArena.com and search for your device. We have the resolutions for just about every device on its specs page. In this tutorial we’ll be using a Motorola DROID RAZR, which has a resolution of 540 x 960 pixels. In order to achieve the sliding effect, the wallpaper's width needs to be double the screen resolution's width and the wallpaper's height needs to be the same as the screen resolution's height. That means our final image will need to be 1080 x 960.
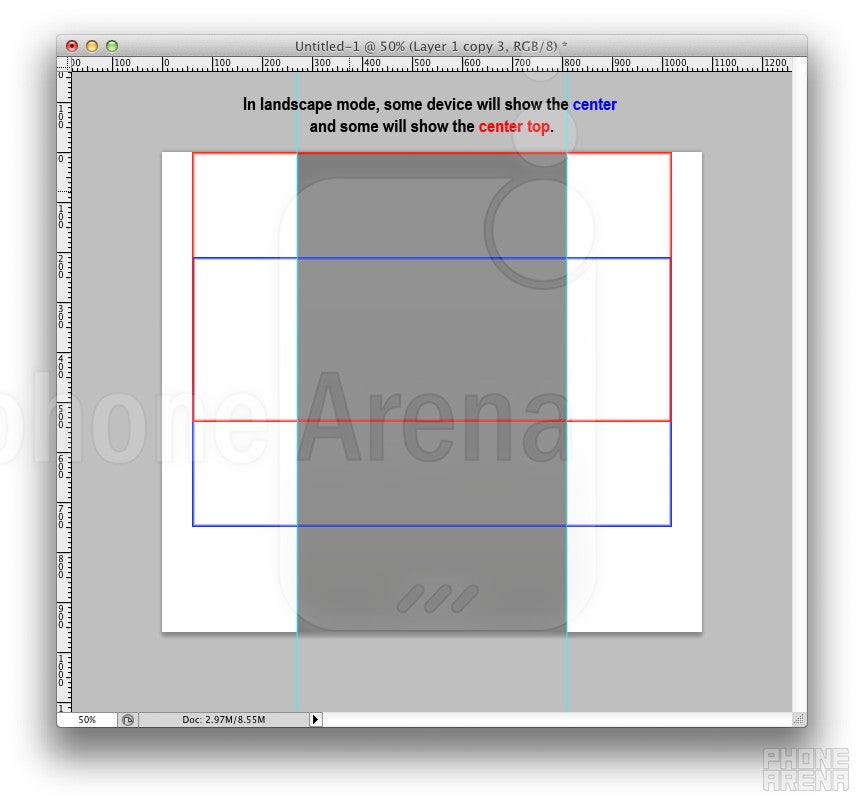
Once you have the resolution information for your device, you want to set up the template. First, create a new image that matches the screen resolution of your device - in our case it will be 540 x 960. If your image editor has guides, place them at the edges of your canvas. If yours doesn’t, which many free ones do not, you can make your own. Simply create a new layer and use the marquee tool to make a 1 or 2 pixel wide line on the edge of your canvas and fill it with the color of your choice. Duplicate this process on both sides of your canvas. Once you have your guides placed on the side of your canvas, edit your canvas size to double the width. If you are given the option, be sure to set your anchor point in the center. The resulting image should give you a center box marked off the matches the size of your device’s screen.
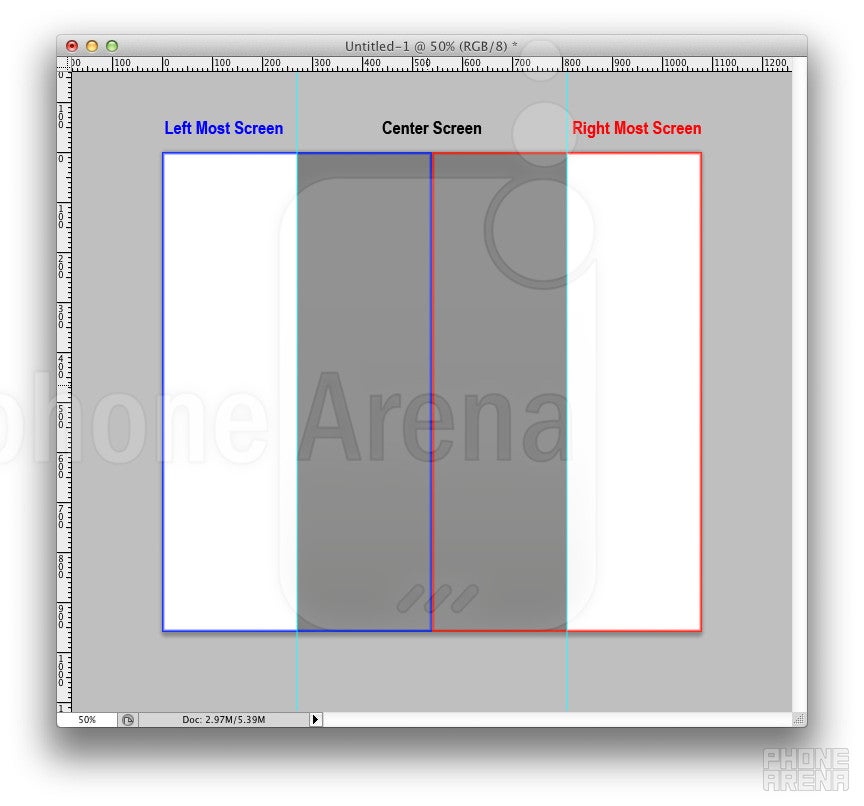
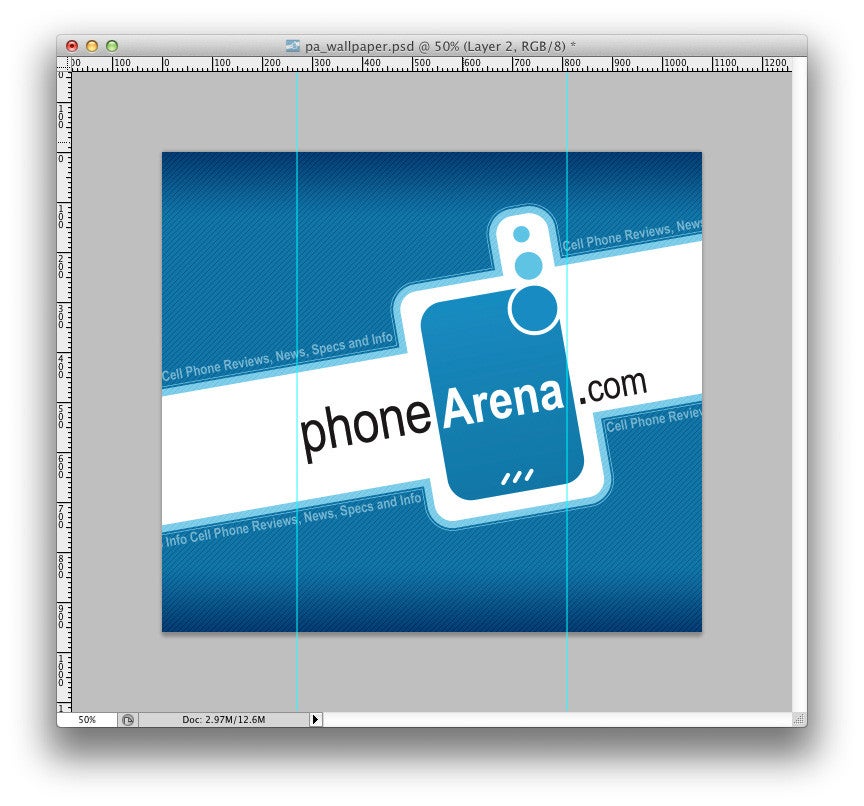
Essentially at this point you can start building your image however you want. You can paste in family photos, images from the web, sports teams, favorite musicians, and custom text - the possibilities are endless. You just want to make sure your main subject matter rests in between those guides so, say for example, when you unlock your phone you're not looking at half of someone’s face.
To see our creation in action on our DROID RAZR, here are screen shots of each of the 5 home screen from our device once our wallpaper was applied.
We’ll leave you with one final tip. Sometimes you may find that when you load your wallpaper on your phone, it feel like it “competes” too much with the icons and they may seem hard to read. If that happens, try creating a new layer on top of your finished composition and fill it with a dark color, like black or a darker version of one of your theme colors. Then, drop the opacity of the layer way down until it darkens the image just a touch. Depending on your image, you can use this same technique with white or a very light color. In our example we used a very dark blue, dropped the opacity down to 25%, and added a blending mode to help make our icons pop a bit off the background.
Overall, just play around with it until you get the image that suits you. Good luck and happy wallpapering!
Follow us on Google News

Things that are NOT allowed:
To help keep our community safe and free from spam, we apply temporary limits to newly created accounts: