Samsung has always been big on features — throwing anything and everything in its software in the hopes to gain some bragging rights. In recent years, it kind of re-imagined how it goes about all the features — supposedly, Samsung is only focused on making stuff that the user would find to be actually practical and useful.
Practical as they may be, there are still a whole lot of settings to go through on a brand new Galaxy S10. And you may not want to use all of them. However, in order to keep you informed of their existence, Samsung will make sure to send you a notification or a settings banner, reminding you there's something you need to do.
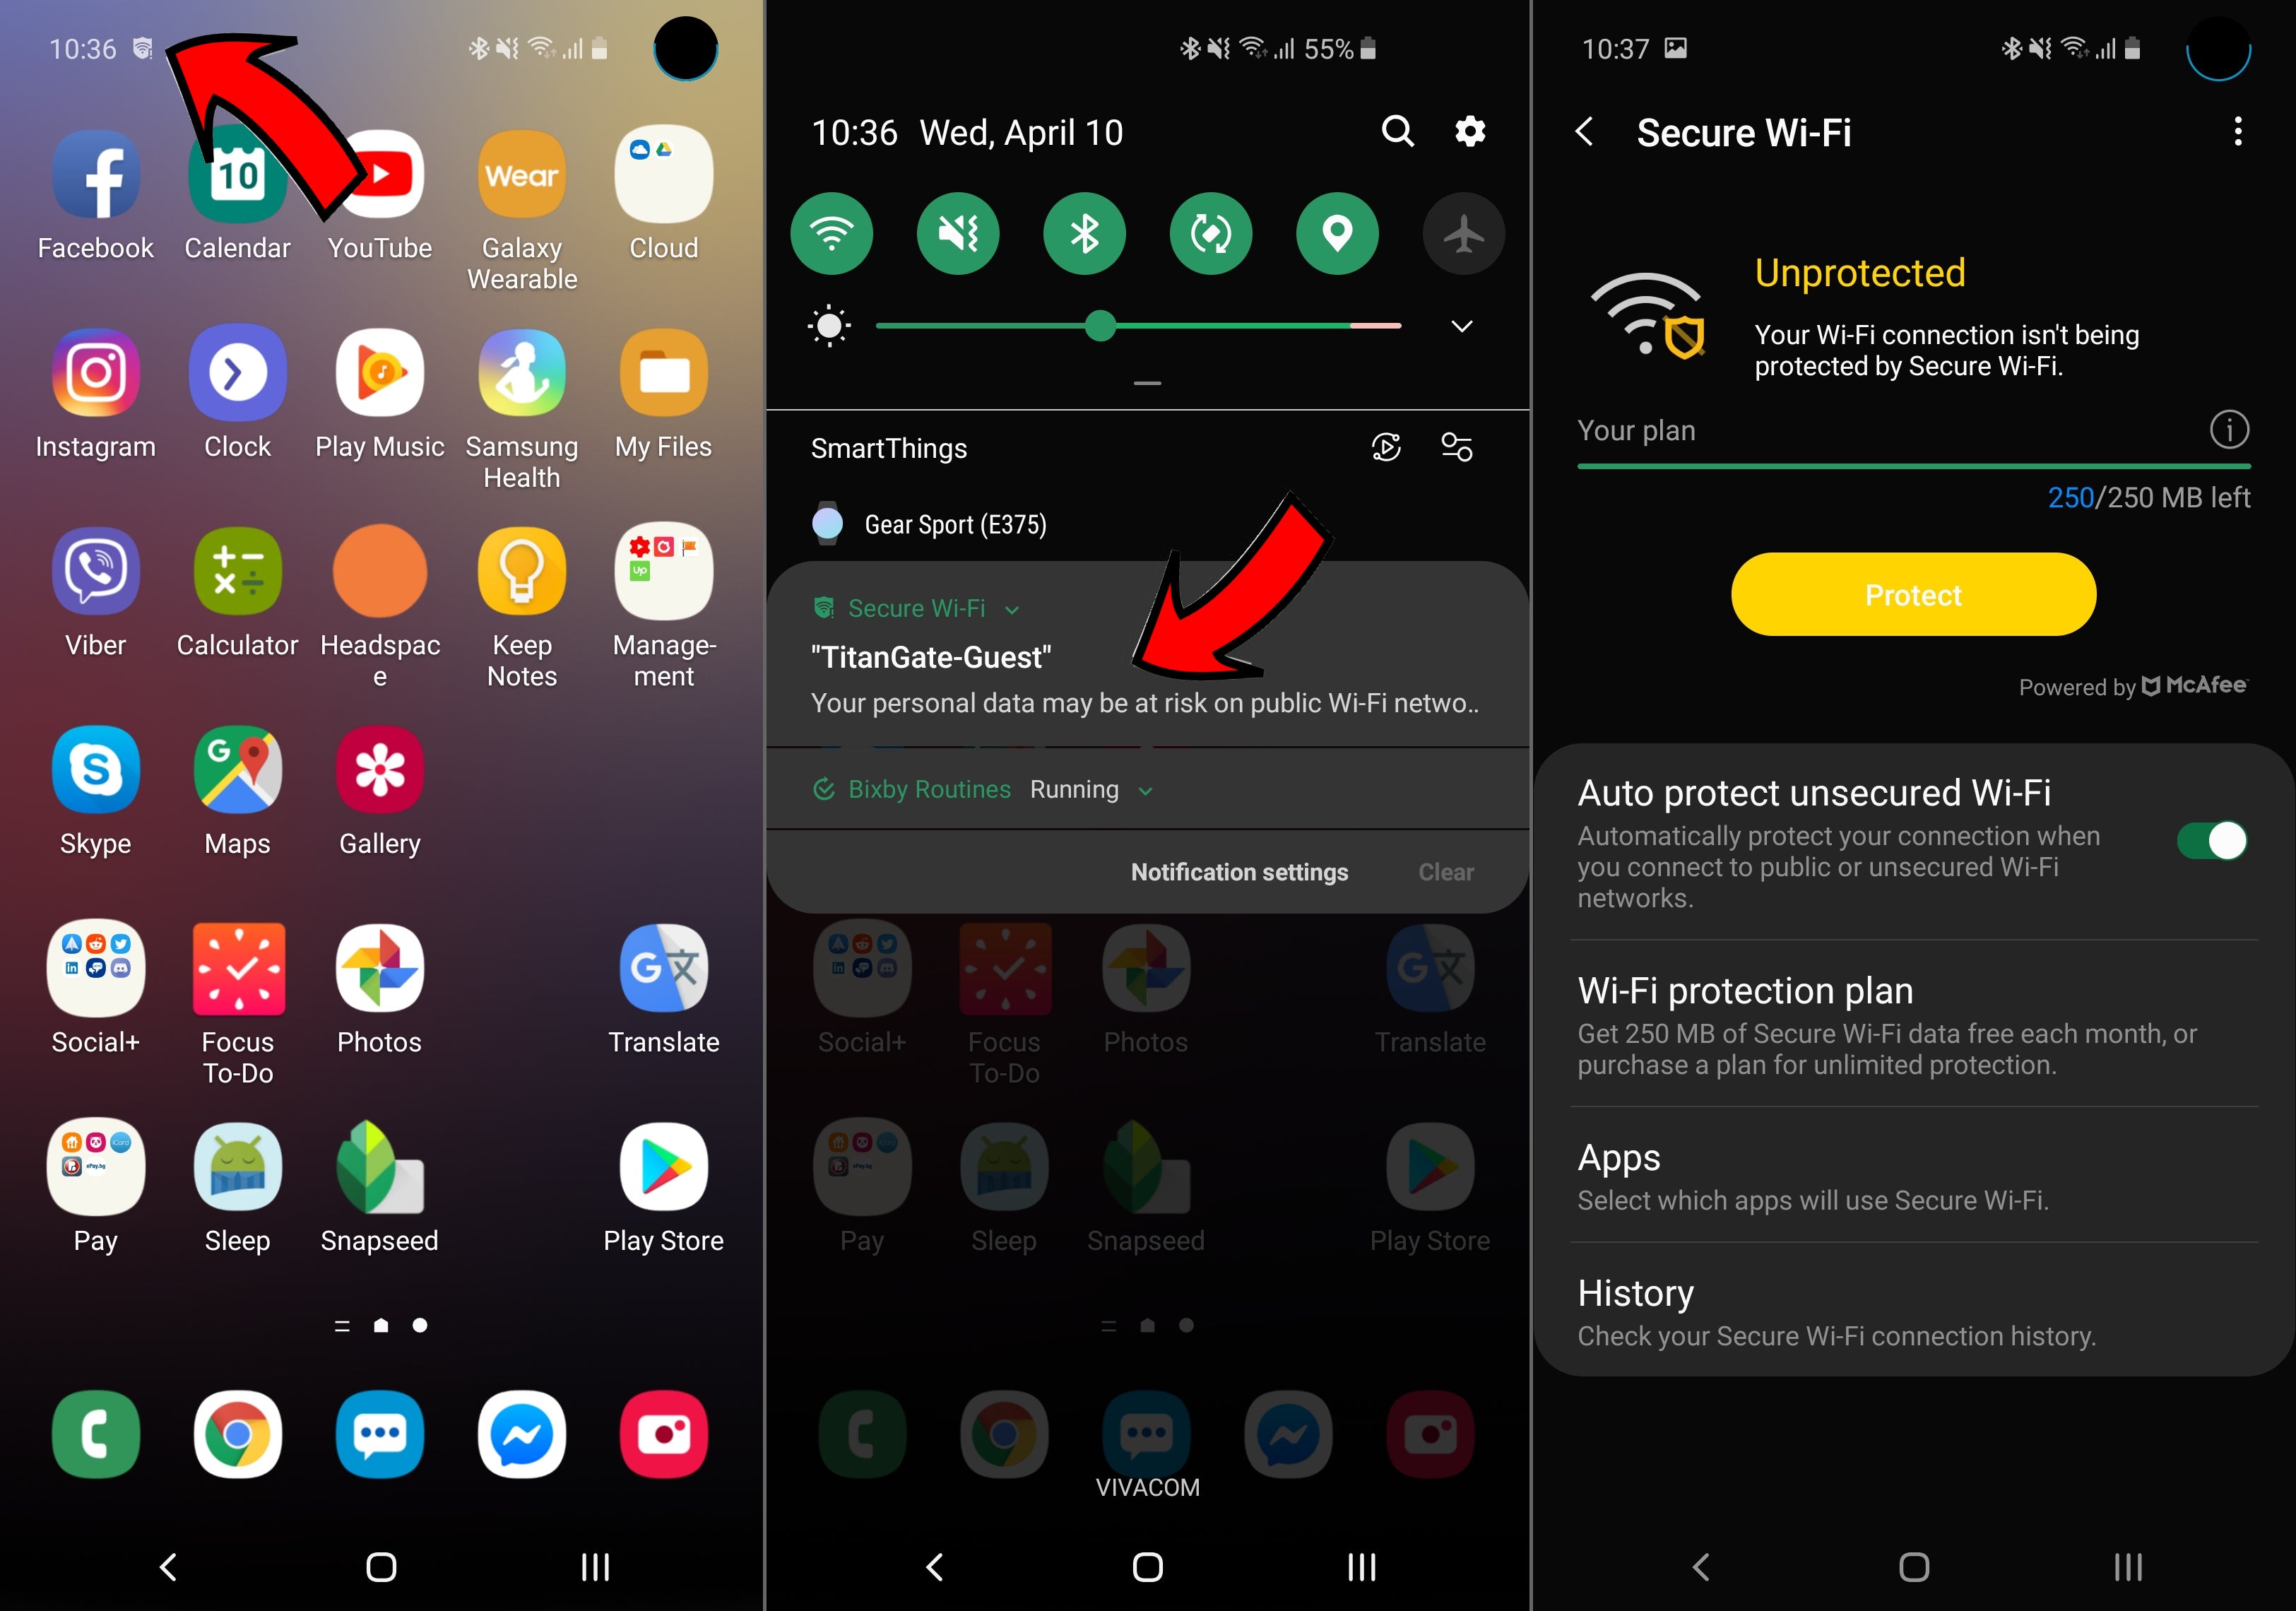
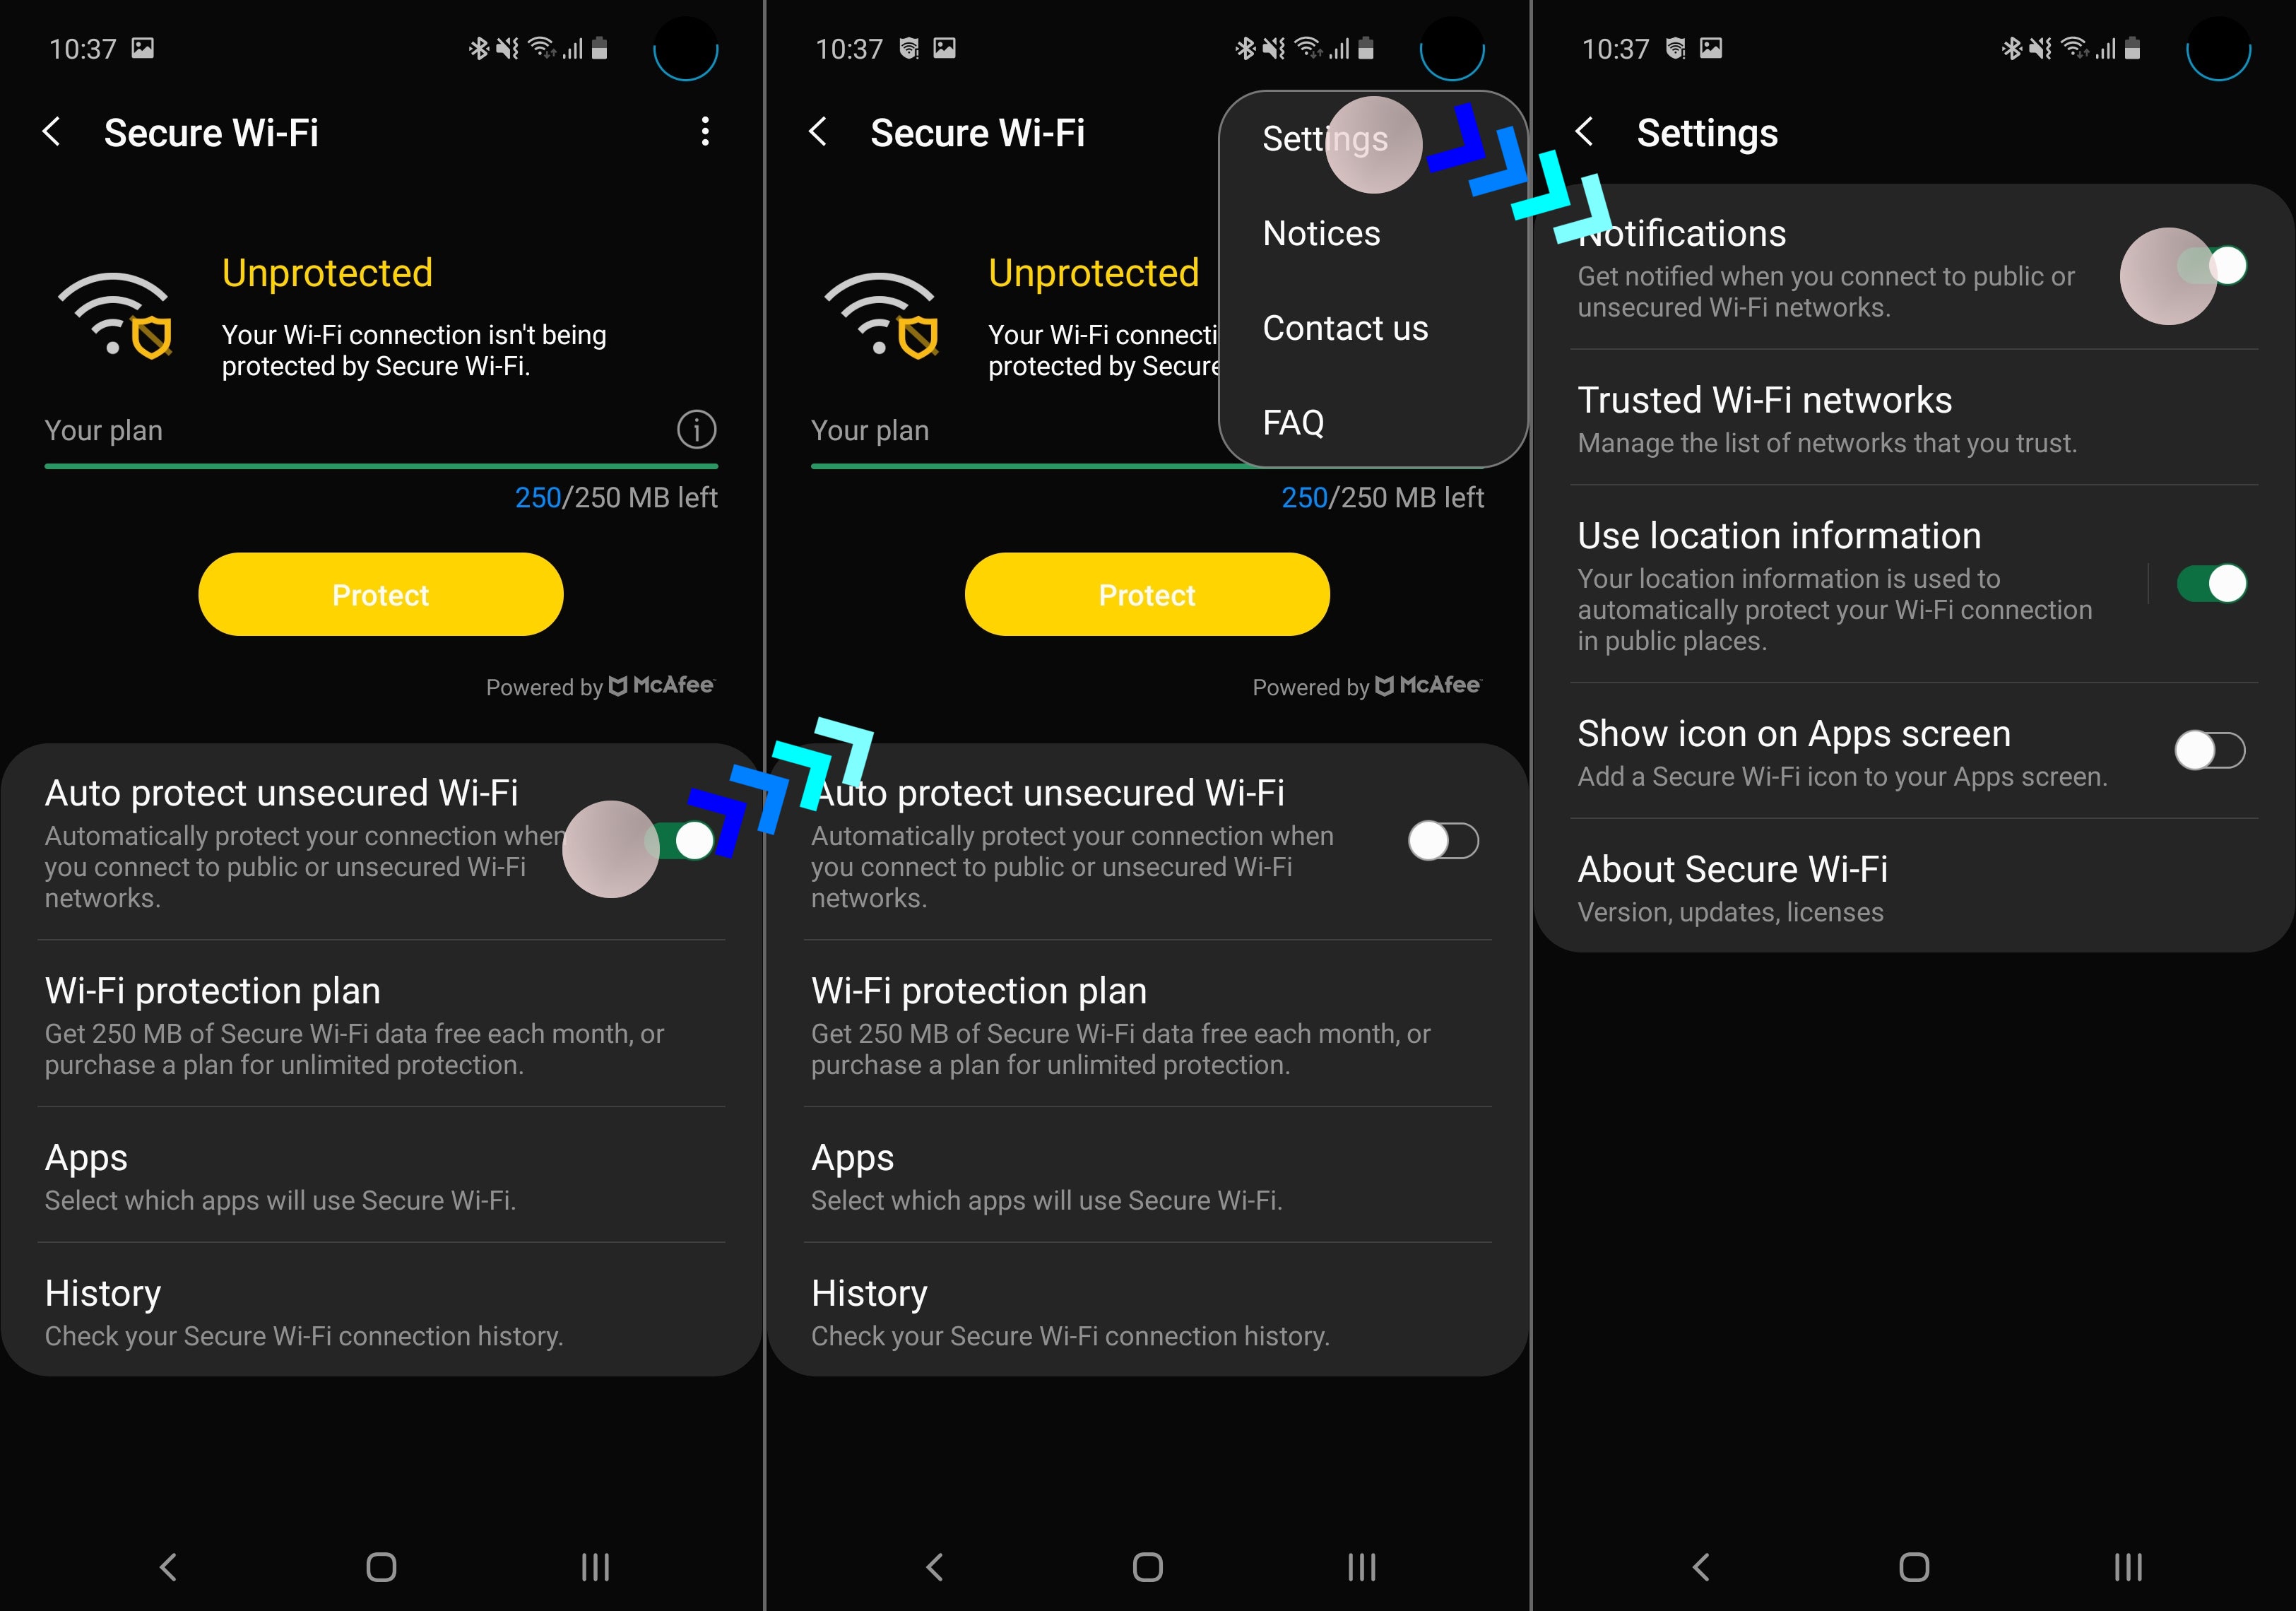
Among them is the Secure Wi-Fi feature. When the phone detects that you are connected via a Wi-Fi network that it does not deem secure, you will be prompted to activate this feature.
How to disable the Secure WiFi app
What is Secure Wi-Fi? Well, it runs your traffic through a filter, powered by McAffee's antivirus, to make sure that you are not downloading anything malicious, or that nobody is trying to nab your data as you are casually browsing on a public network.
But it's not free. Well, not exactly. You can use Secure Wi-Fi for up to 250 MB of traffic (per month), and then you need to pay a small fee to unlock it for unlimited surfing.
Is that really needed? Not by everyone, no. Especially when Secure Wi-Fi pops up when you connect to your own home Wi-Fi. But it's certainly annoying when that persistent notification pops up every time your phone is on a network.
Recommended Stories
So, if you're not using Secure Wi-Fi, you may want to scrape it altogether. Or, you may want to keep the feature, but would like it to stay away from your notifications.
There are two methods of taking care of it. One will disable Secure Wi-Fi for you, the other will leave it intact, but will "silence" it, so you only have to deal with it when you head into Settings yourself.
I. Disable Secure Wi-Fi
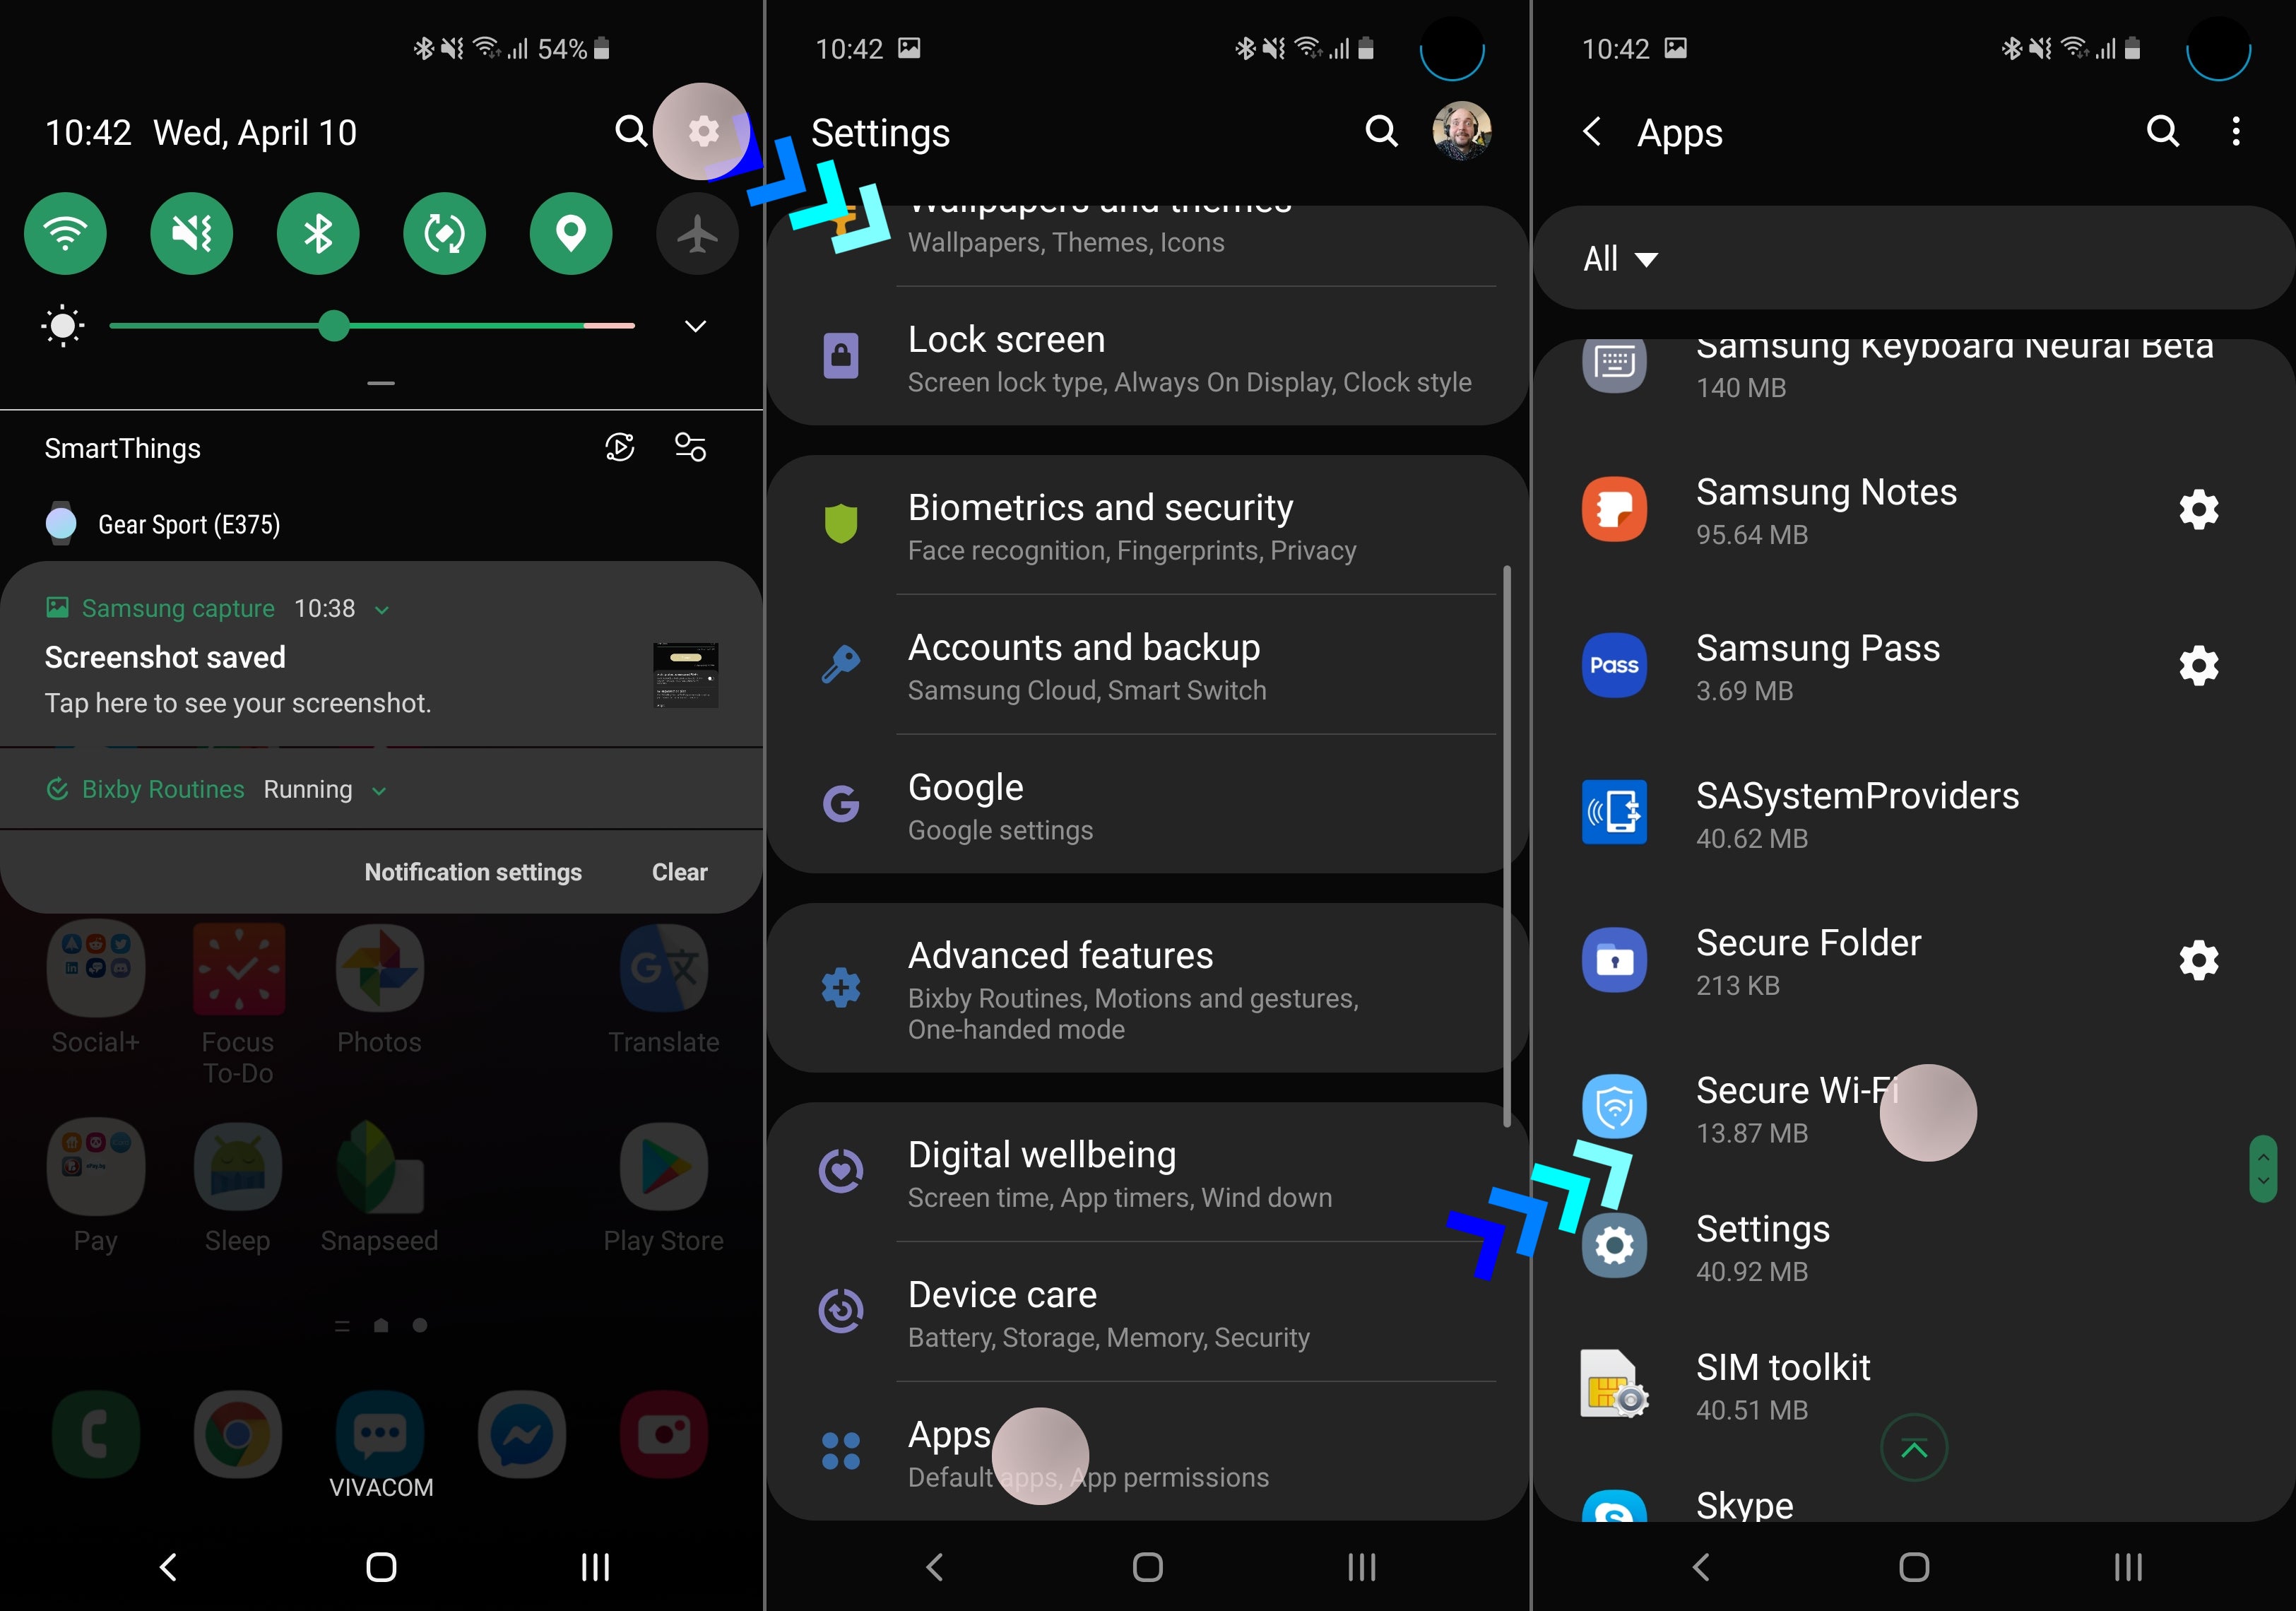
If you don't want to ever use this feature, you might just want to get rid of it entirely. Go into Settings → Apps → Secure Wi-Fi.
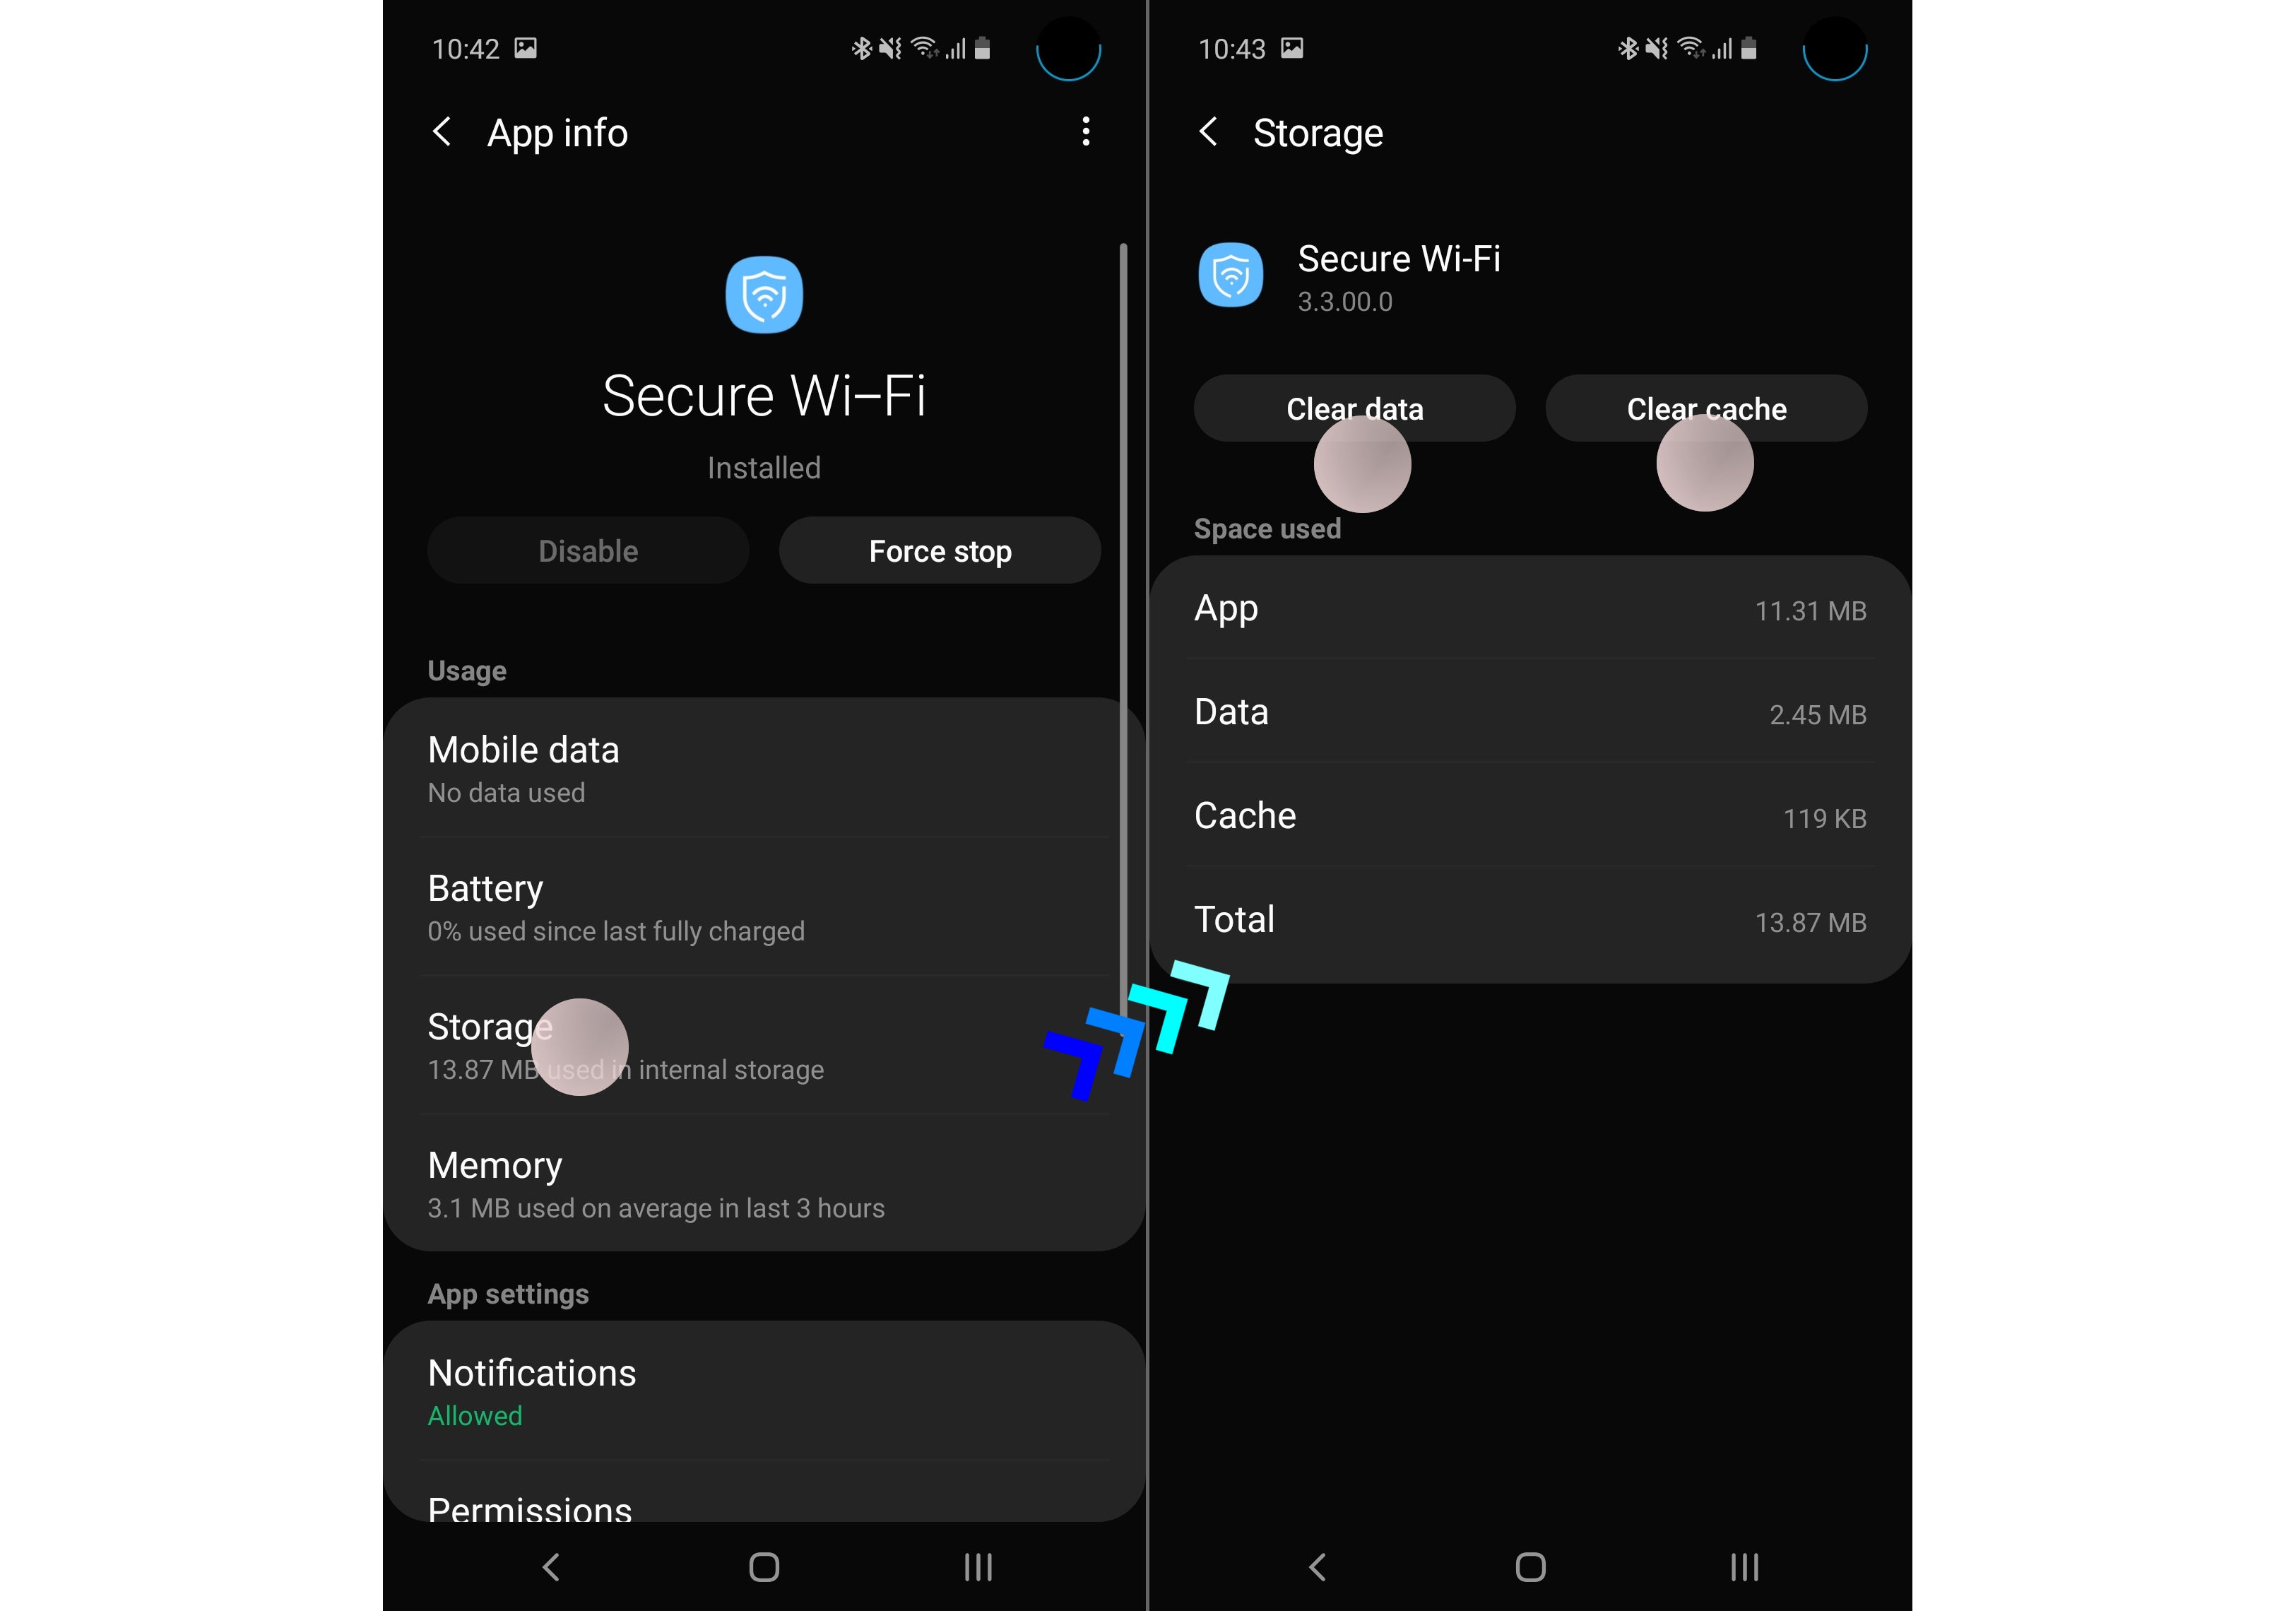
There, you will notice you can't "Disable" the app. No worries, there's another solution. Go into Storage and then tap Clear Data and Clear Cache. You're done.
The next time you connect to a Wi-Fi network, you will get a notification from Secure Wi-Fi. Dismiss it and you will never need to worry about it again. Basically, this leaves Secure Wi-Fi "inactive" on your phone and it's buried pretty far down your Settings menus, so you won't go activating it by accident.
II. Silence Secure Wi-Fi but keep it active
If you would rather have Secure Wi-Fi stay active on your phone, but stay out of your notifications and not activate itself automatically, we can do that.
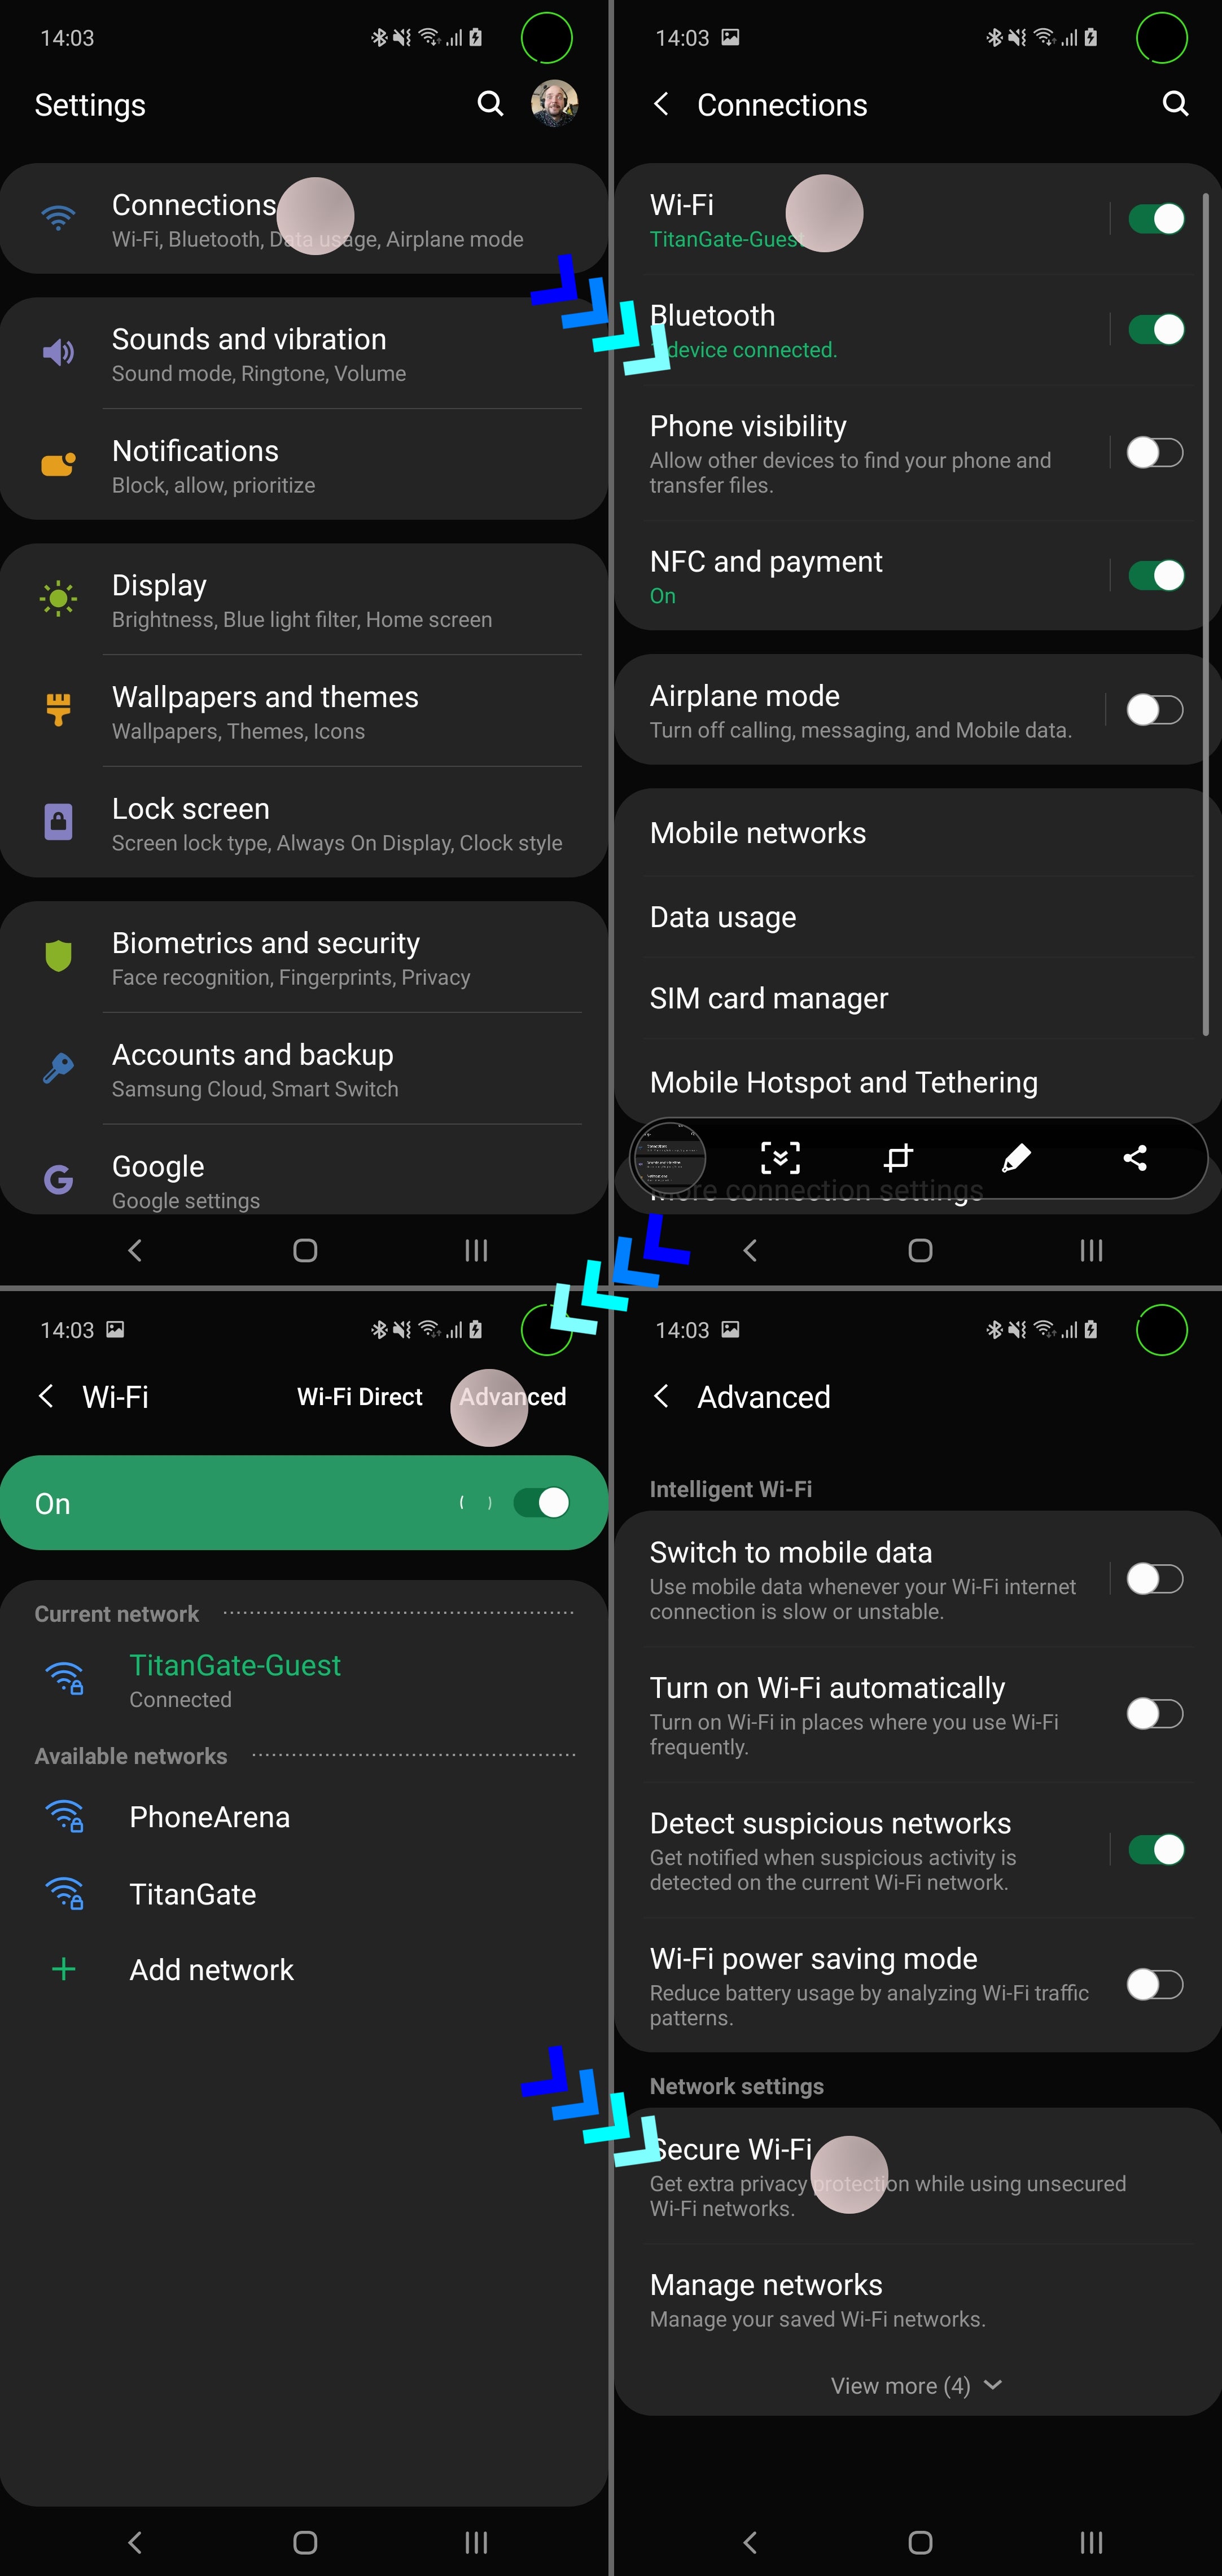
Go into Settings → Connections → Wi-Fi → Advanced → Secure Wi-Fi.
In here, you want to disable "Auto protect unsecured Wi-Fi". Then, tap the triple dot menu in the top right and open Settings. Here, you can disable notifications, so Secure Wi-Fi doesn't pester you again.
Finally, you can enable "Show icon on Apps screen" to make it easier to reach the Secure menu in the future. After all — you just disabled its automation and notifications, it's all up to you to turn it on and off when you need it.
Preslav, a member of the PhoneArena team since 2014, is a mobile technology enthusiast with a penchant for integrating tech into his hobbies and work. Whether it's writing articles on an iPad Pro, recording band rehearsals with multiple phones, or exploring the potential of mobile gaming through services like GeForce Now and Steam Link, Preslav's approach is hands-on and innovative. His balanced perspective allows him to appreciate both Android and iOS ecosystems, focusing on performance, camera quality, and user experience over brand loyalty.
Recommended Stories
Loading Comments...
COMMENT
All comments need to comply with our
Community Guidelines
Phonearena comments rules
A discussion is a place, where people can voice their opinion, no matter if it
is positive, neutral or negative. However, when posting, one must stay true to the topic, and not just share some
random thoughts, which are not directly related to the matter.
Things that are NOT allowed:
Off-topic talk - you must stick to the subject of discussion
Offensive, hate speech - if you want to say something, say it politely
Spam/Advertisements - these posts are deleted
Multiple accounts - one person can have only one account
Impersonations and offensive nicknames - these accounts get banned
Moderation is done by humans. We try to be as objective as possible and moderate with zero bias. If you think a
post should be moderated - please, report it.
Have a question about the rules or why you have been moderated/limited/banned? Please,
contact us.


Things that are NOT allowed: