Use these LG V20 camera tips and tricks to shoot the best photos you've ever taken
If the LG V20 were a car, it would probably be a Mustang. It isn't cheap. It isn't practical. It behaves like a stallion that hasn't been tamed yet. But it is built to perform and impress with muscle and power. That's one way I can describe LG's high-end phablet after spending over a month in its company.
The camera was one of the things I was most impressed by while reviewing the LG V20. For those not familiar, the phone is equipped with a dual camera at the back – one takes high-quality regular photos and videos, while the other boasts a wide-angle lens for outstanding images. And at the front, there's a single wide-angle camera that can take epic group shots. (Plenty of photos can be seen in our LG V20 review.) But to make the most of this powerful camera setup, there's really a thing or two you should know first.
The basics: interface tips and tricks
Great photos are usually the result of one being at the right place at the right time. Having quick access to a camera also helps. That's why the LG V20 has a shortcut for launching the camera from stand-by – you double-press on the volume down button to launch it. The option is found in Settings > General > Shortcut Keys, but you should have that enabled by default. What's not enabled is the option to take a photo instantly after triggering the shortcut, so enable that if you find it useful.

Double-pressing on the volume down button launches the camera
Another camera feature that's not instantly obvious is the built-in burst mode – hold down the shutter button, and the camera will take a series of photos in rapid succession. About 10 shots per second are captured in good light, and you may later pick the best image of the bunch while discarding the rest.
Every single one of these burst mode frames is a 16MP photo
Keep in mind that you need plenty of light to capture good-looking burst photos. In low light, moving objects in the frame will most certainly come out blurry, so there's little point in using the feature in such conditions. I'd also recommend disabling HDR mode, as doing so usually yields better results. In addition, make sure you have your focus set at the right spot (with a tap on the screen, for instance), because it won't be adjusted automatically for you as a burst is being captured. Exposure will be, however. Also be aware that you can't use the flash or shoot RAW while taking bursts.
Tinkering with the settings
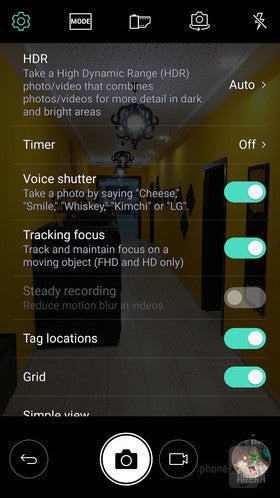
The LG V20 camera settings screen
Another option I'd strongly recommend enabling is the HDR mode, as it is off by default. HDR, as some of you may know, takes multiple images at different exposures and combines them to produce a single high dynamics range photo. In other words, dark areas in the image aren't overly dark and light areas aren't overly bright. Most of the time, I have the HDR mode set to Auto, and it seems to work pretty well.
Also in the settings menu you'll find the Grid option. Let it be your guide while taking photos – keep your horizon straight to make your sceneries look their best. And look up what that "rule of thirds" thing is all about. It really makes a difference, once you get the hang of it.
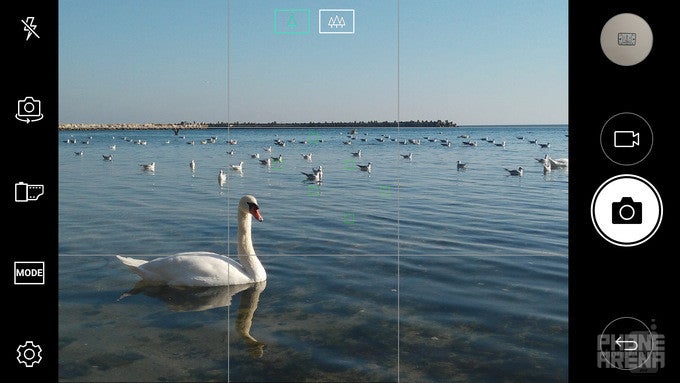
The LG V20 camera app with the grid option enabled. Use the lines as a guide to keep your horizon straight. Also, applying the 'rule of thirds' – where your subject is at a point where two of the grid lines intersect – makes for more interesting shots
Using aperture to your advantage
The main camera on the LG V20 boasts a wide, F1.8 aperture, which allows a lot of light to hit the sensor. This optical property also creates a shallow depth of field effect, most noticeable when taking close-ups. What this means is that objects in focus look nice and sharp, while those behind or in front of that point are blurry. You won't be able to achieve the bokeh you'd get out of an expensive camera, but you might be able to put more emphasis on your subject if you try using the effect to your advantage. Remember that the closer you get, the greater the background blur you'll be able to achieve.
The V20's wide-angle camera and when to use it
But there's a good reason why you don't want to use the wide-angle camera all the time. Firstly, there's some noticeable distortion, meaning that photos have that GoPro-like fish-eye look. Secondly, the camera is technically inferior to the main one, so it can't capture low light images as clearly. There's no image stabilization or autofocus either.
That aside, the wide-angle camera comes in handy when you want to capture a scene from a different perspective. It is not only nice having in tricky situations. It can also serve as a creative tool – one that will surely make your photos stand out on Facebook or Instagram.
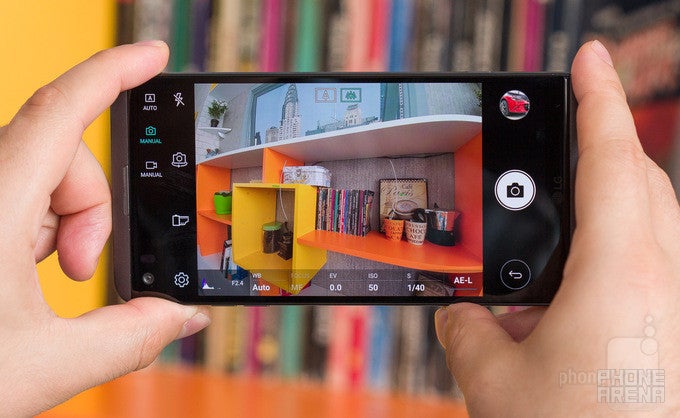
Manual camera controls: making the most of the LG V20's camera
Manual camera controls are something you don't use every day. You don't need to, as the V20's Auto mode takes care of those, well, automatically. But if you want to achieve a certain effect or to correct for any errors the Auto mode might make, you are absolutely free to do so. Better yet, you don't need to adjust every single setting. You can tweak just one aspect of the photo and let the camera take care of the rest. I'll now go over the manual settings that you're allowed to control on the LG V20 and I'll show you how to use them to take better photos.
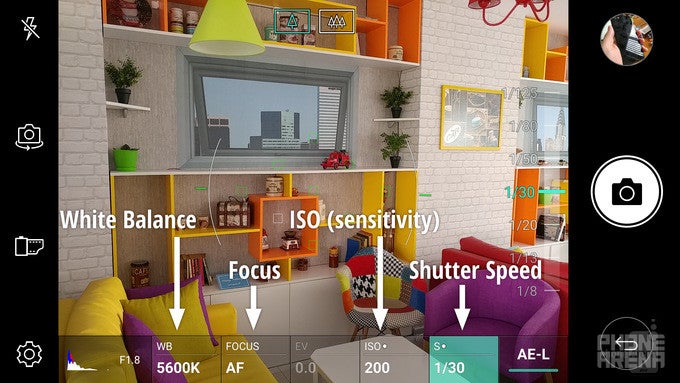
White balance
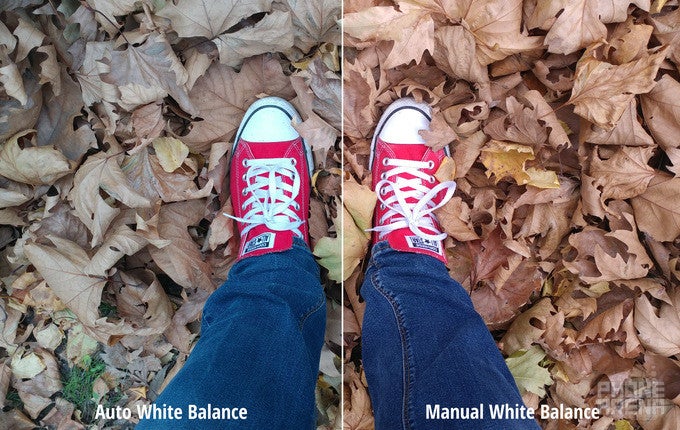
Have you ever seen a photo that looked cold, blueish, and unnatural in color? This is usually the result of inaccurate white balance, which is a setting that your phone's camera normally adjusts on its own, based on what it "sees" in the picture. While using the LG V20, I noticed that it might fail to set the right white balance on cloudy days (like in the example below) or when there are several different kinds of light sources in the picture. That's when the manual white balance comes in handy. It can be used to make photos look more realistic in terms of color, or you can add warmth or coldness to achieve a desired visual effect.
Focus
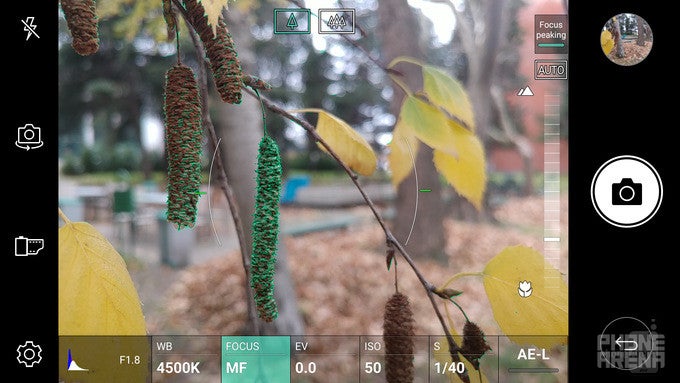
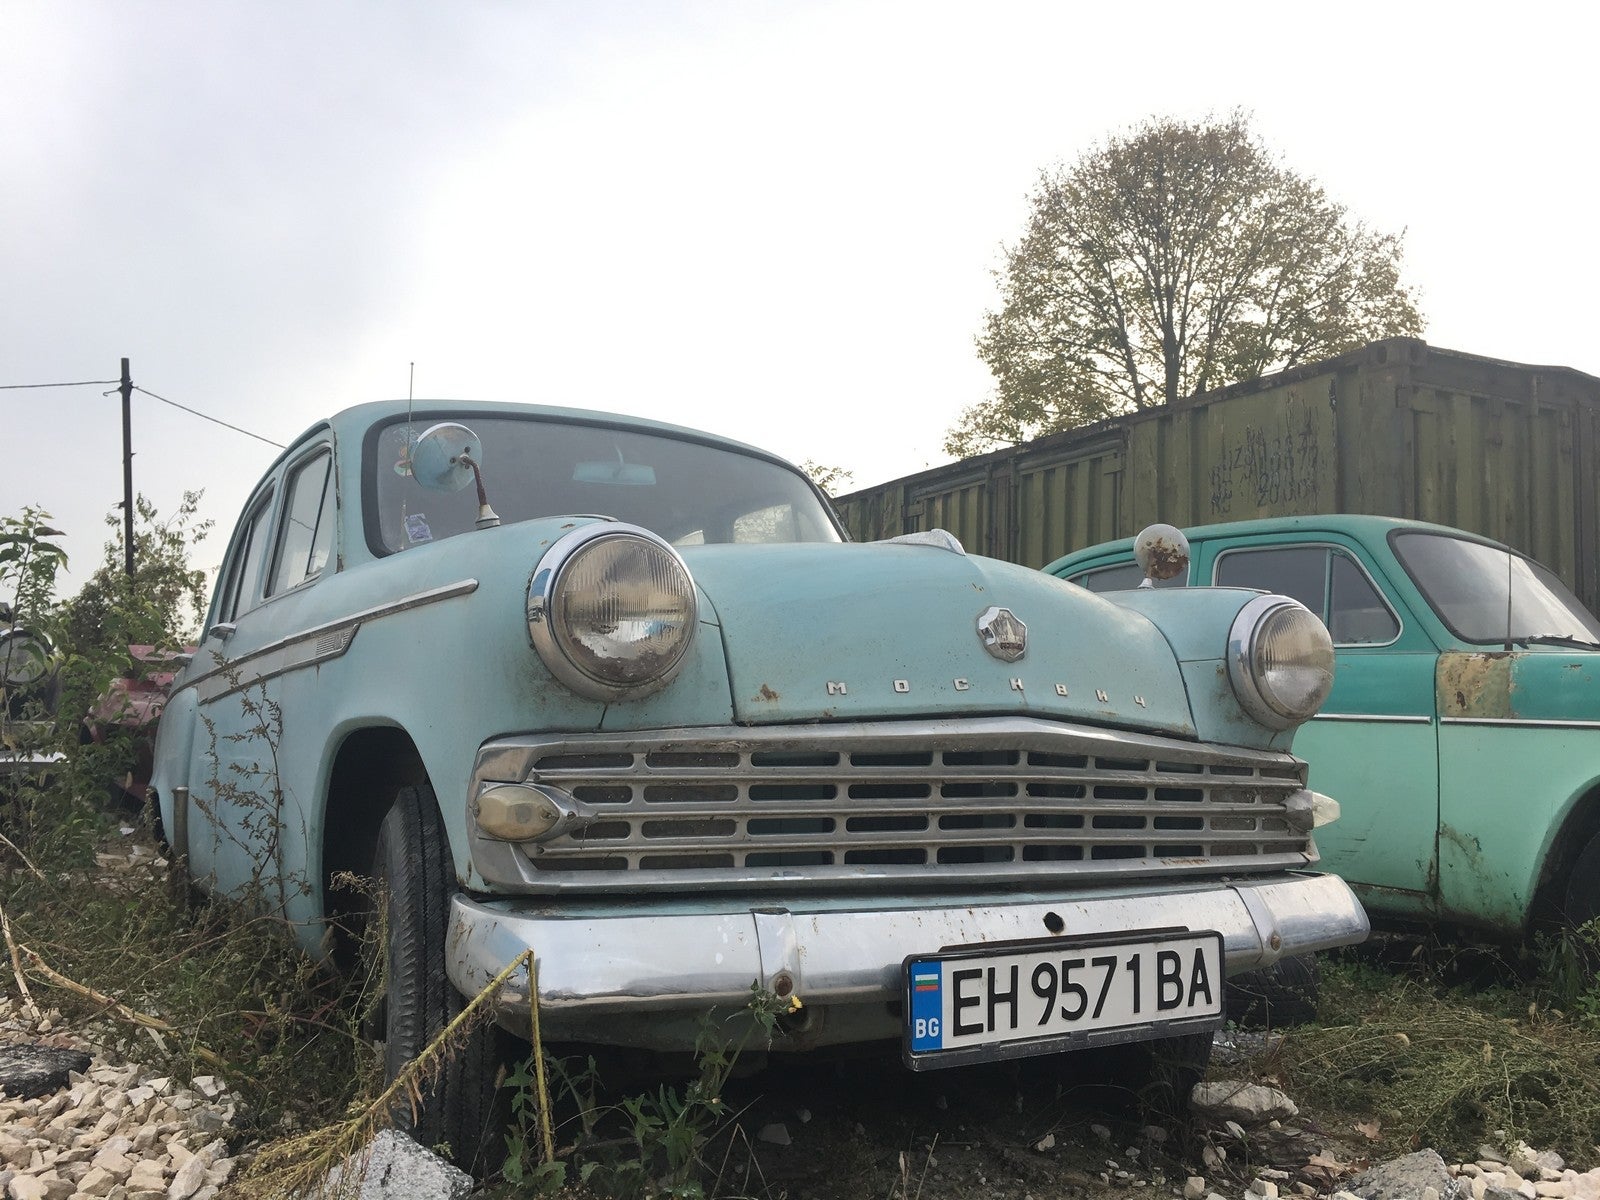
There's not a whole lot to say about this setting – it adjusts what objects in the photo are in focus and what isn't. Most of the time, a simple tap to focus is enough, but in darker settings, manual focus could prove useful. To make fine adjustments easier for the photographer, LG has added focus peaking, which is a handy feature that highlights in green the areas in focus. Here's a screenshot of what peaking focus looks like, and below it I've included two images where I used manual focus to achieve the look I wanted:
ISO and shutter speed
These two settings have a direct effect on the image's exposure – they determine how bright or dark it would turn out. The ISO setting adjusts the camera's sensitivity higher or lower, and while it may be tempting to turn up the dial to 11, greater sensitivity values produce more digital noise.
Meanwhile, the shutter speed is the time (in seconds) that it takes for the photo to be captured. For well-lit scenes, this could be several hundredths or even thousandths of a second, but in low-light conditions, the shutter has to stay "open" for longer to absorb as much light as it can. That's why it is more common to see motion blur in low-light images.
The job of a photographer willing to take control over these settings is to find the right balance between them. Keep in mind that your exposure is balanced when the Exposure Value (EV) reading is at 0.0, but going above or below that figure is not forbidden. It all depends on the look you want to achieve.
To give a few examples, I used a slow shutter speed of 2 seconds (and my pretty steady hands) to capture the image of the ship below. In automatic mode, this image would have come out totally dark. In contrast, I used a very high shutter speed of 1/800 of a second to capture the dart exiting the barrel of a Nerf gun. I also used manual settings to underexpose the image of a sunset in order to capture the pretty colors of the sky, with the trees only posing as silhouettes.
By the way, the tips in this artistic camera tutorial I made with the LG G4 apply to the V20 as well.
RAW: what it is and why use it
My colleague Peter did a great job explaining what RAW photos are and how to take them with an iPhone, so go check out his posts to learn more. The TL;DR version of it all is that RAW images contain uncompressed image data and are therefore more suitable for image editing than JPEGs. In the example below (not taken with a V20), a RAW image has been used to enhance the overall look of the image. However, RAW files occupy more space, might slow your camera down, and not all apps can view them. That's why if you're not into image editing, you'd be better off leaving the RAW option disabled.
To give RAW photography a try, enable the RAW option in Settings when in Manual camera mode. Then you can use an advanced image editor, such as Adobe Lightroom or Snapseed, to modify the RAW images on your LG V20. Remember that RAW images are saved only if you're shooting in Manual camera mode.
Popular stories


Latest News

Things that are NOT allowed: